

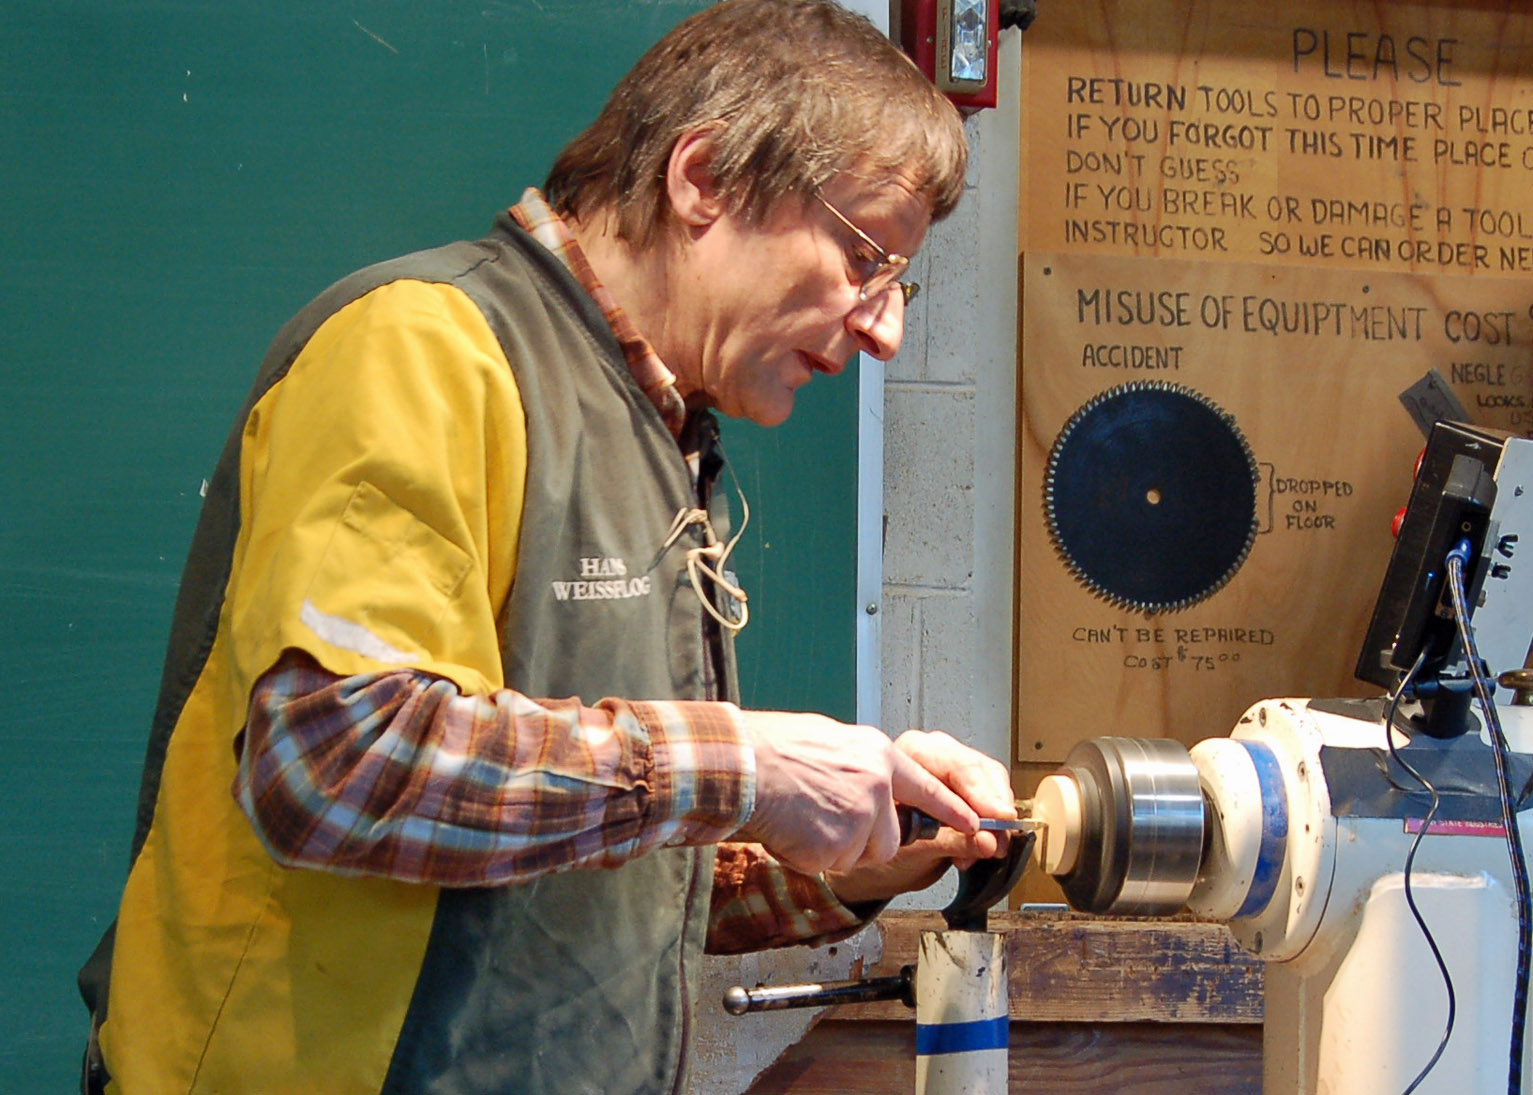
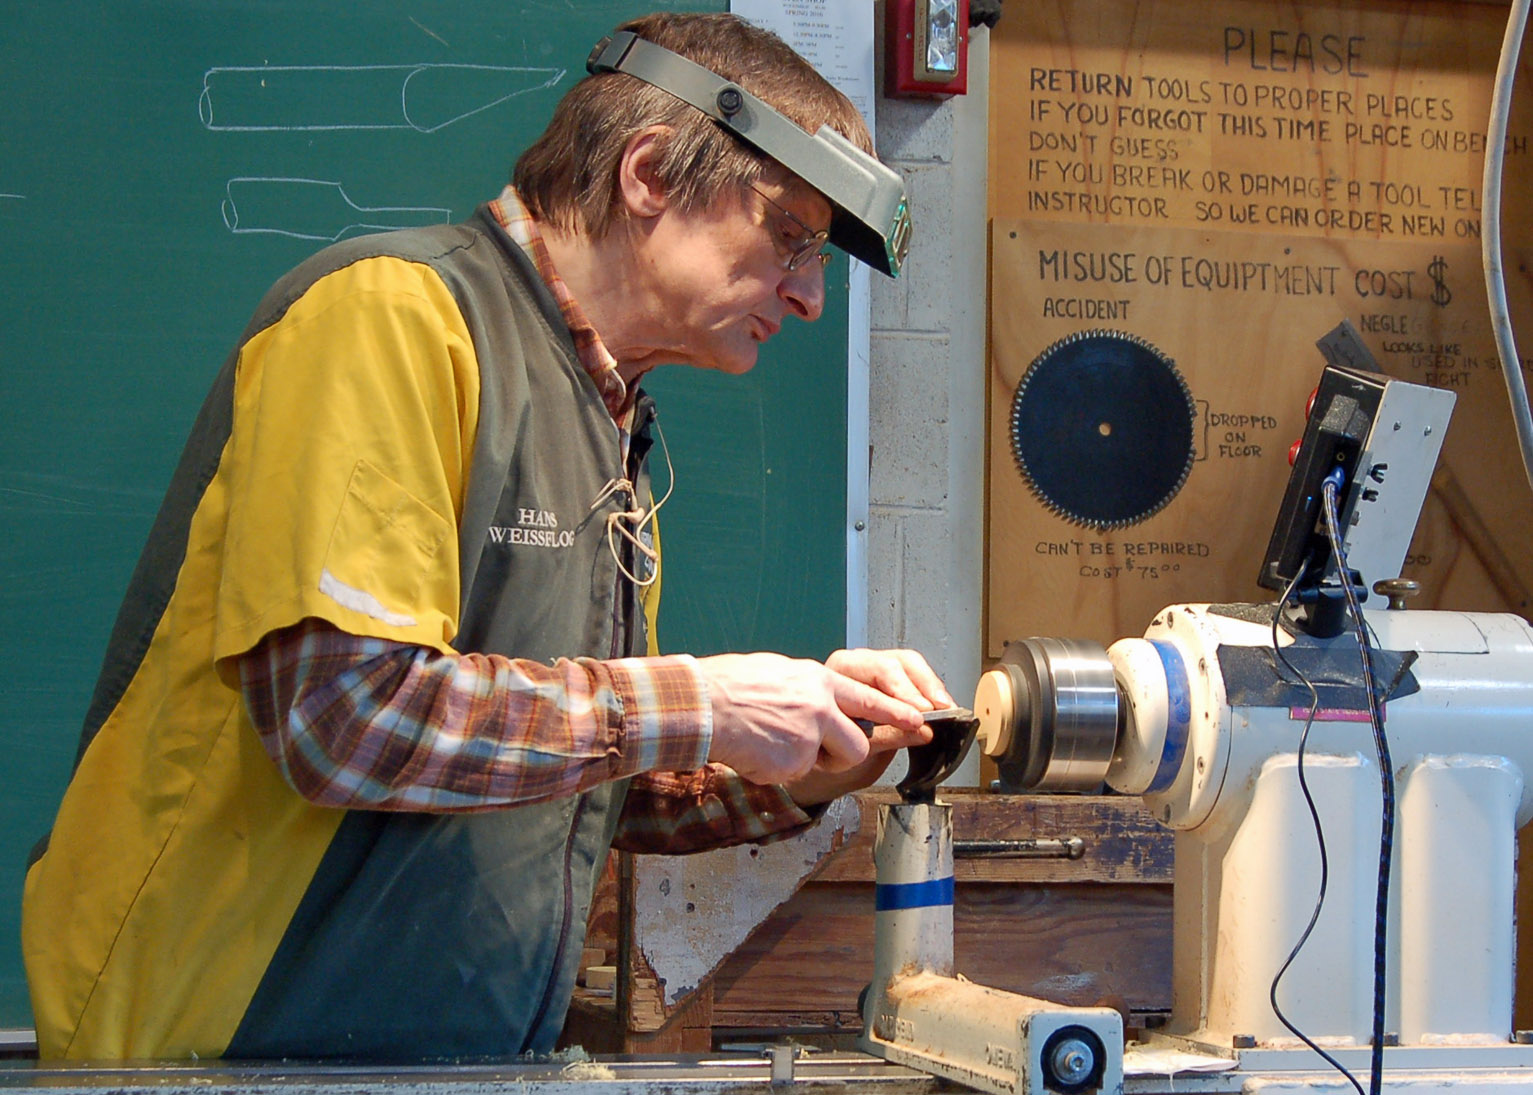
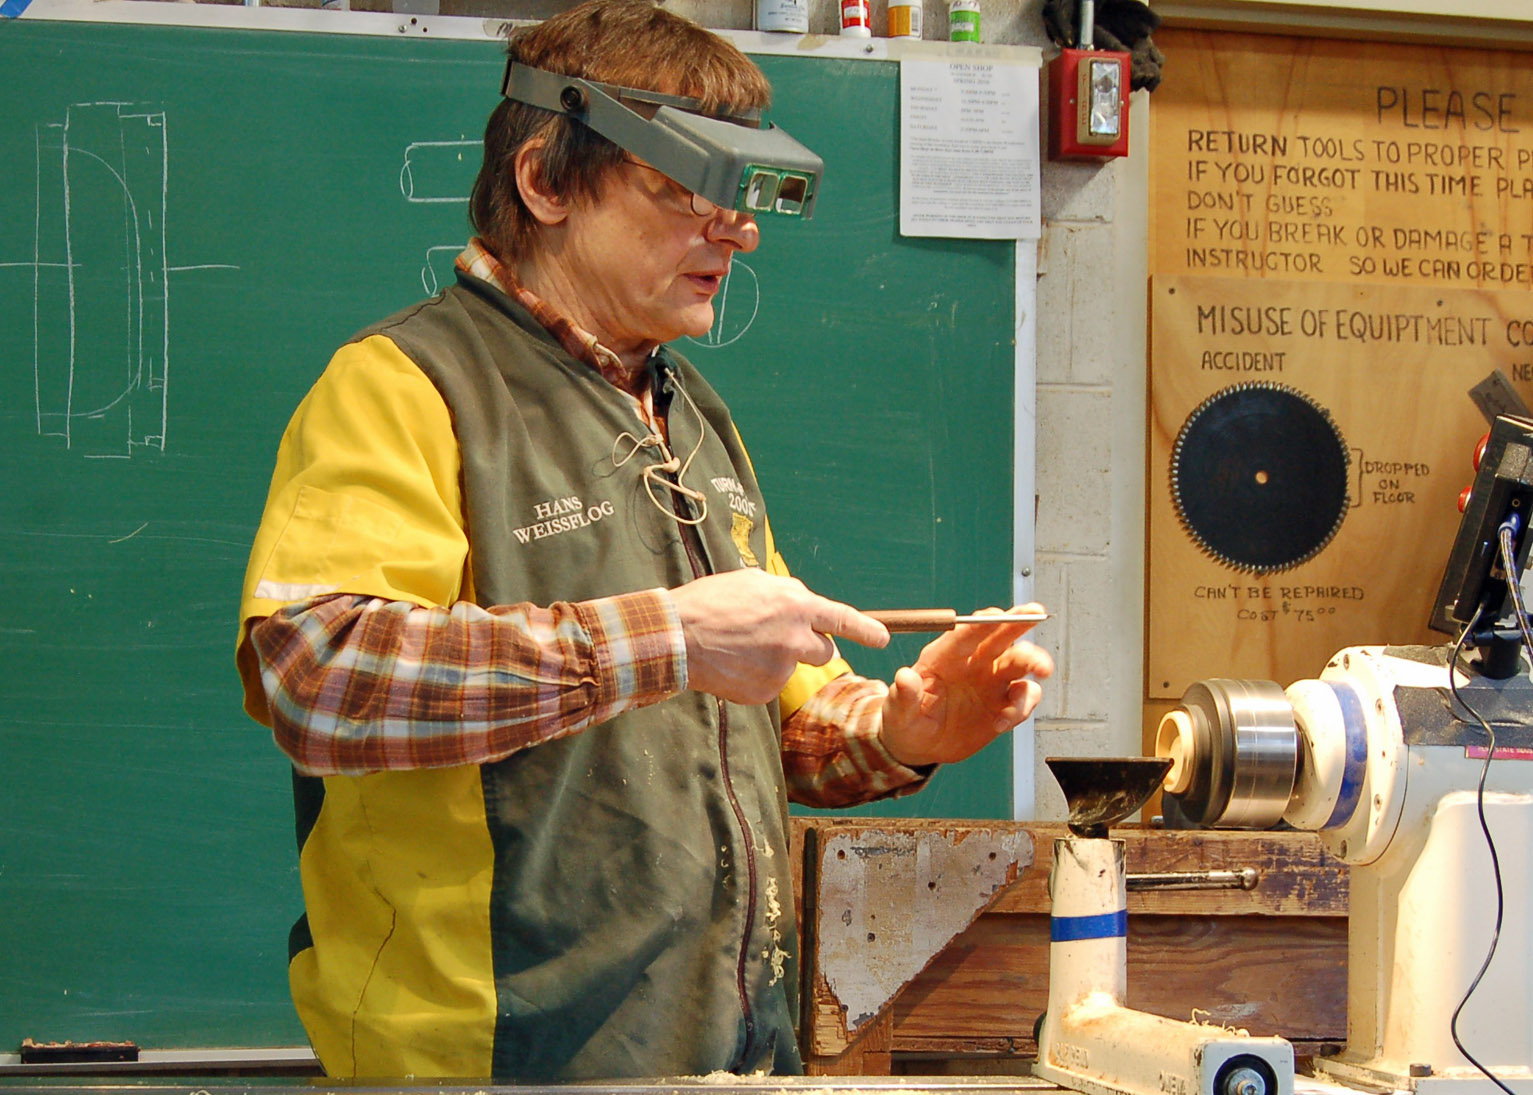
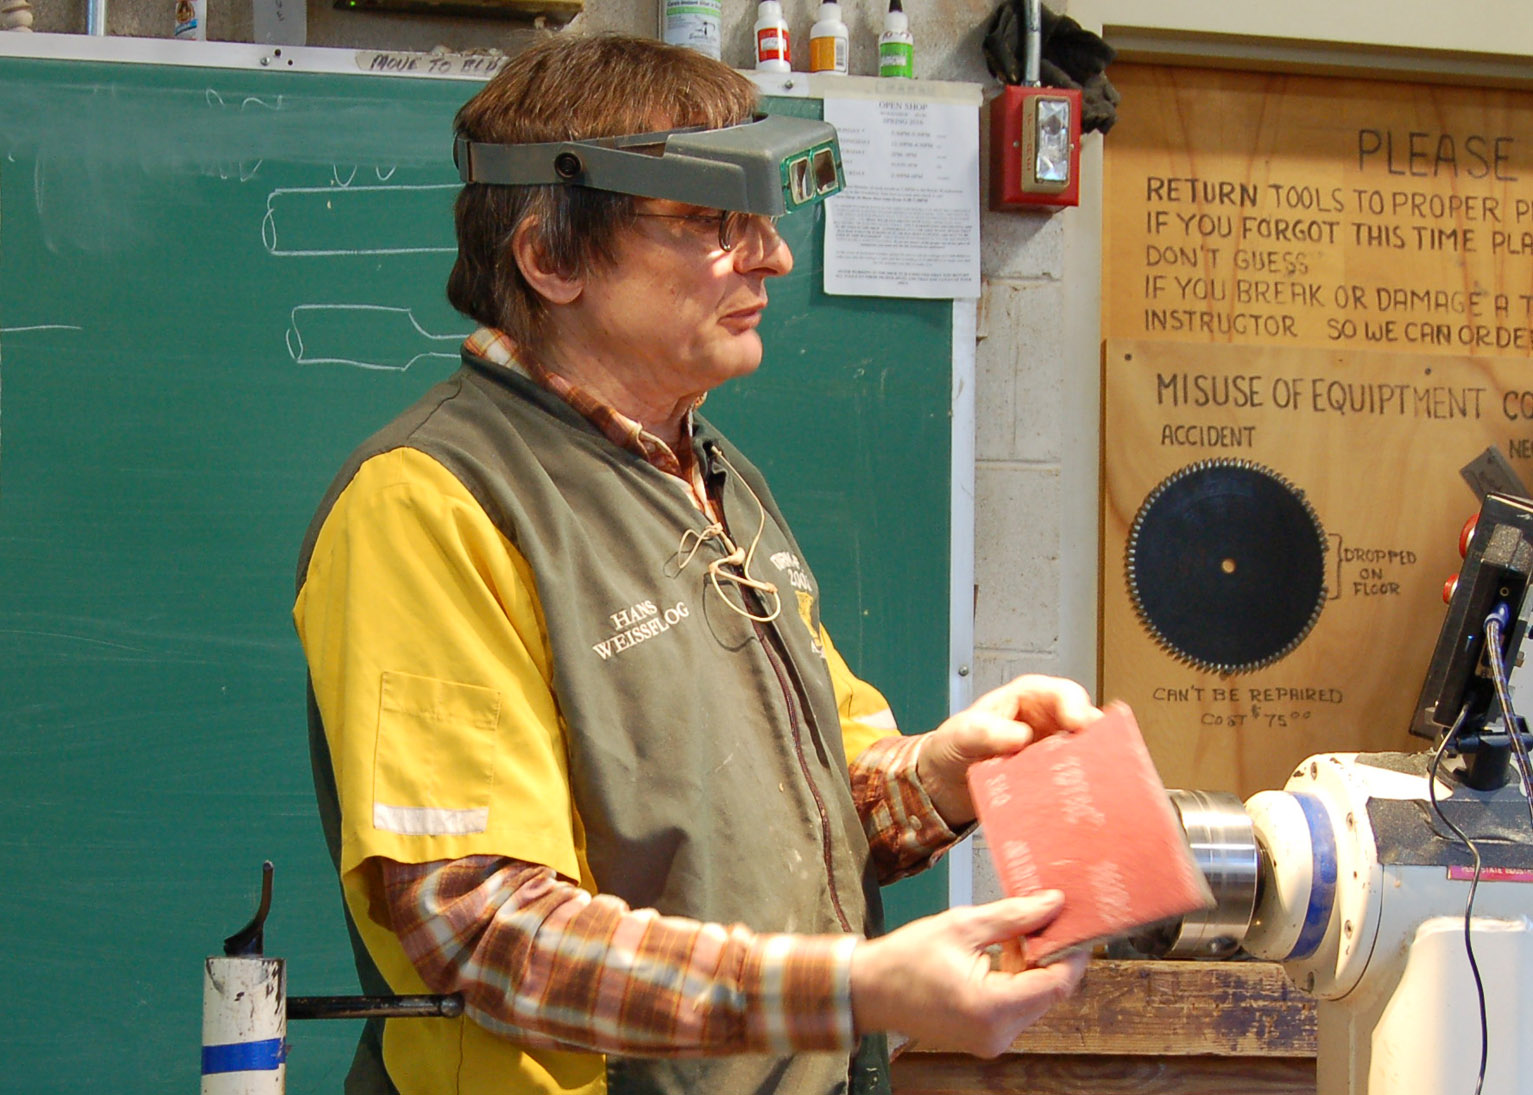
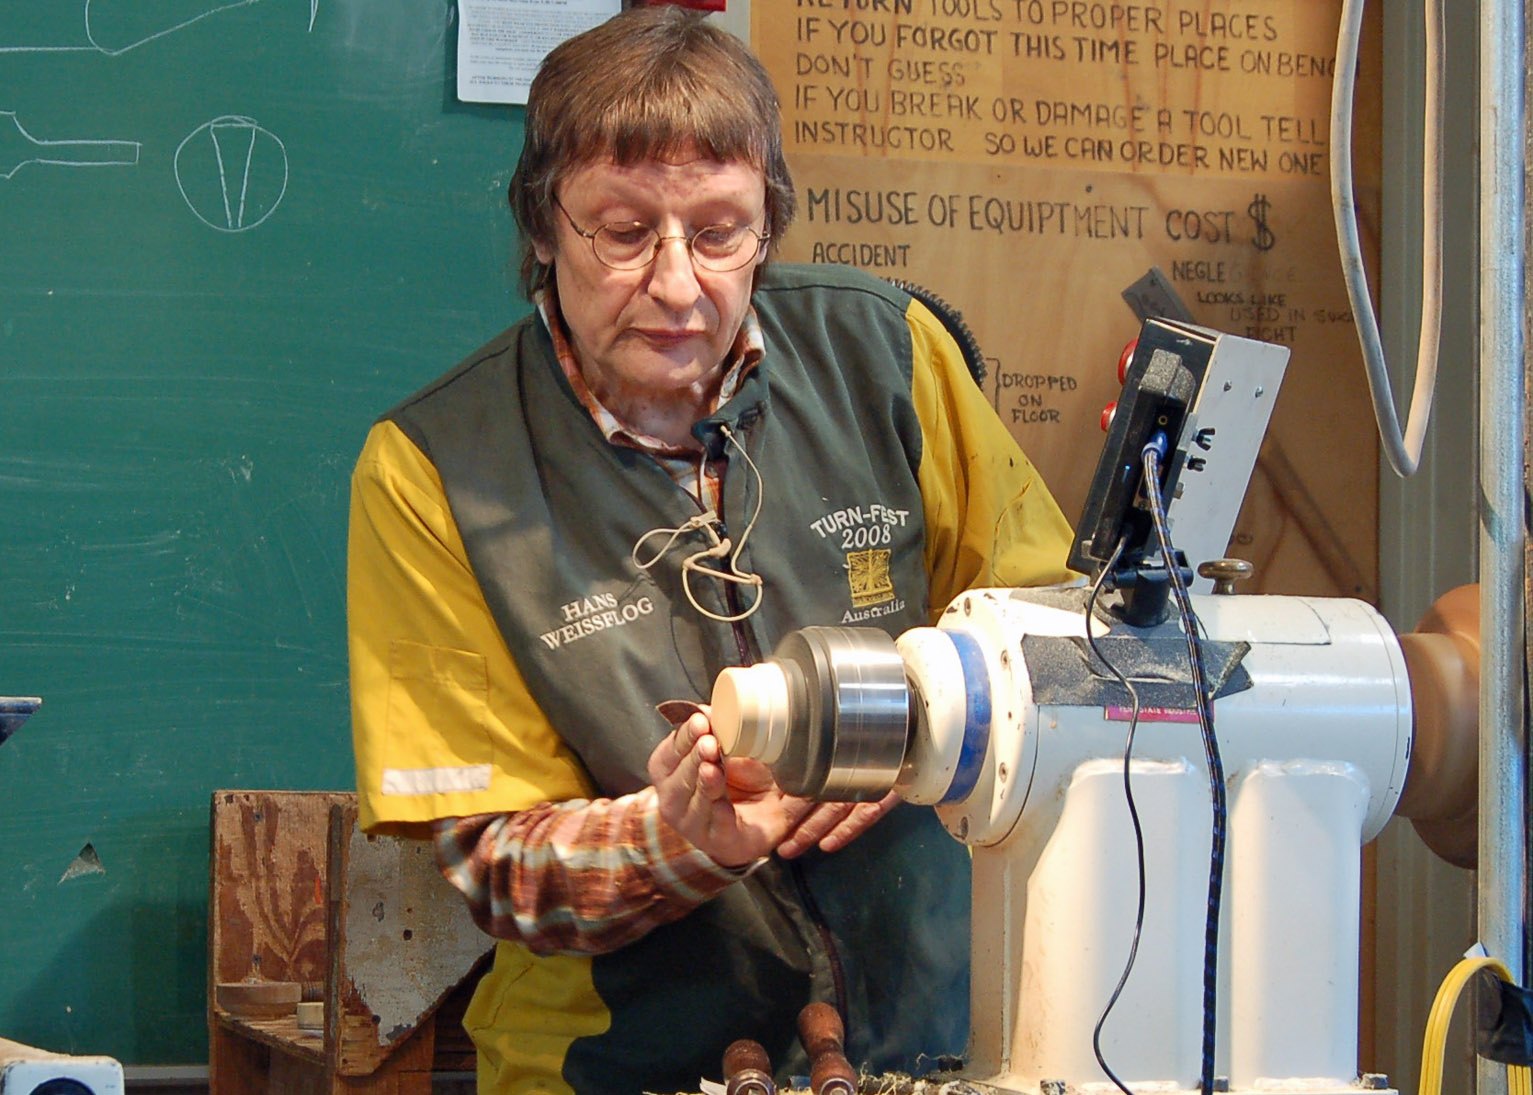
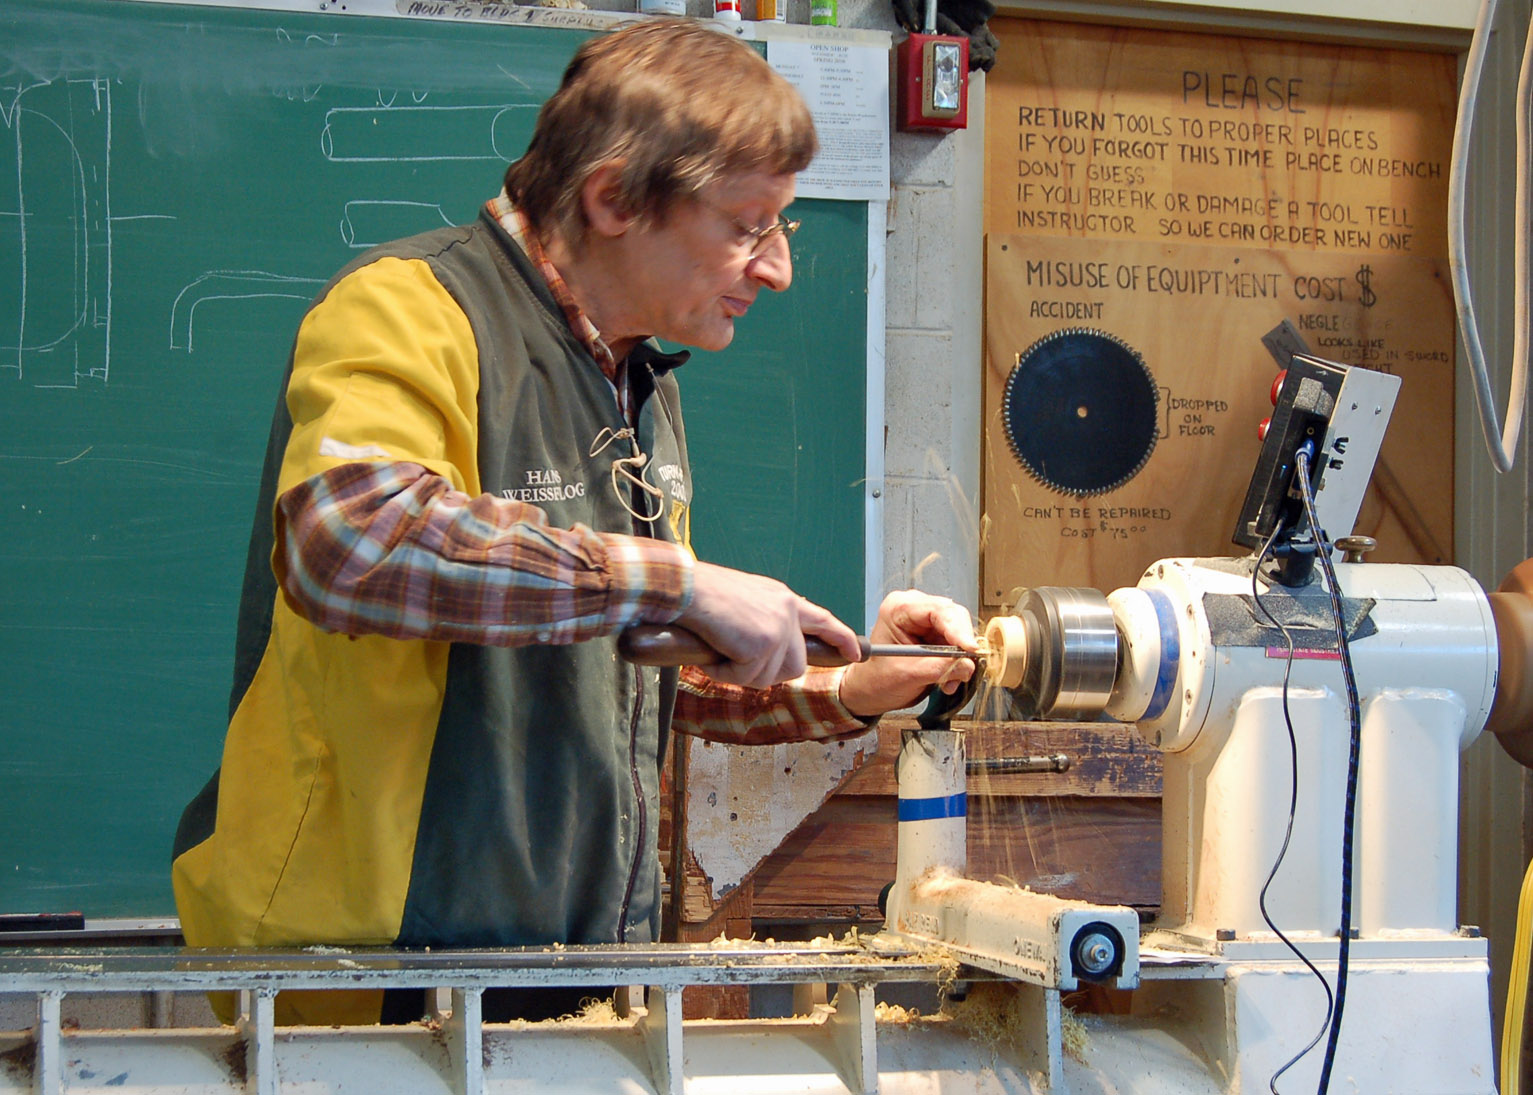
We had a fantastic workshop performed by Hans Weissflog. It was full of technique and approach, and thanks to Ric Baker's camera and projection system we got to see it all.
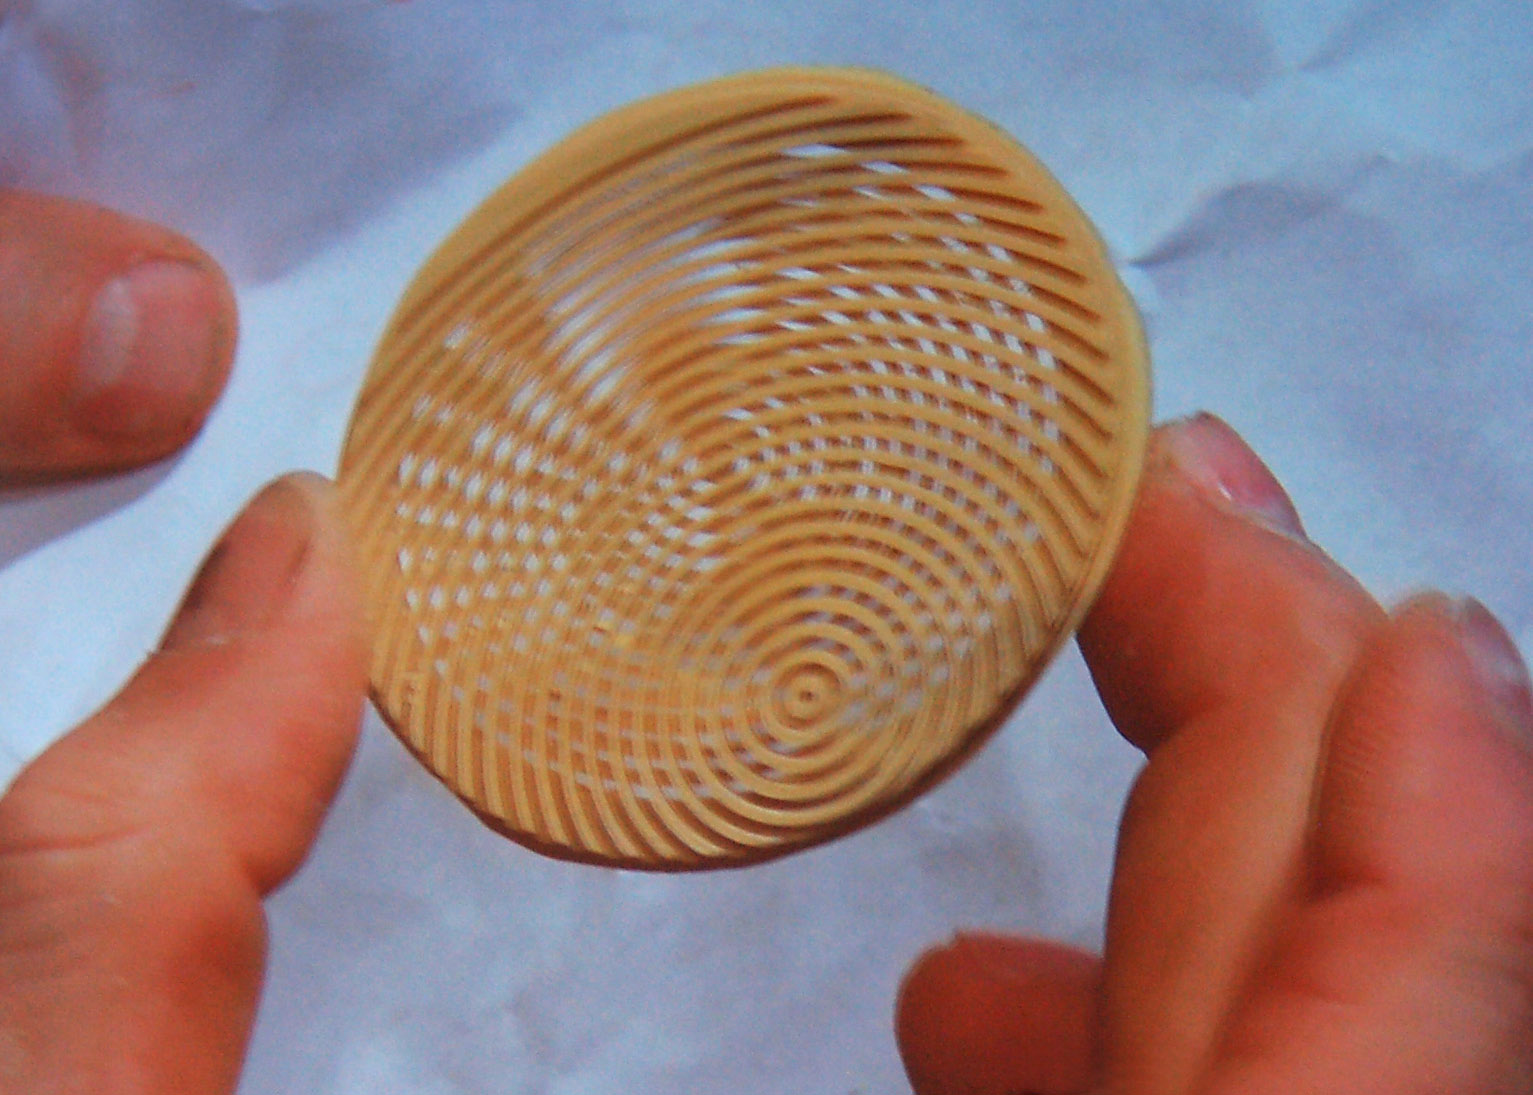
Hans started off showing us his ionic piercing on a lidded box. Similar to the one shown above, to keep things "simple" for the workshop his demonstration piece was made of just a single specie, dogwood. Simple is tongue in cheek because this turning was developed with an eccentric chuck, three jamb chucks, a couple of specialized tools, and a whole lot of imagination and talent.
So you get the lay of the land, Hans made the top side of the lid on a "home-made" eccentric chuck, complete with eccentric ribs like those shown above. He then rotated the lid and turned the inside and added concentric ribs. He flipped the lid again and detailed the topside and outside of the lid. Hans then made the base, turning the inside first; then the sides. He flipped the base over and finished the bottom. The result was perfect. Sounds simple, right? Well, here's the rest of the story...
Please use the guides on either side of the pictures to scroll through the pictures (or click on a picture thumbnail) as you read the accompanying text below the slide show.
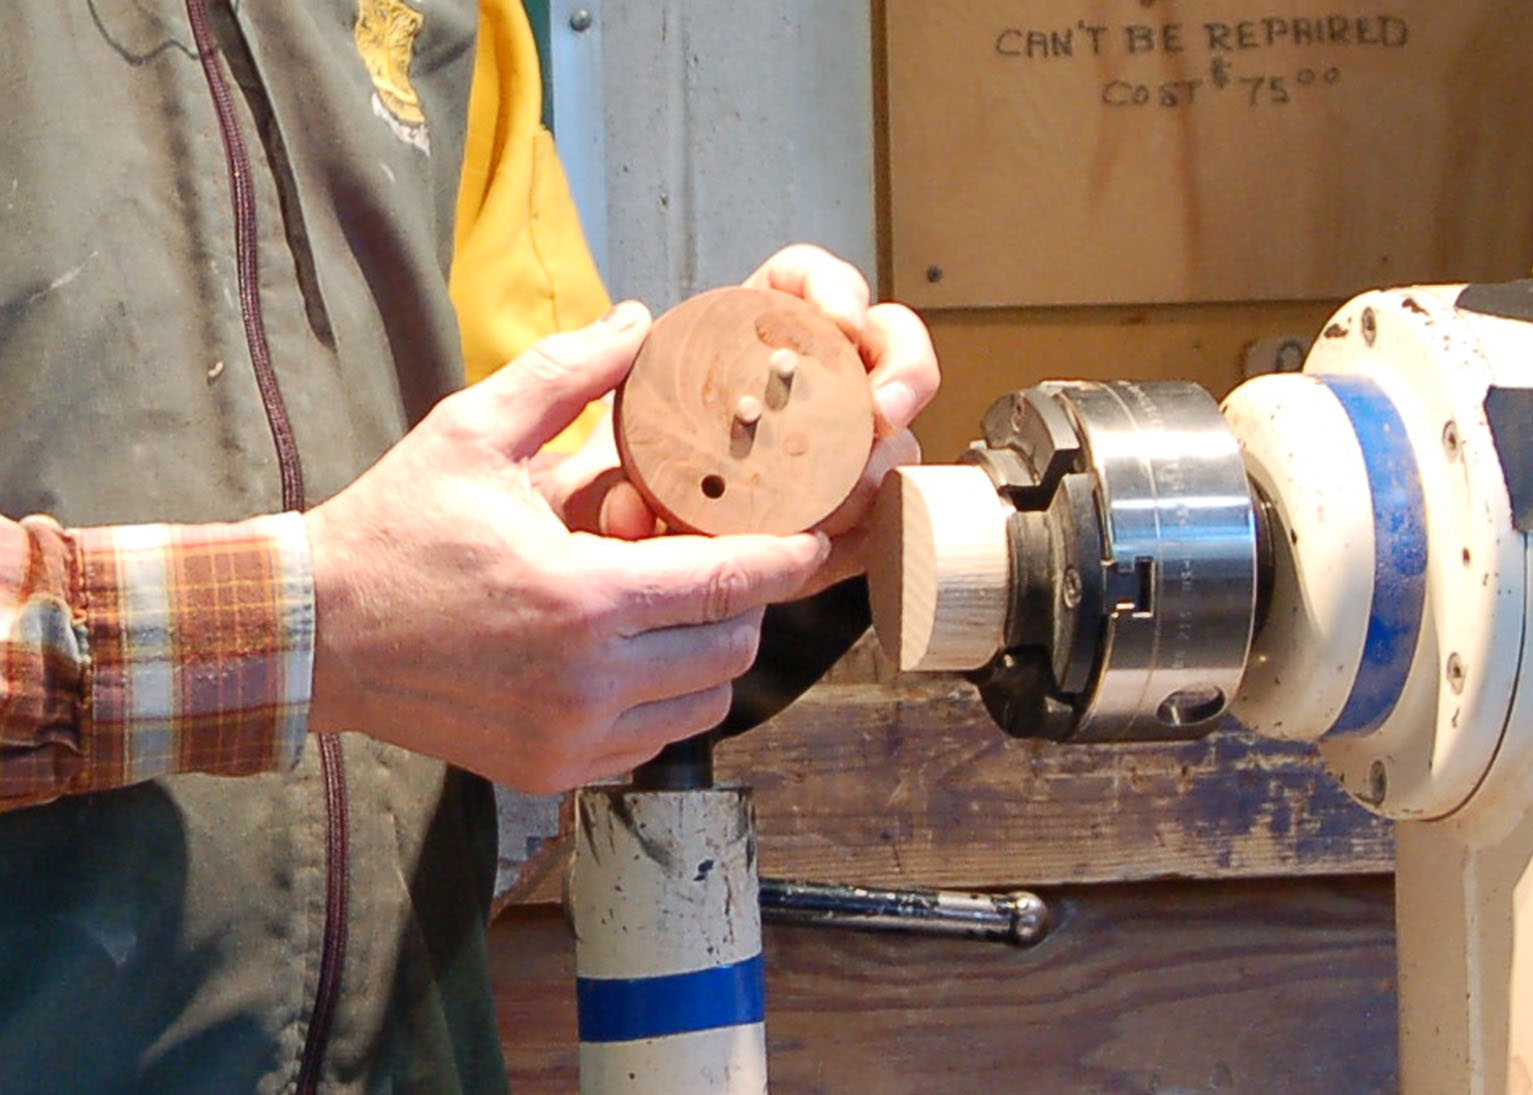
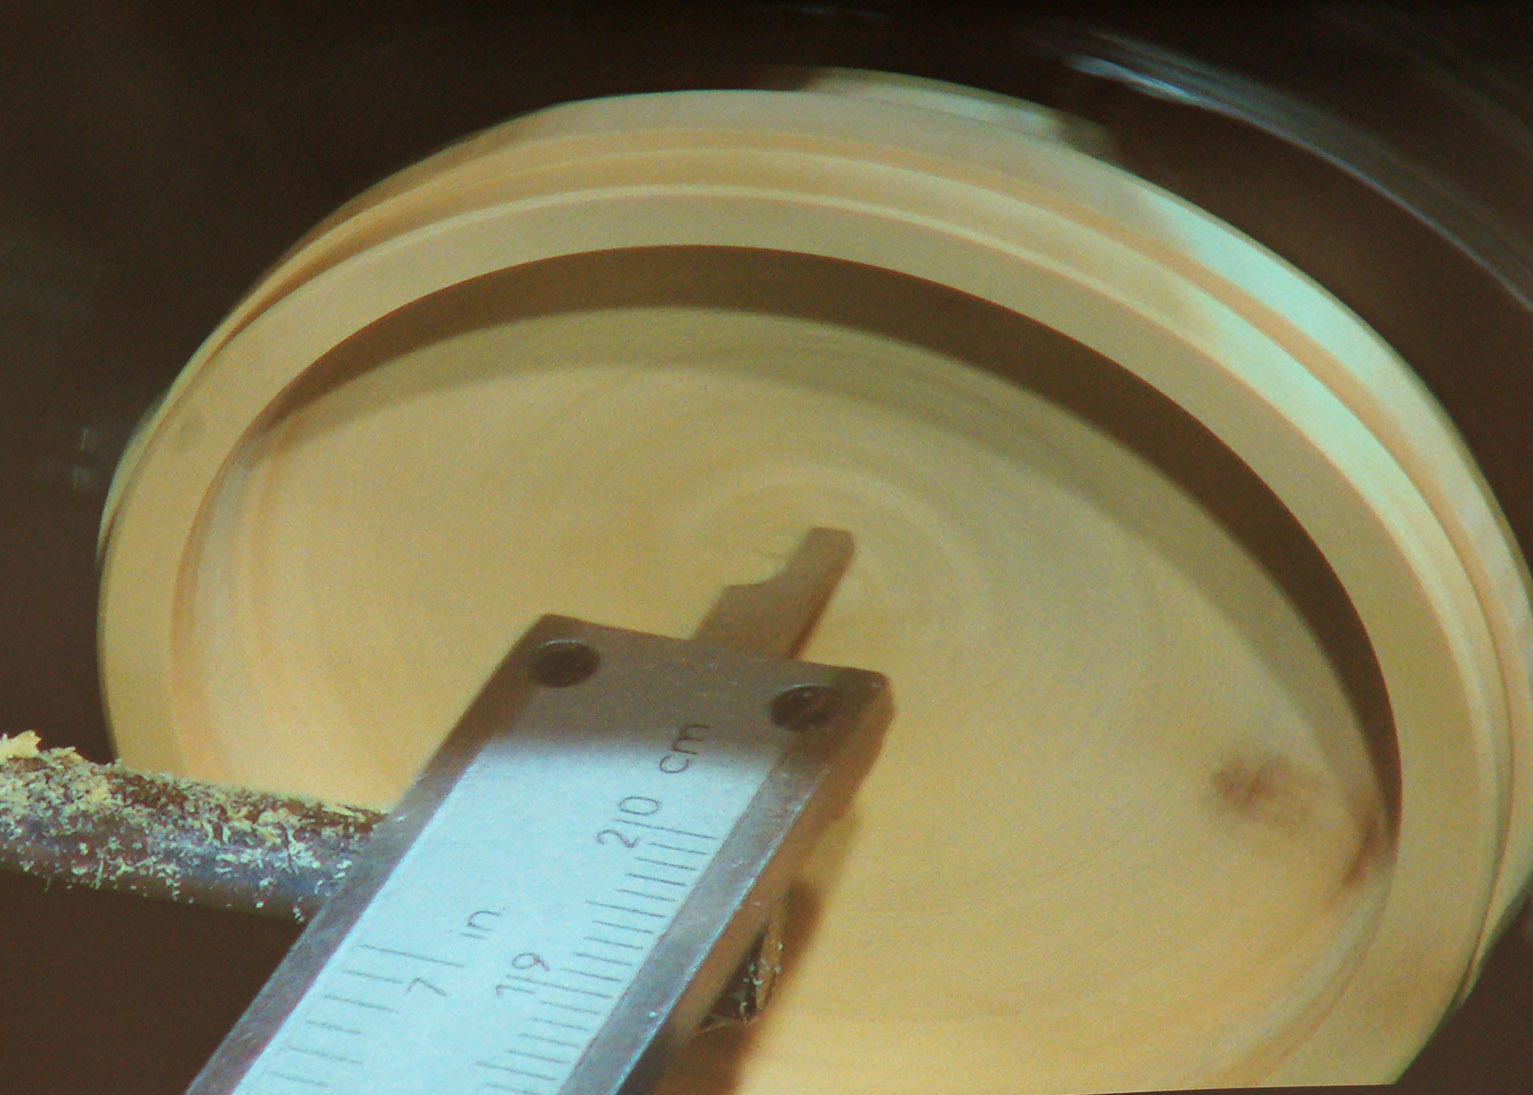
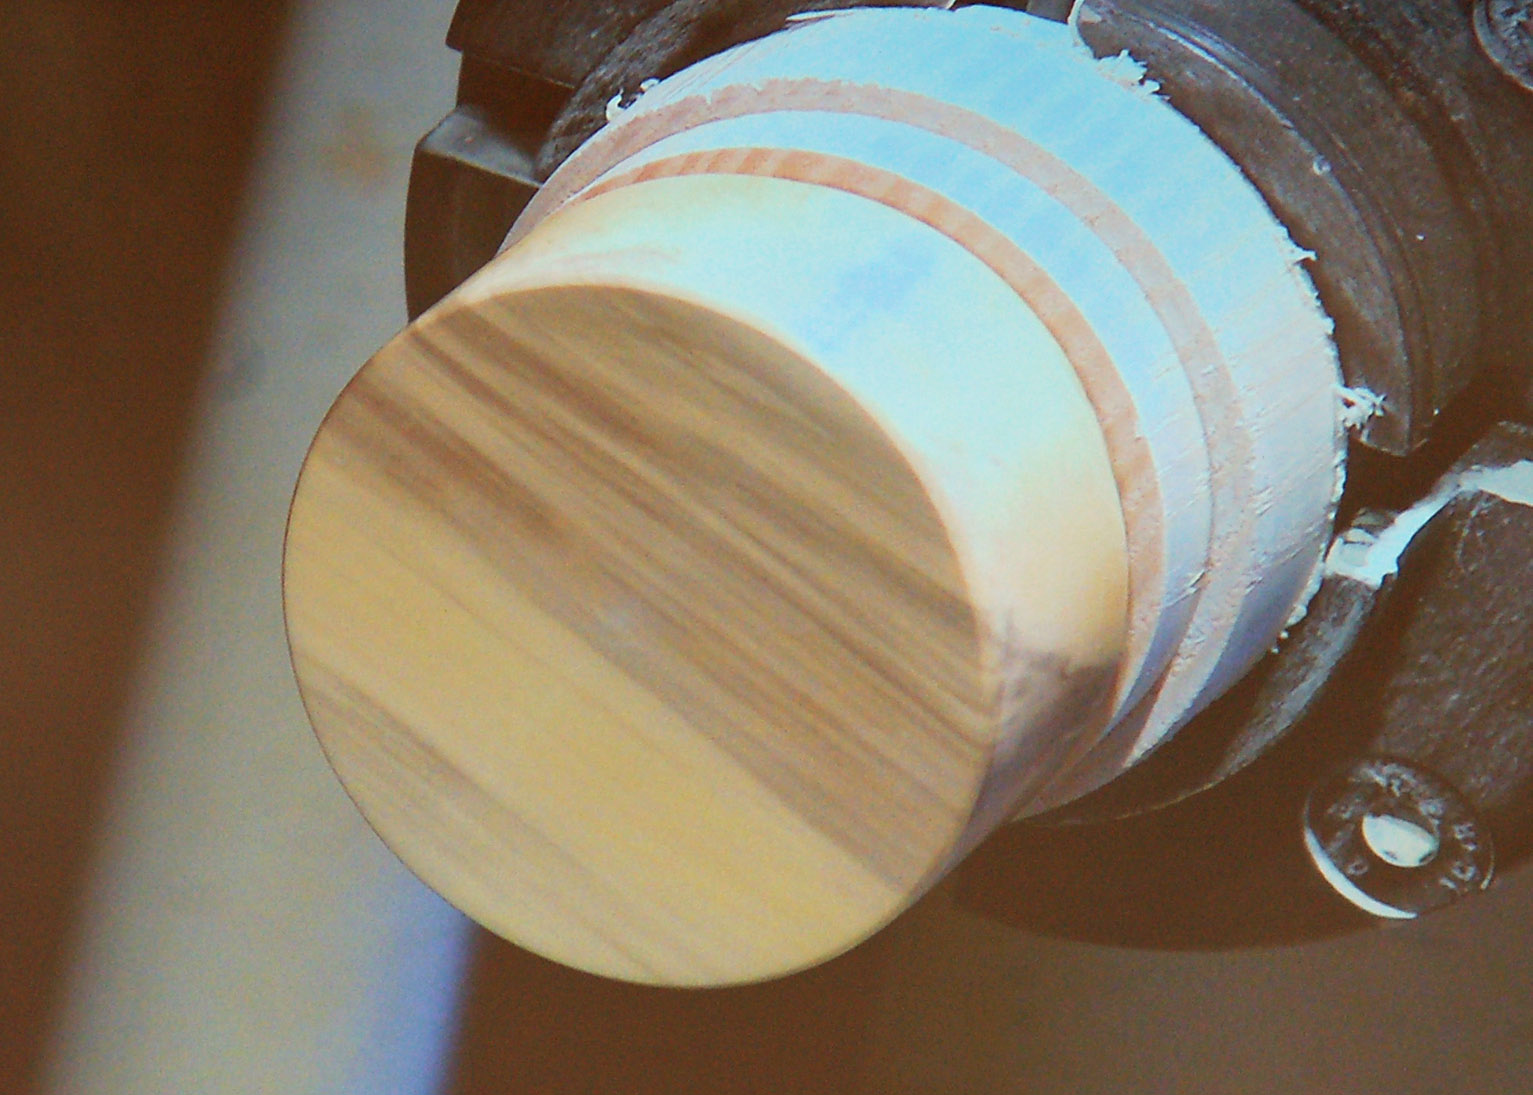
Hans made this eccentric chuck with 6 mm dowels space at 19 mm apart. Holes were drilled in the lid to a depth such that the holes could be turned away later in the process. With a little planning, the amount of eccentricity can be determined by the placement of the holes on the lid blank. One of the important features that Hans reinforced with us was that the faces of the blank and chuck be dead flat.
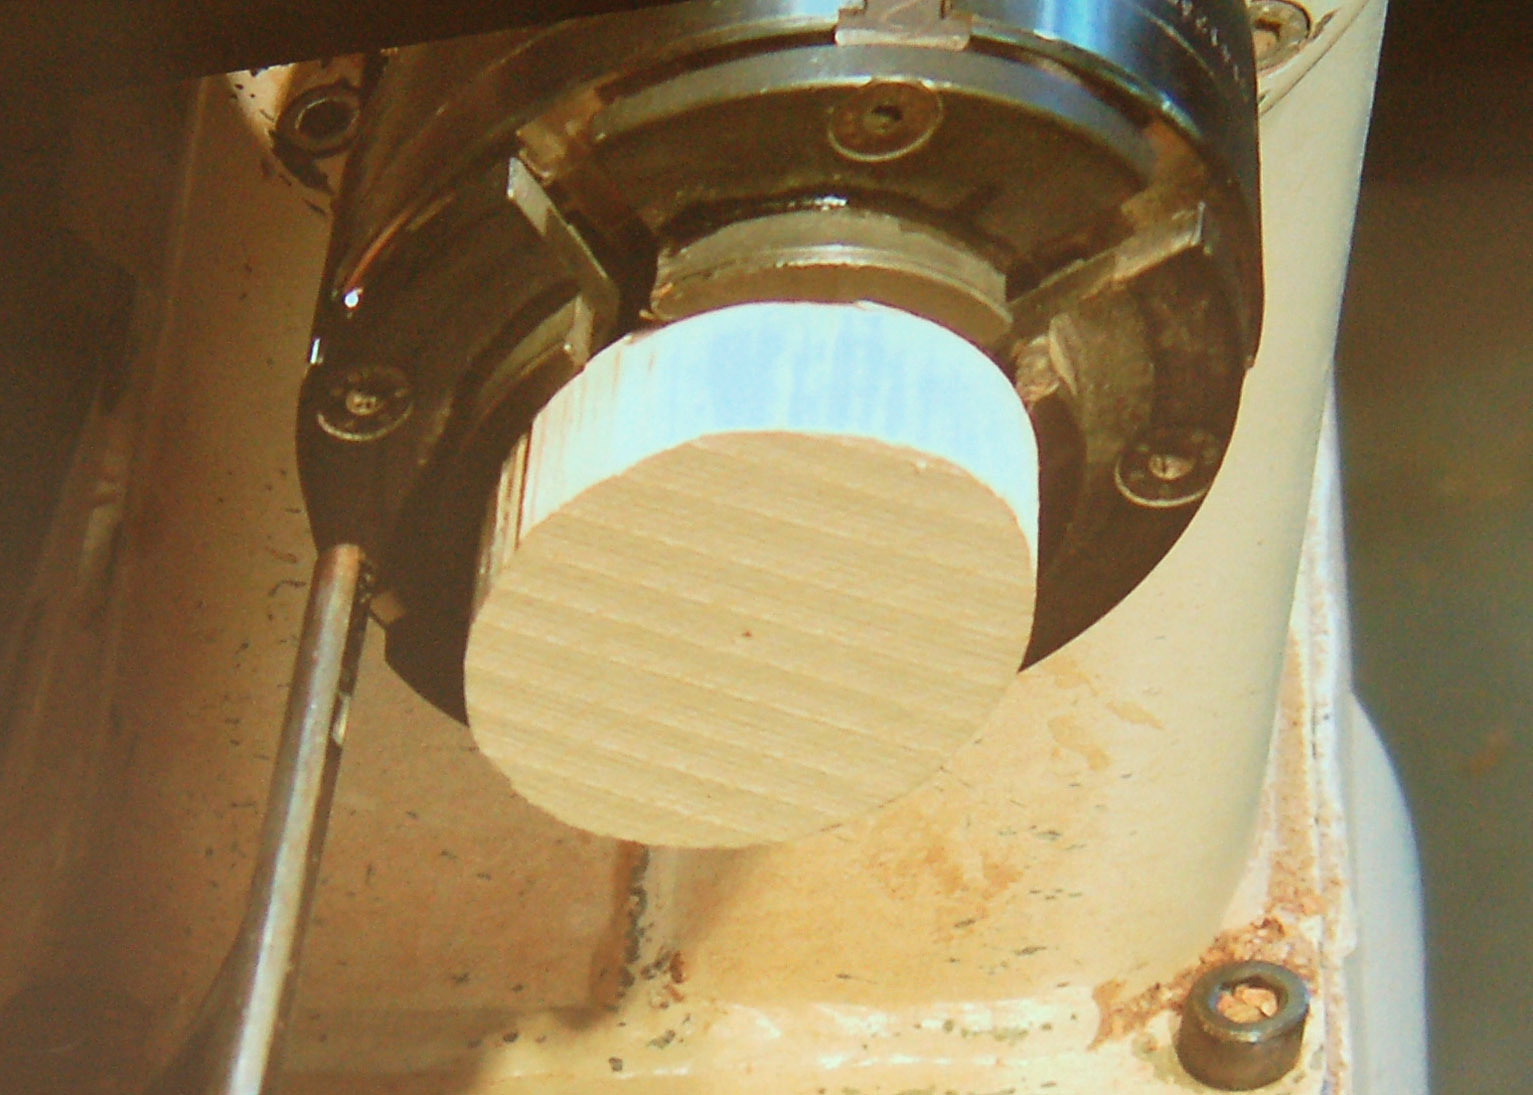
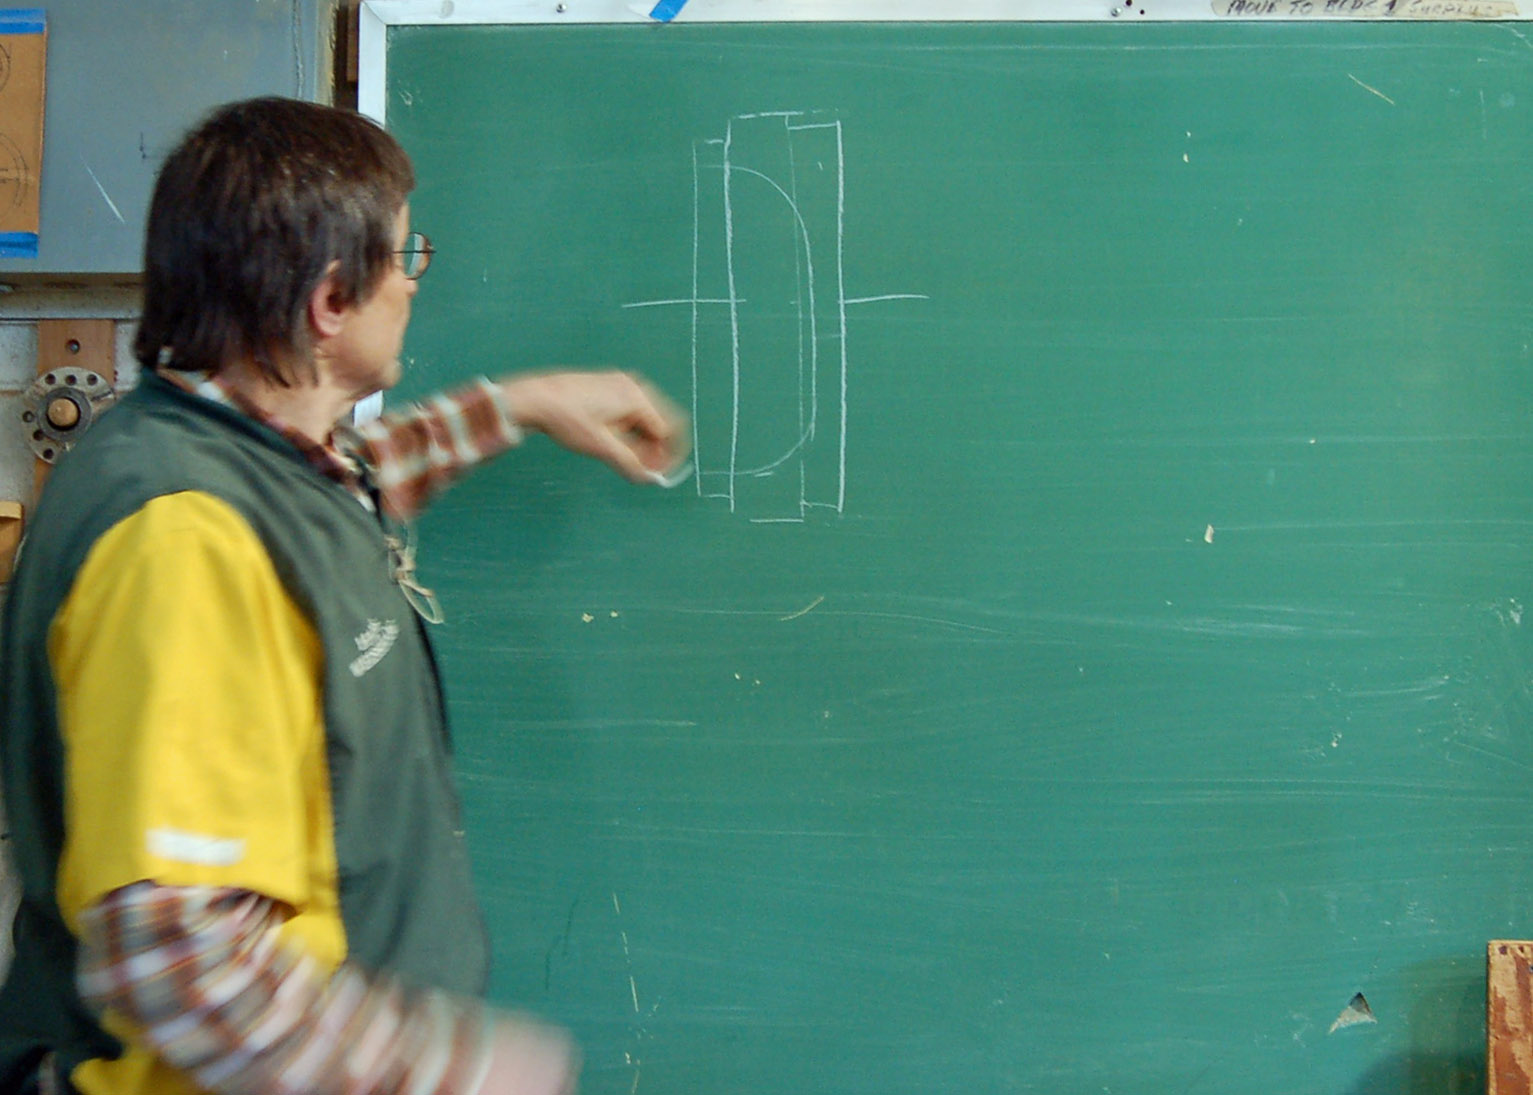
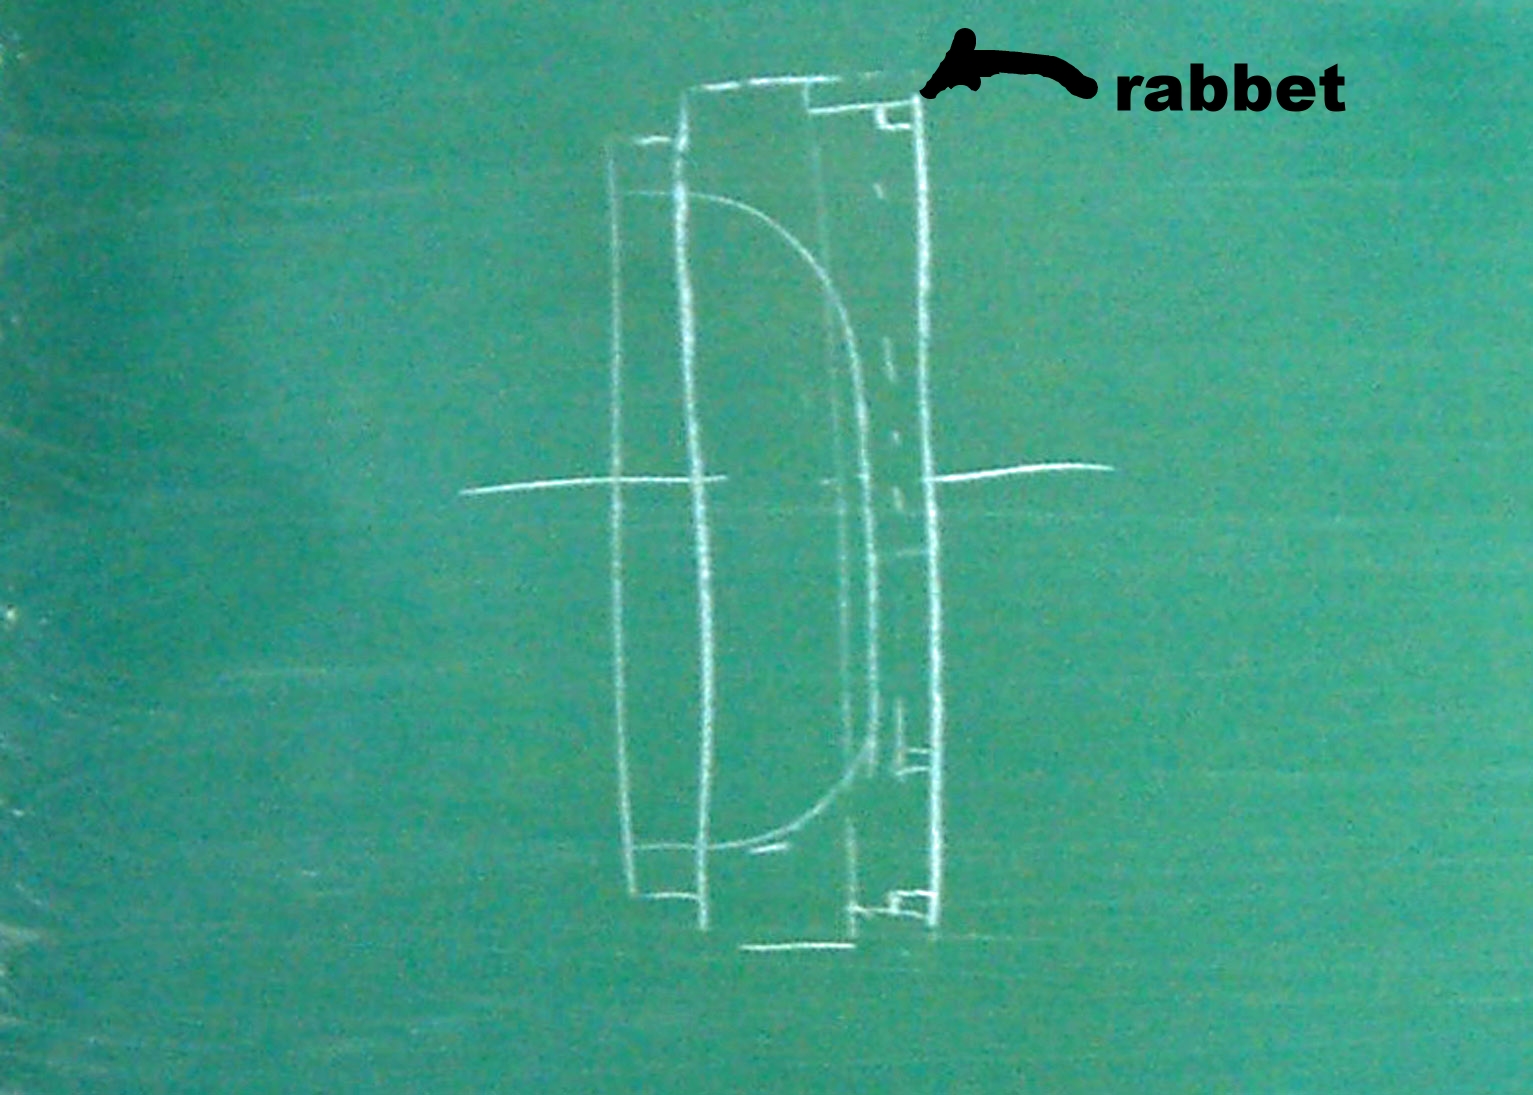
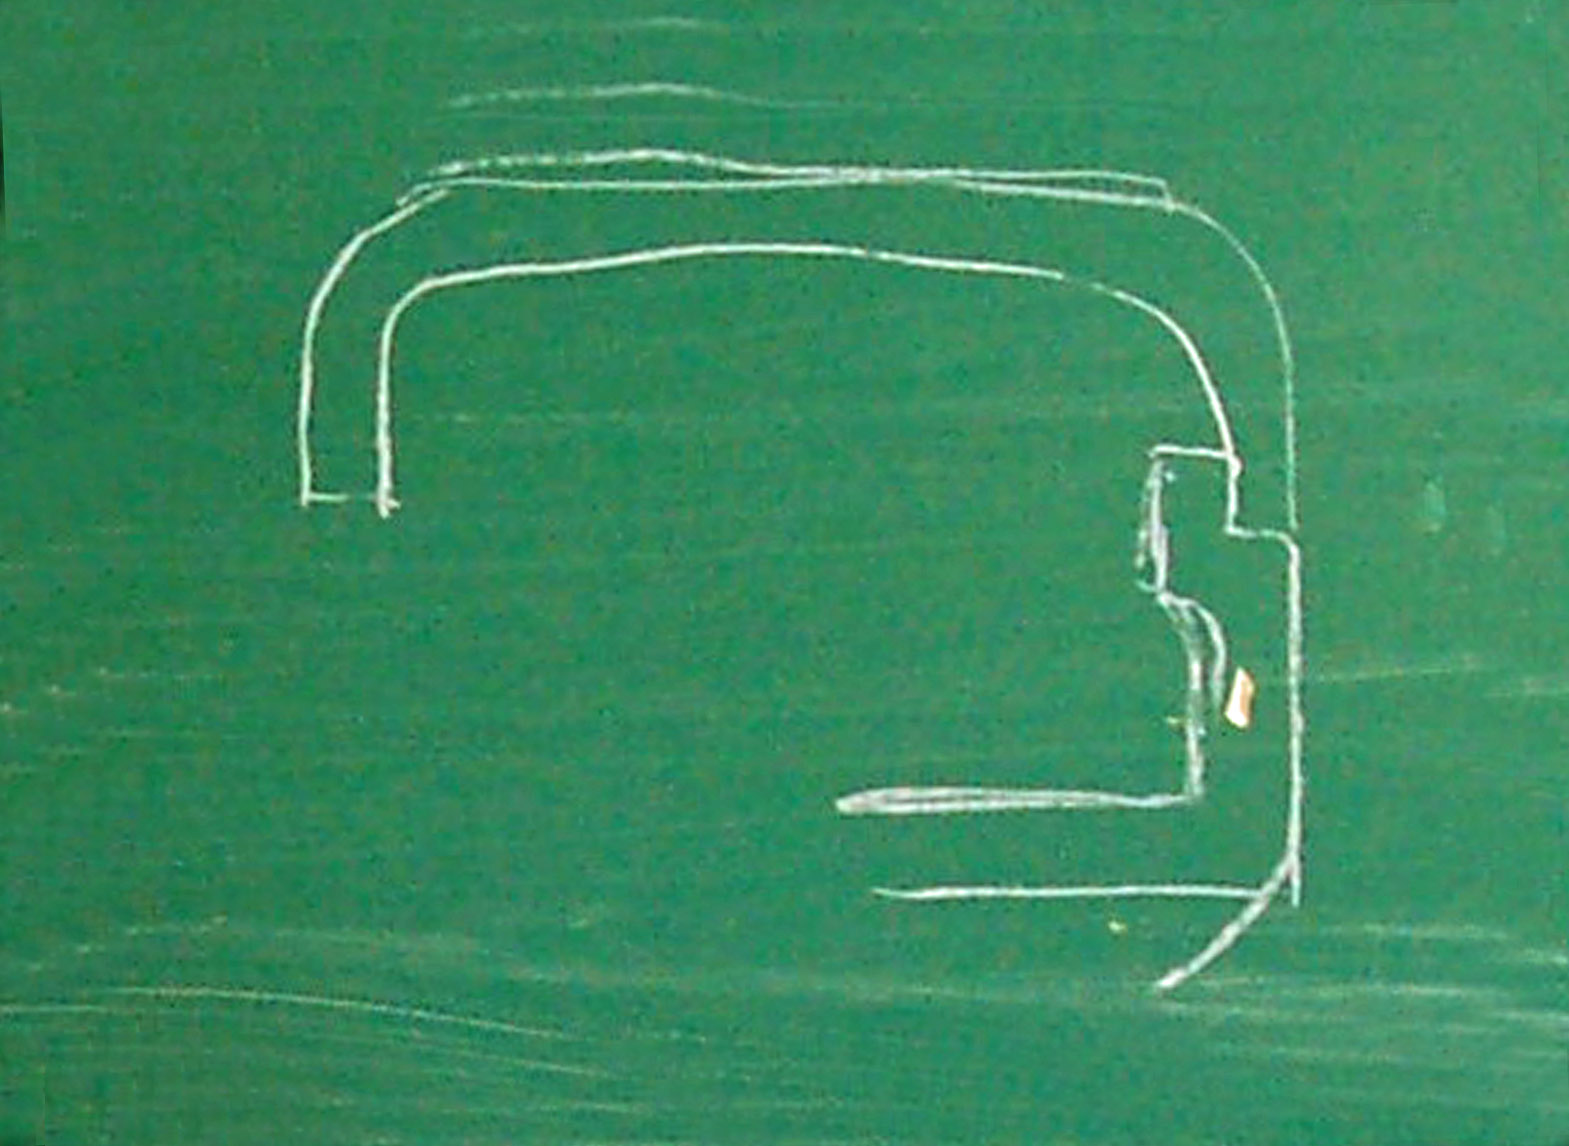
Hans brought along a lid blank and mounted it in a 4 jaw chuck. It had a tenon turned on it and was predrilled on the back side for mounting on the eccentric chuck. Hans then showed how he flattens the face and sides using first a 3/8ths bowl gouge with a finger nail grind, followed by a skew that he used as a flat profile scraper. To see what he was planning, Hans drew a cross-sectional view of the lid.

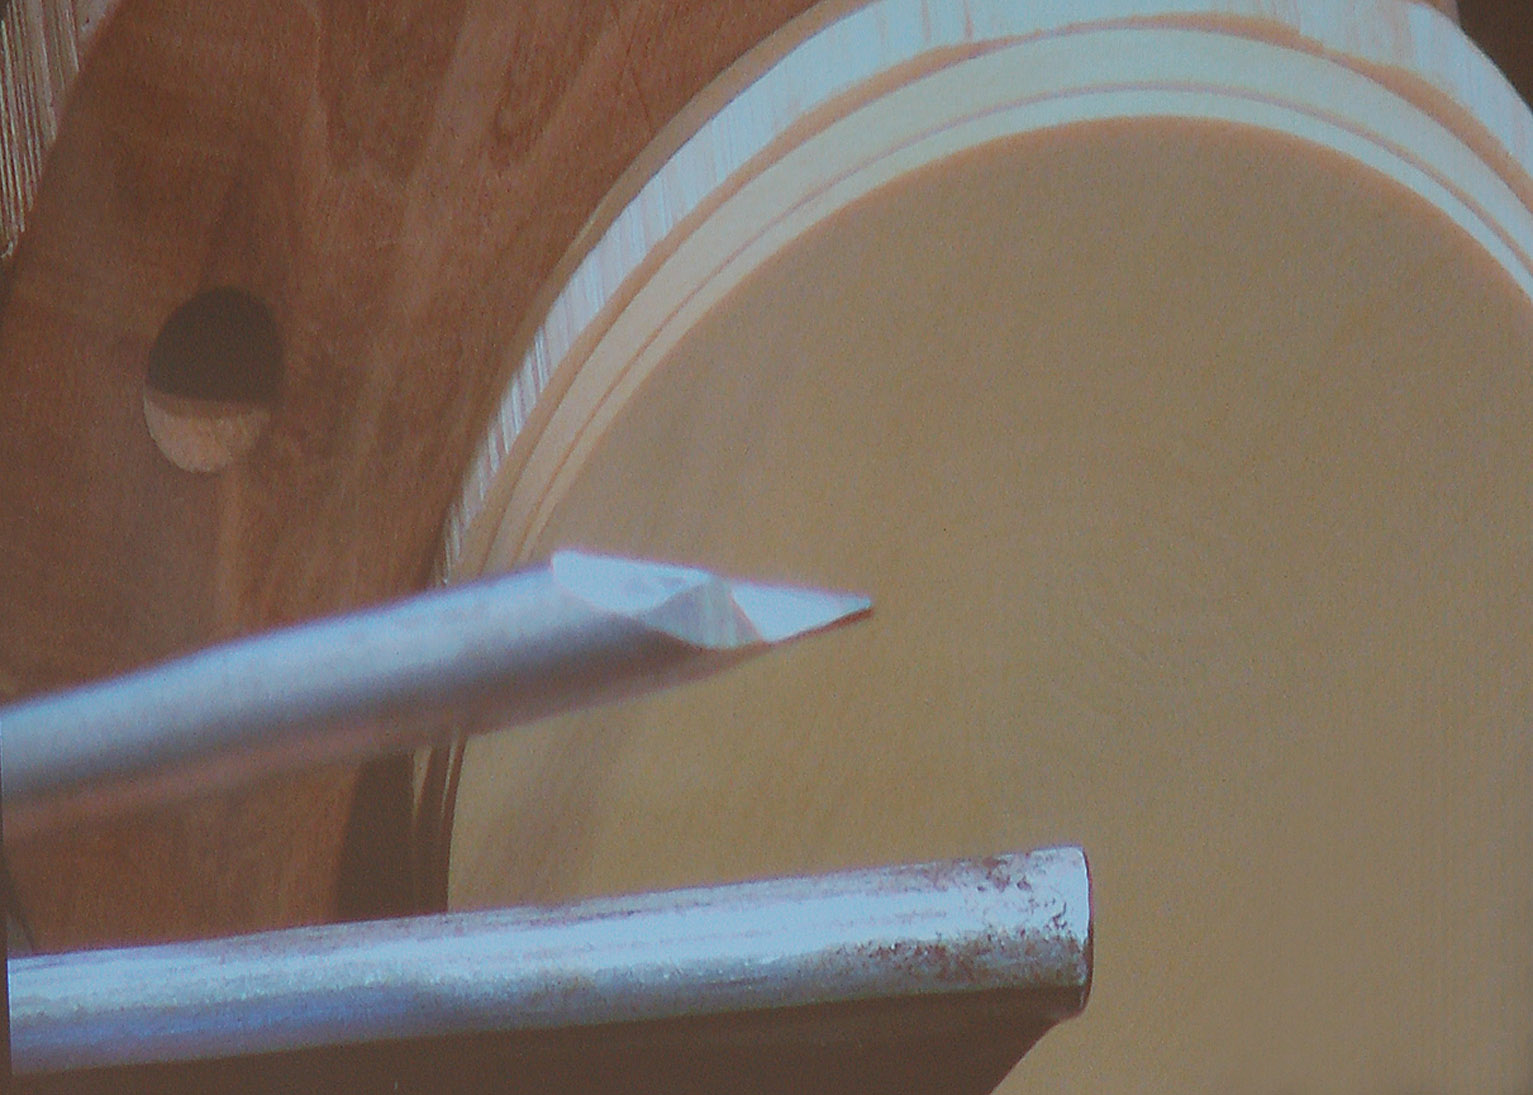
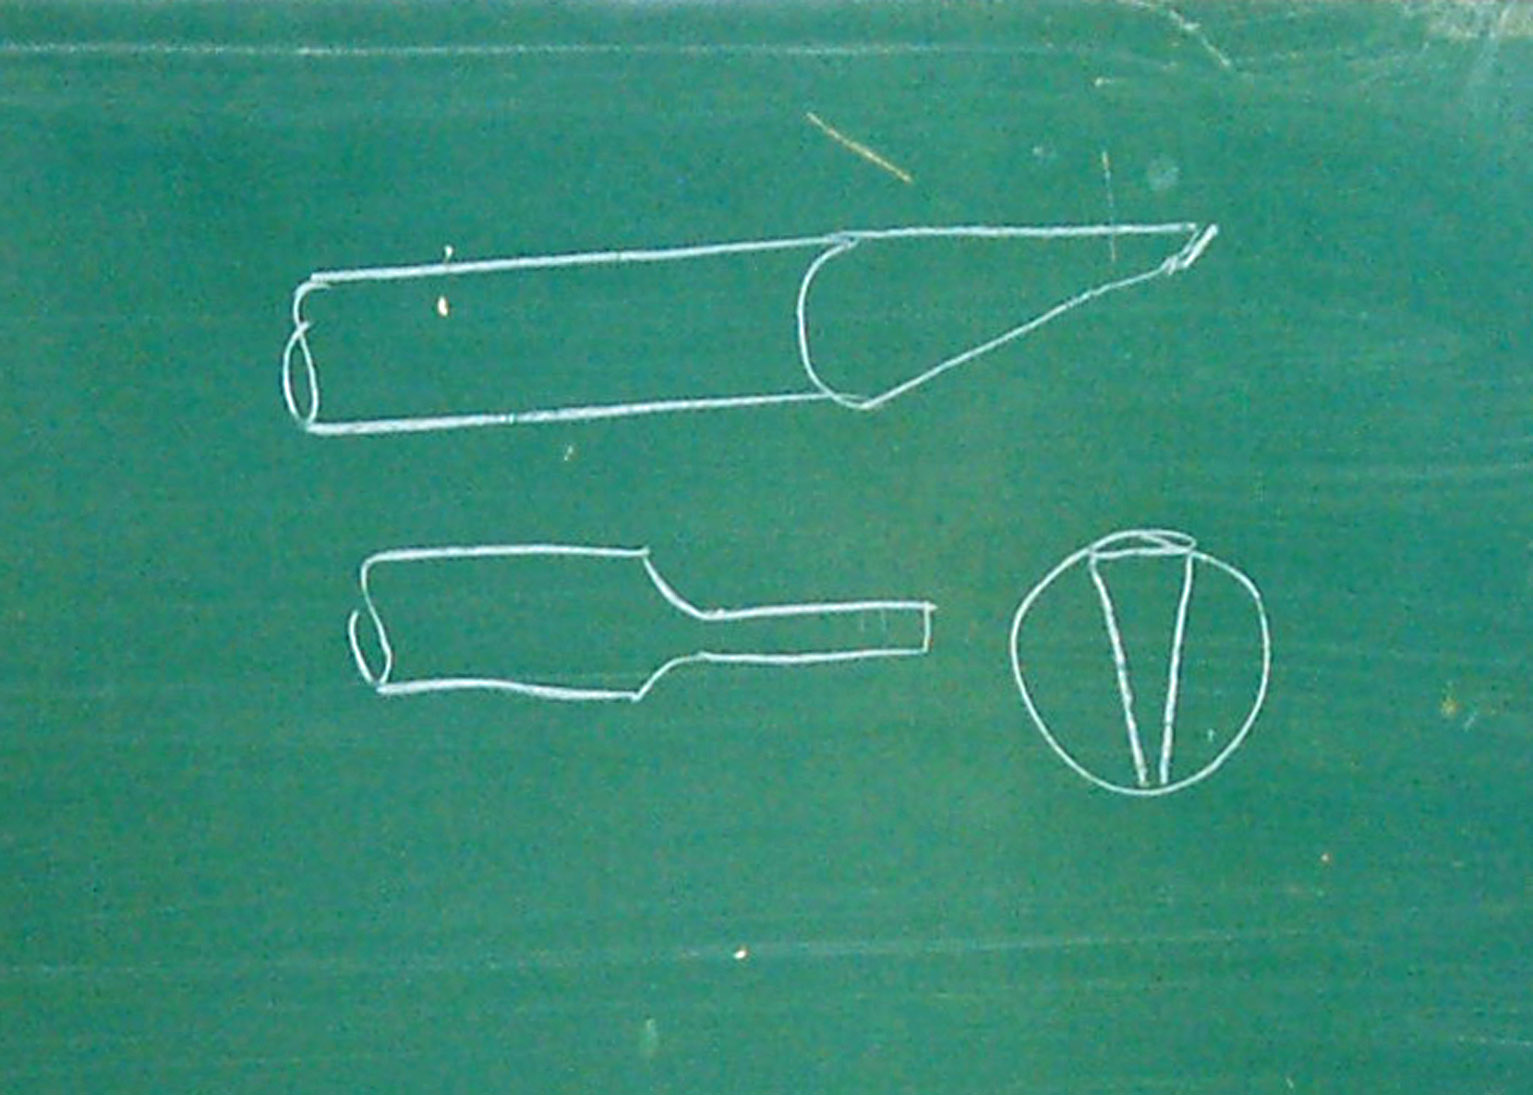
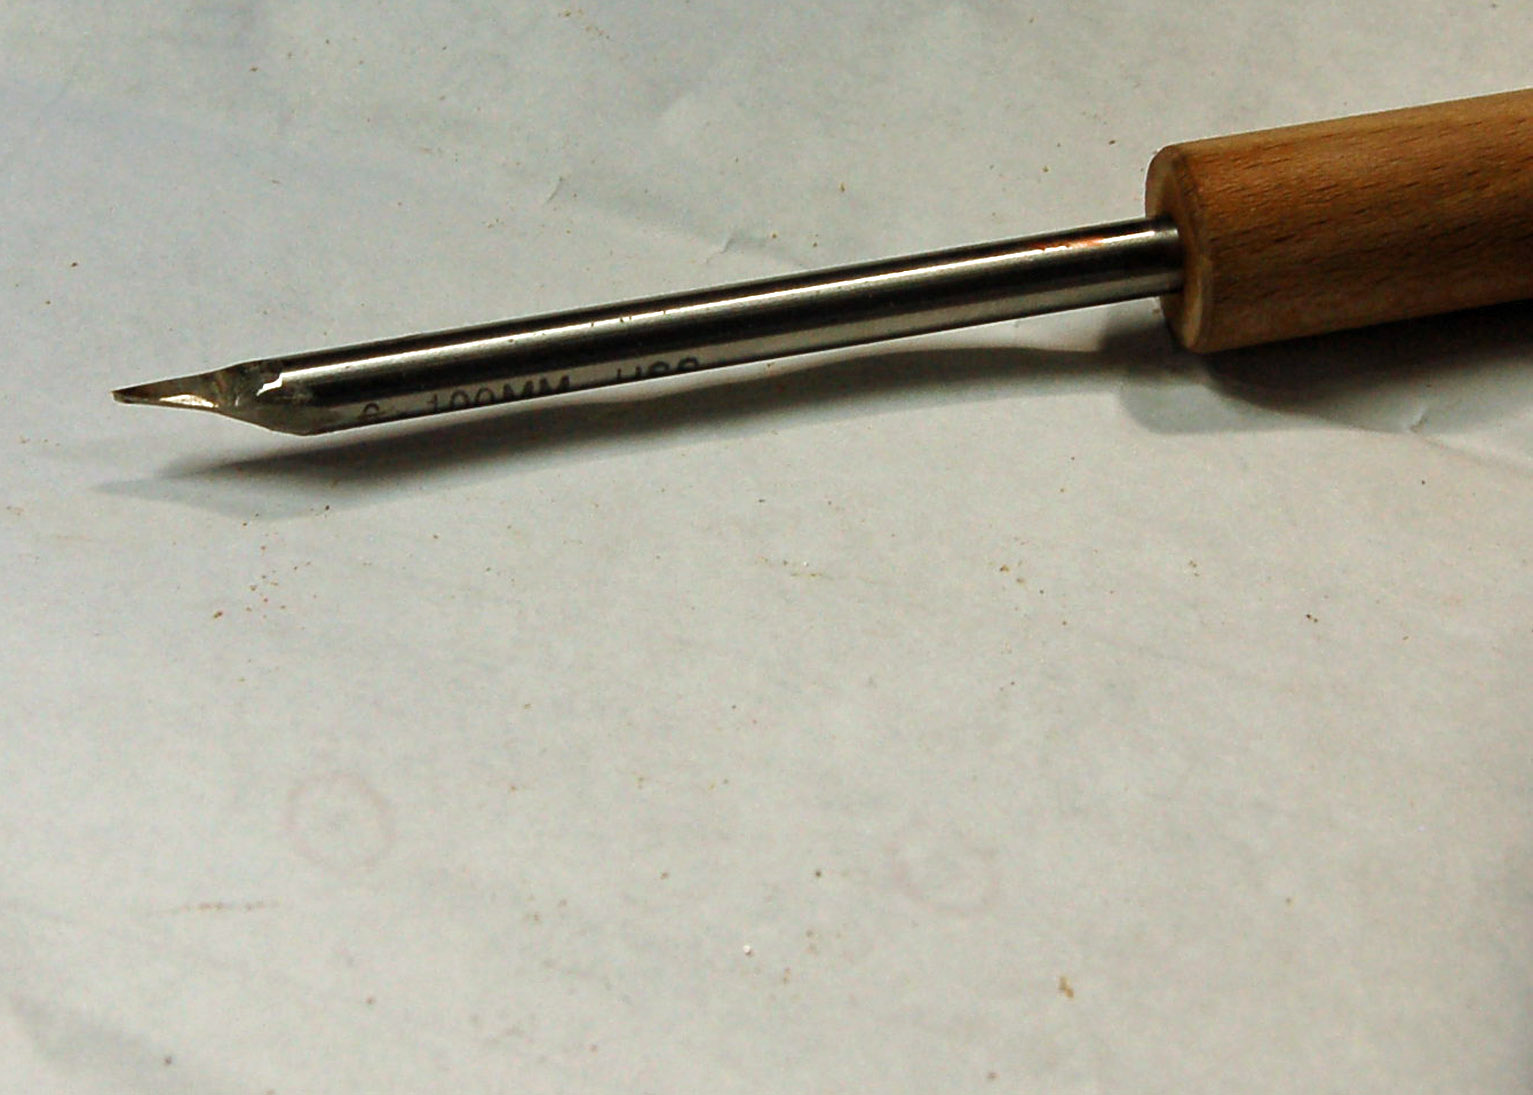
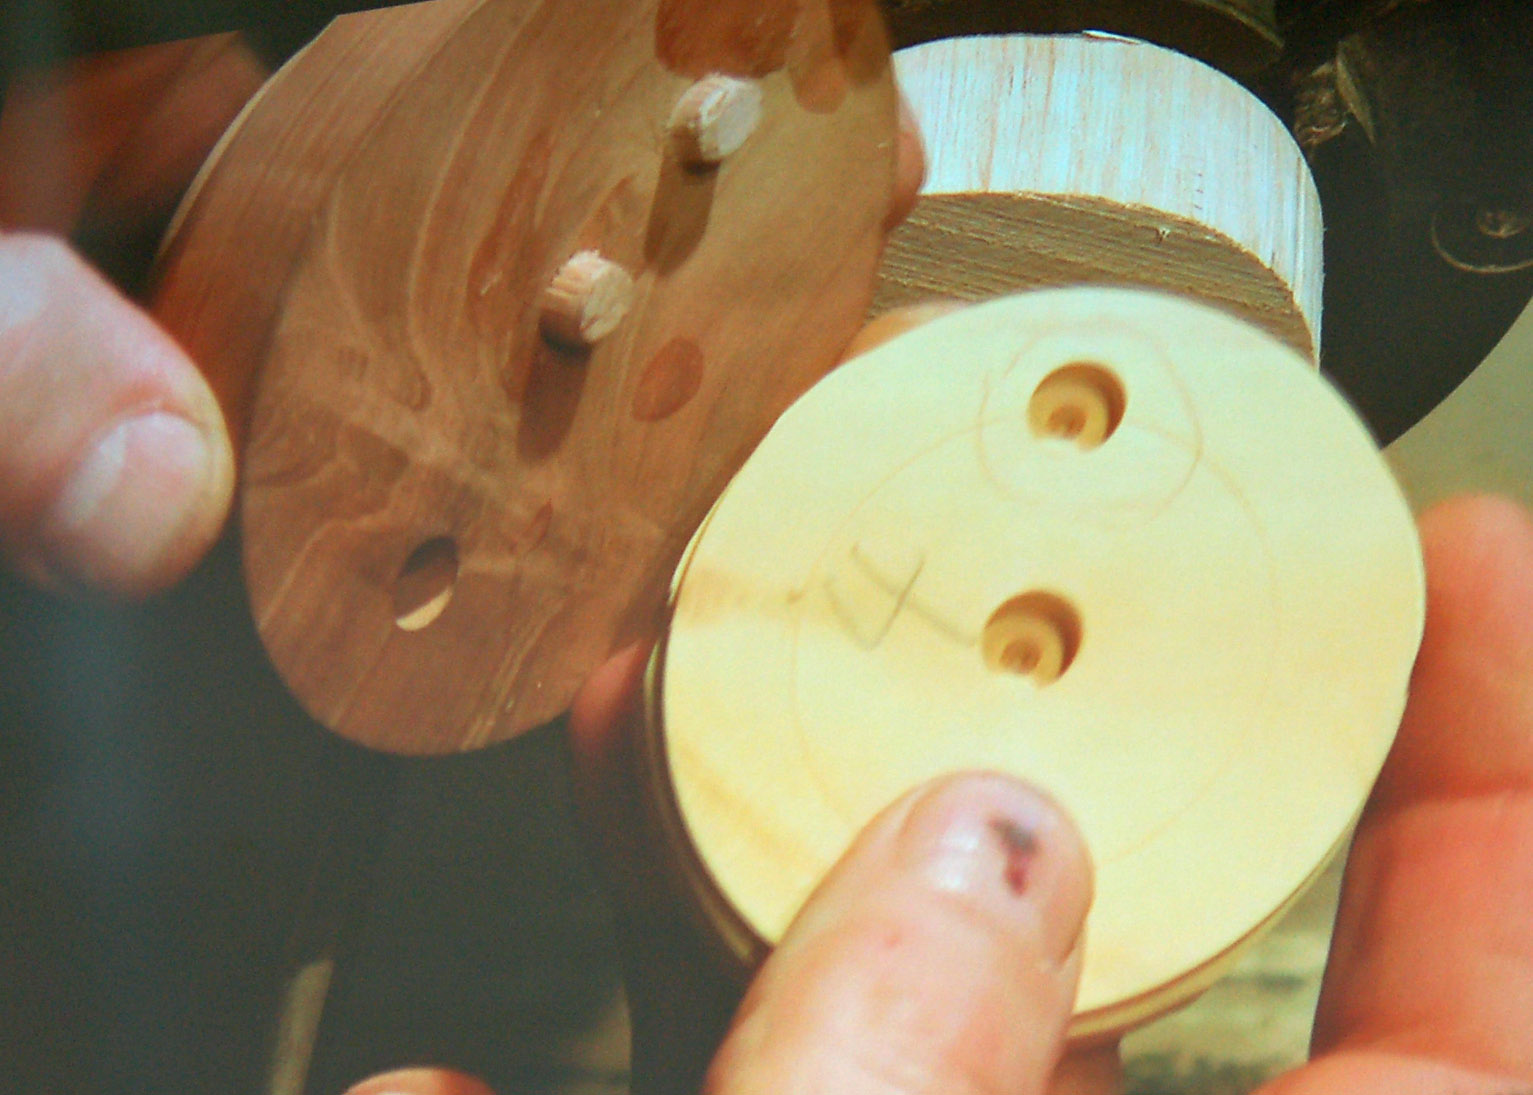
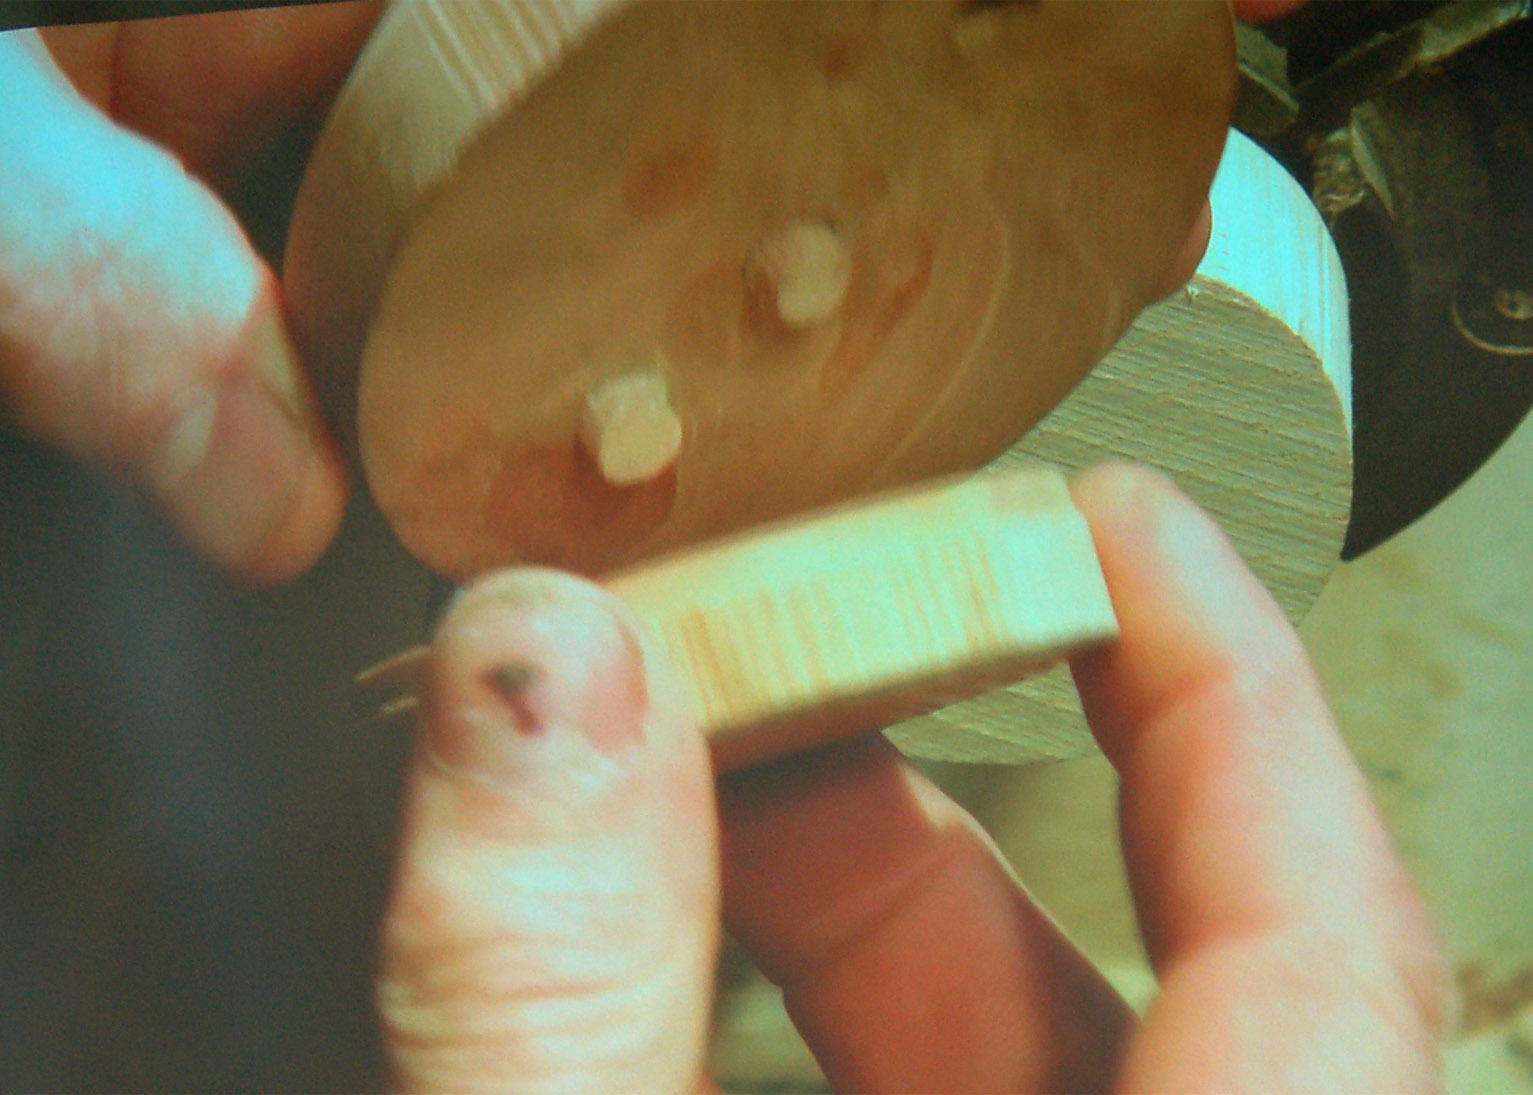
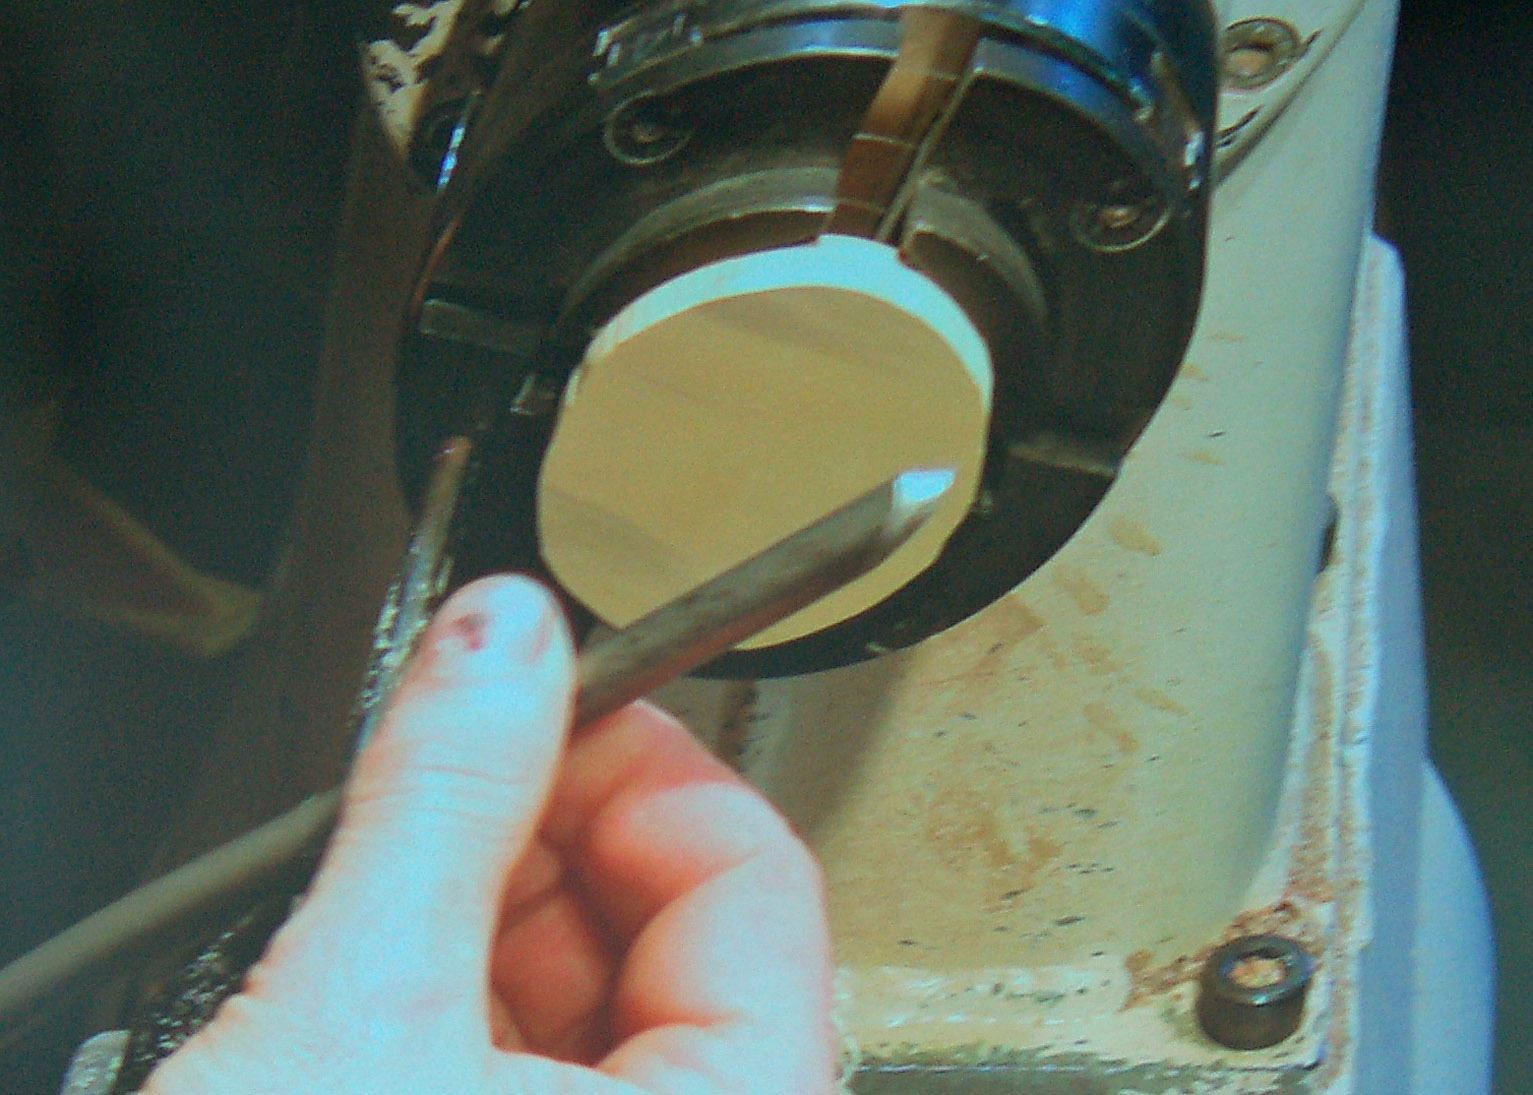
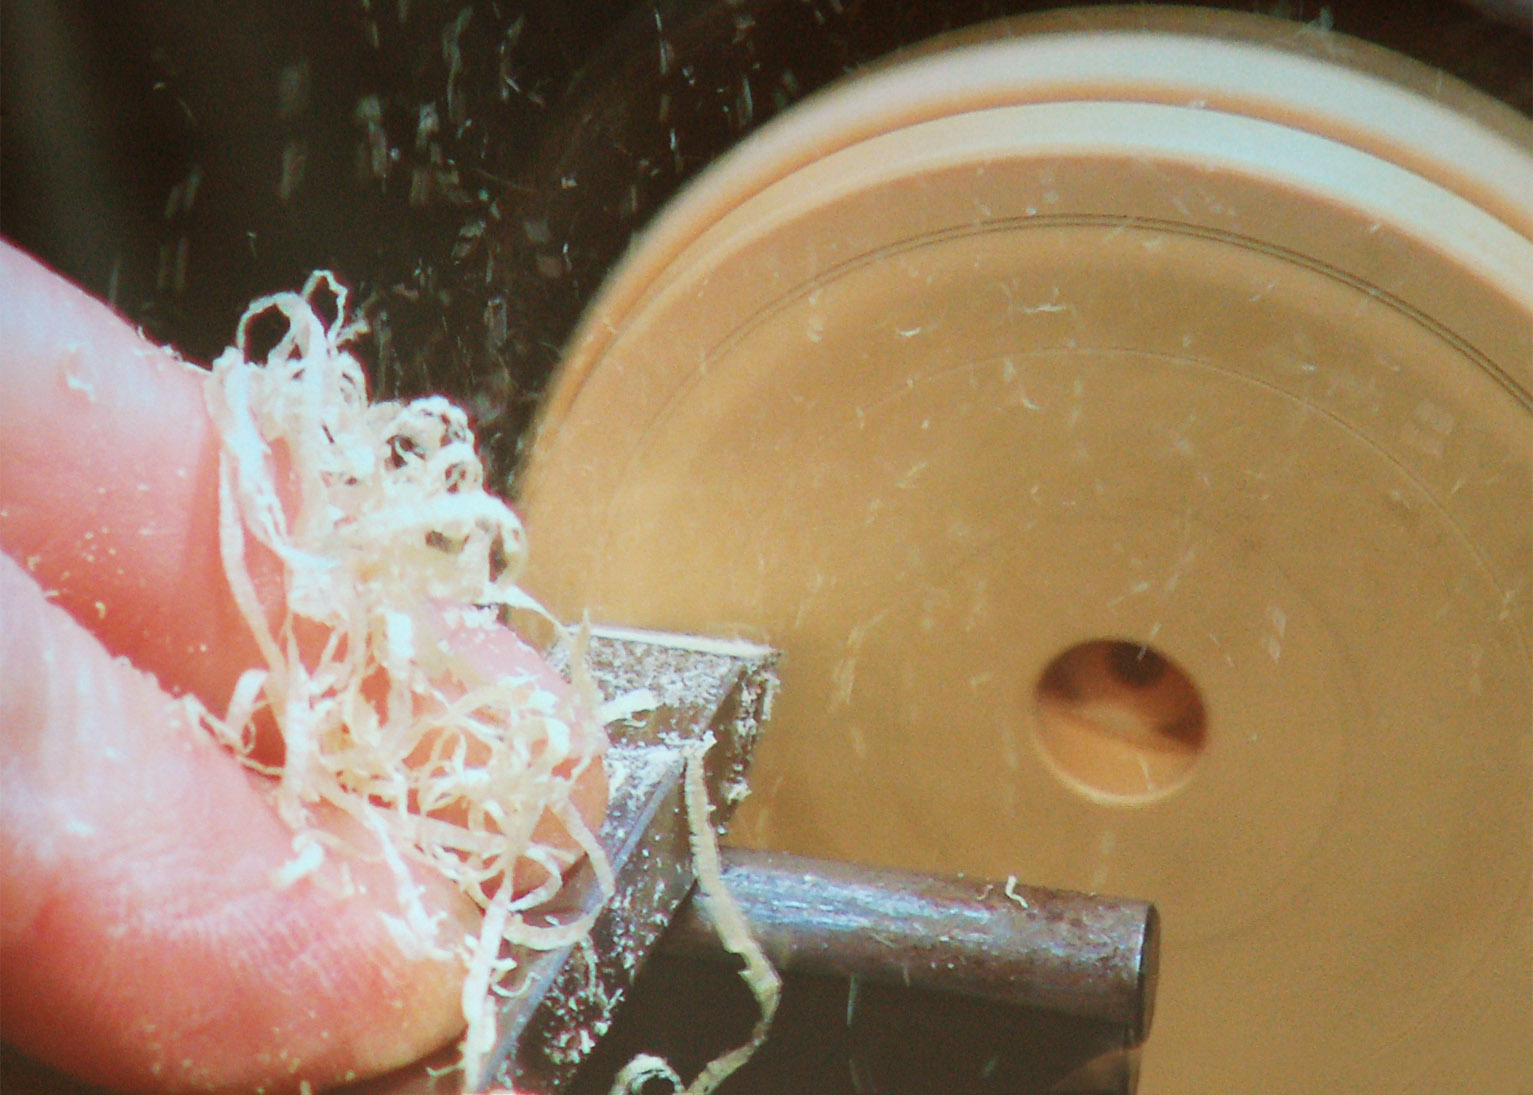
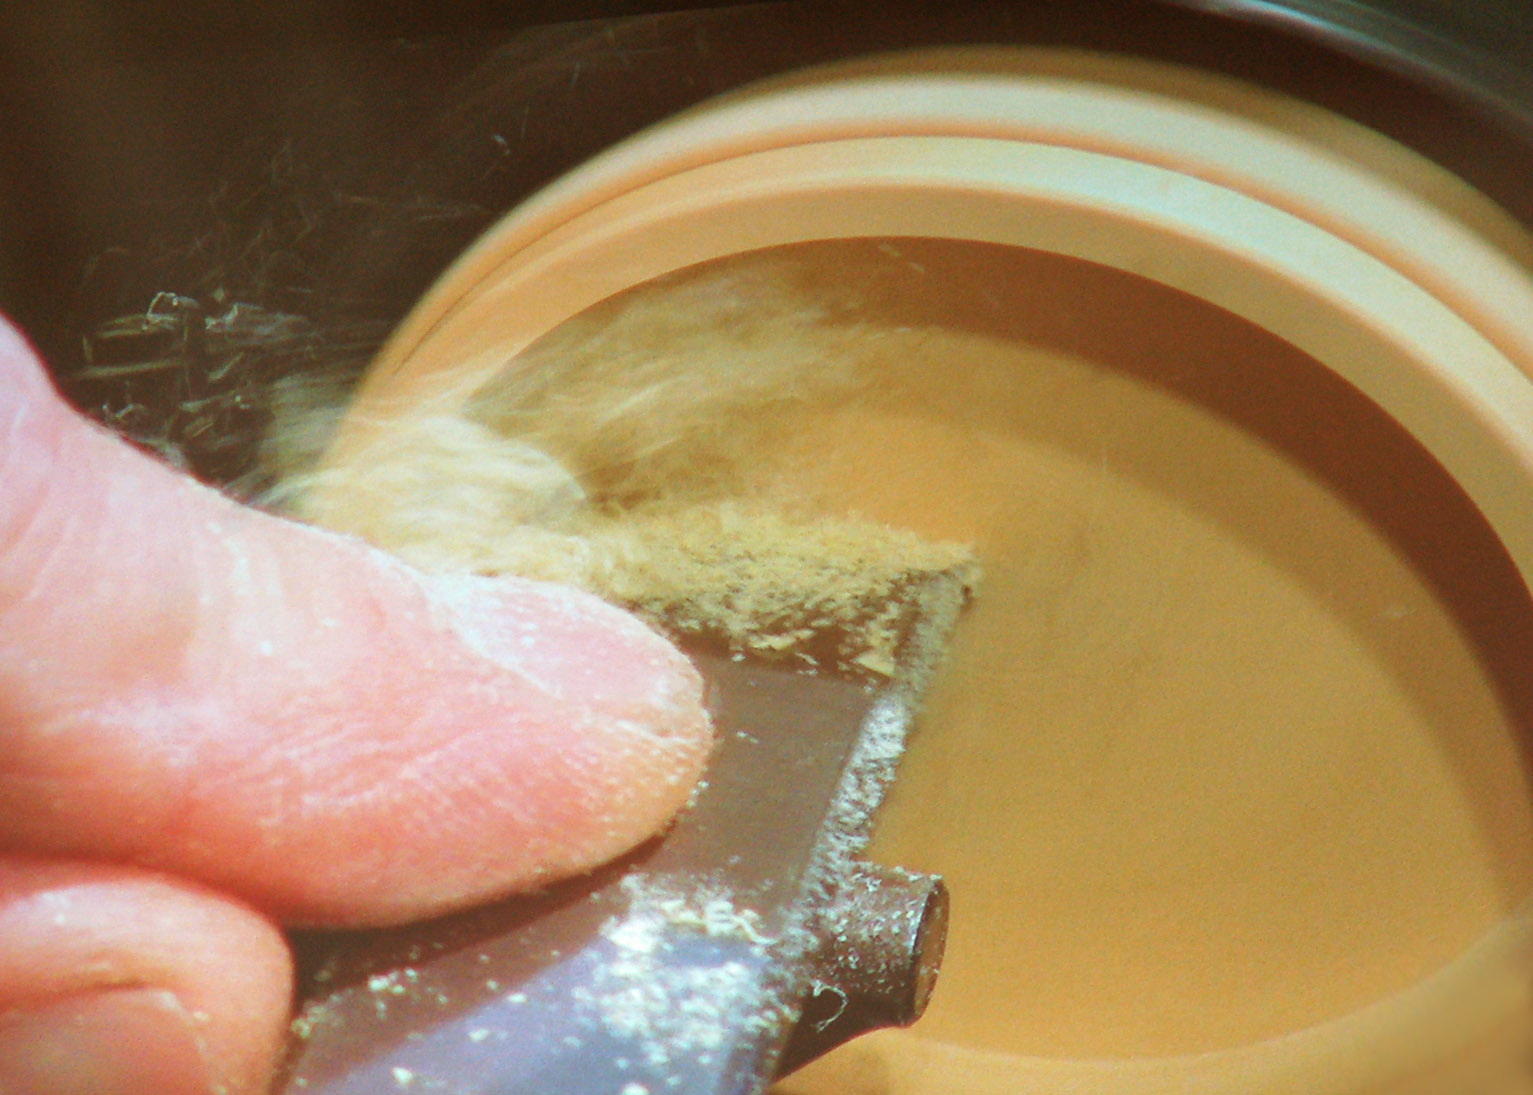
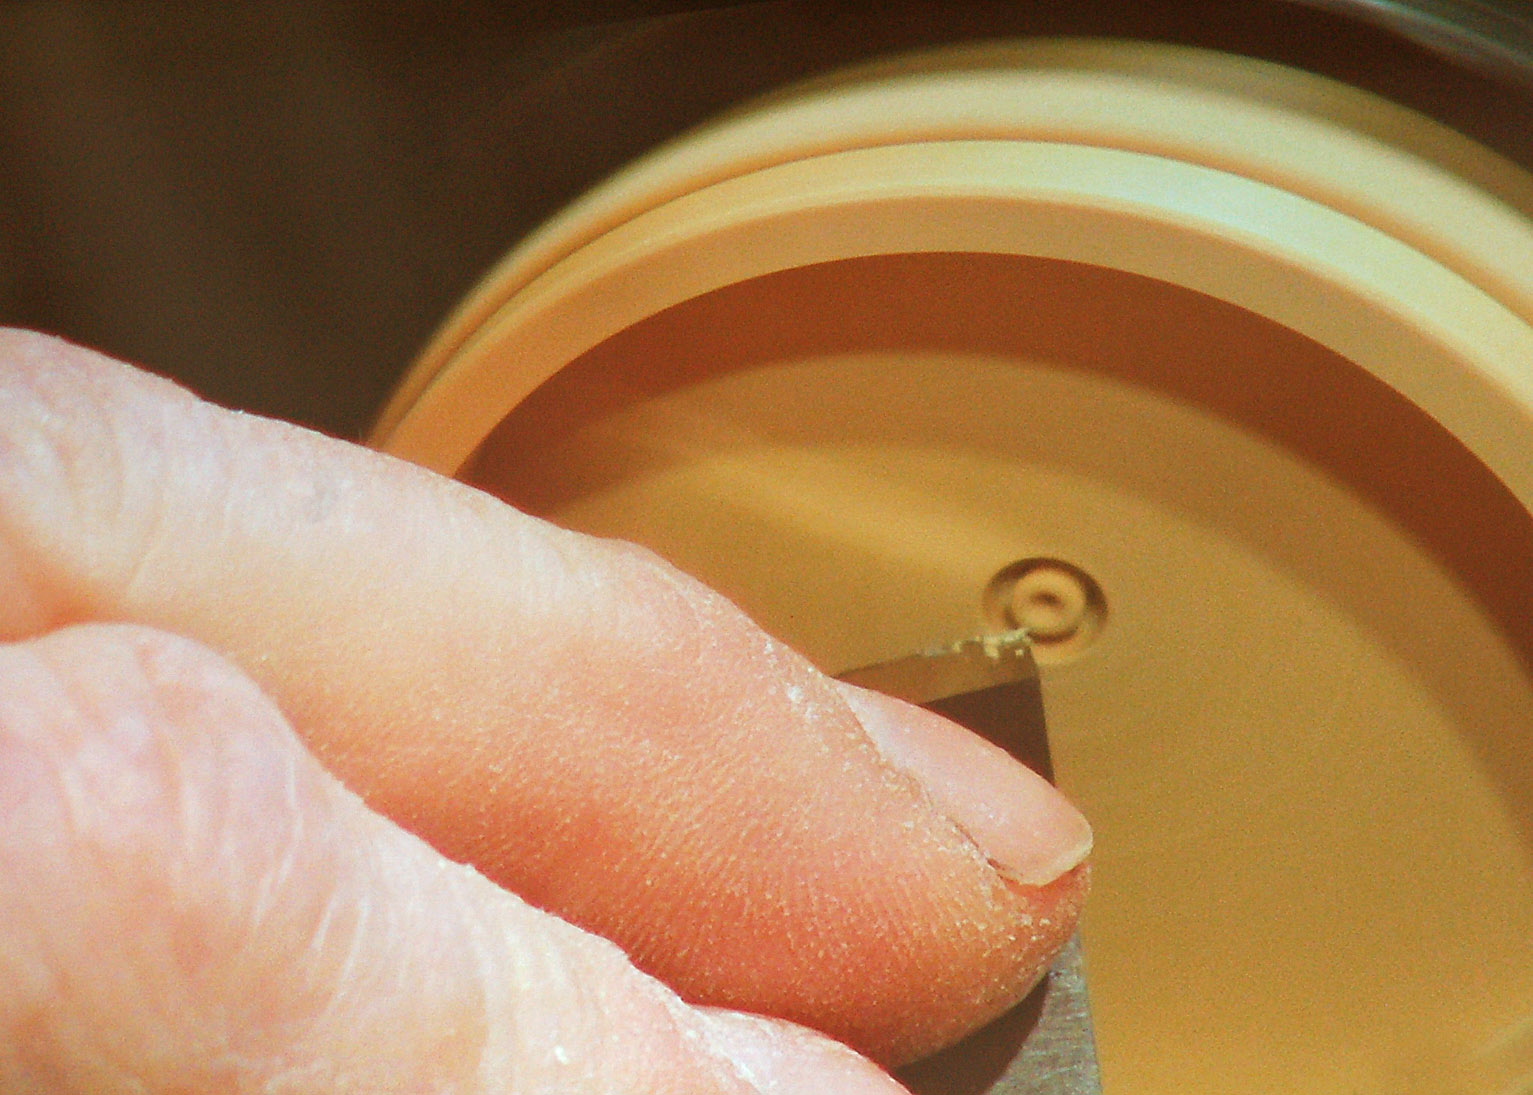
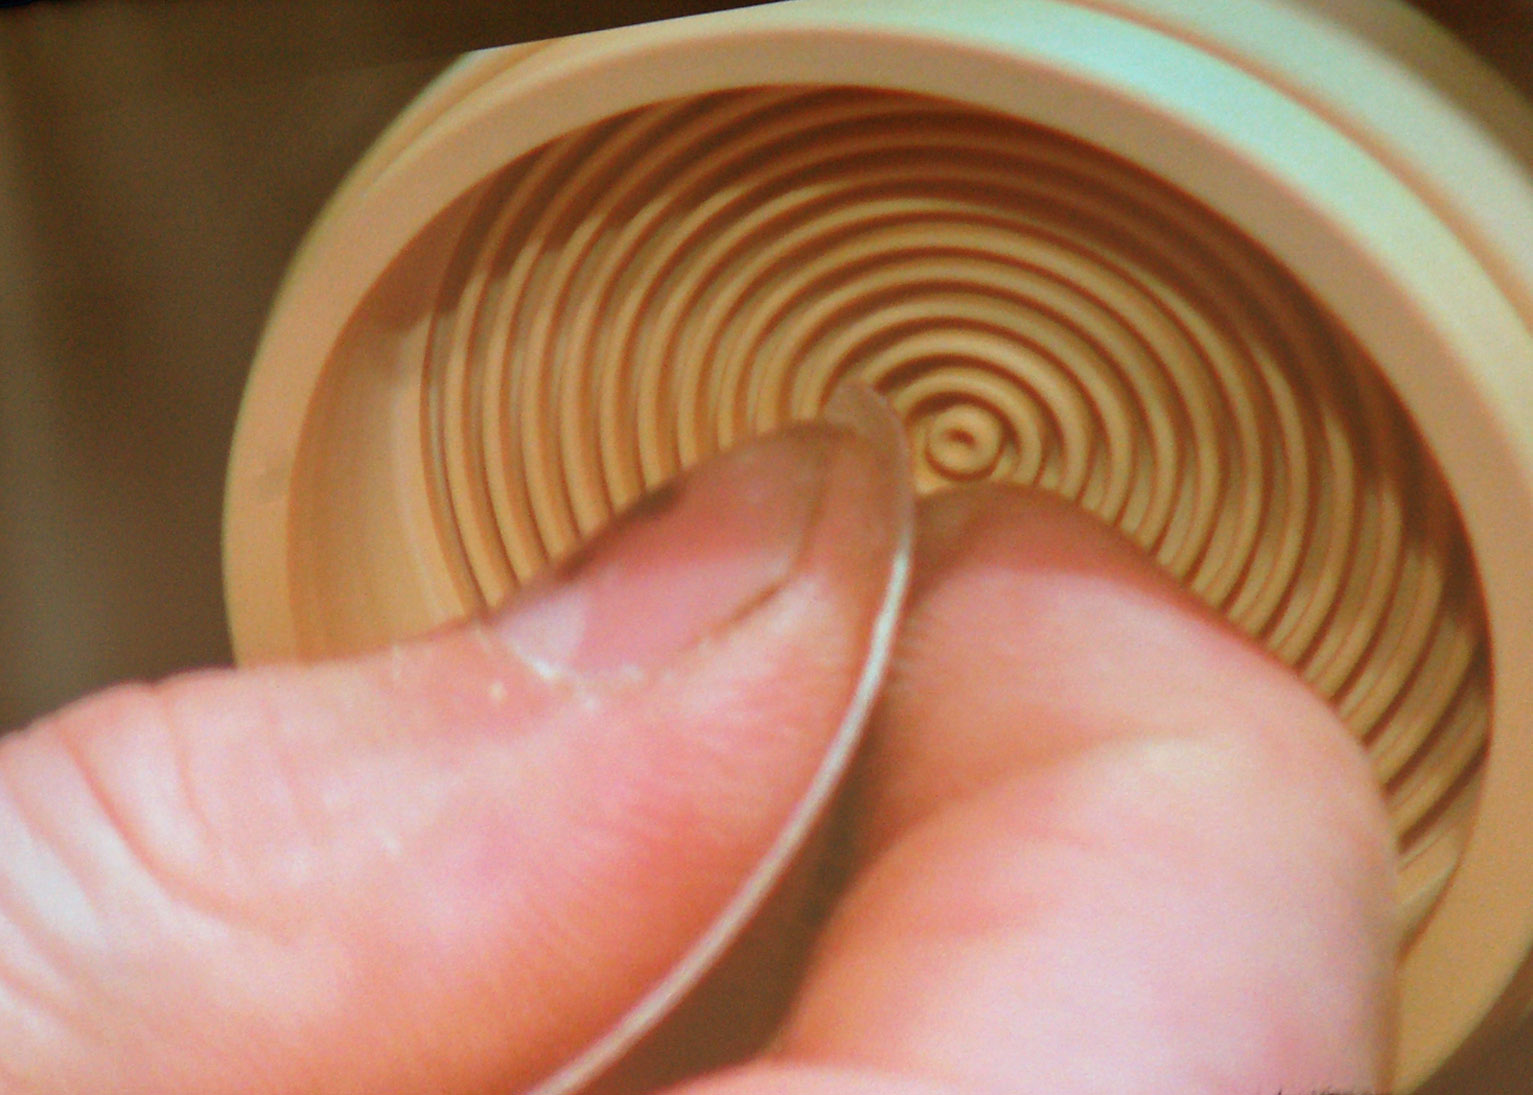
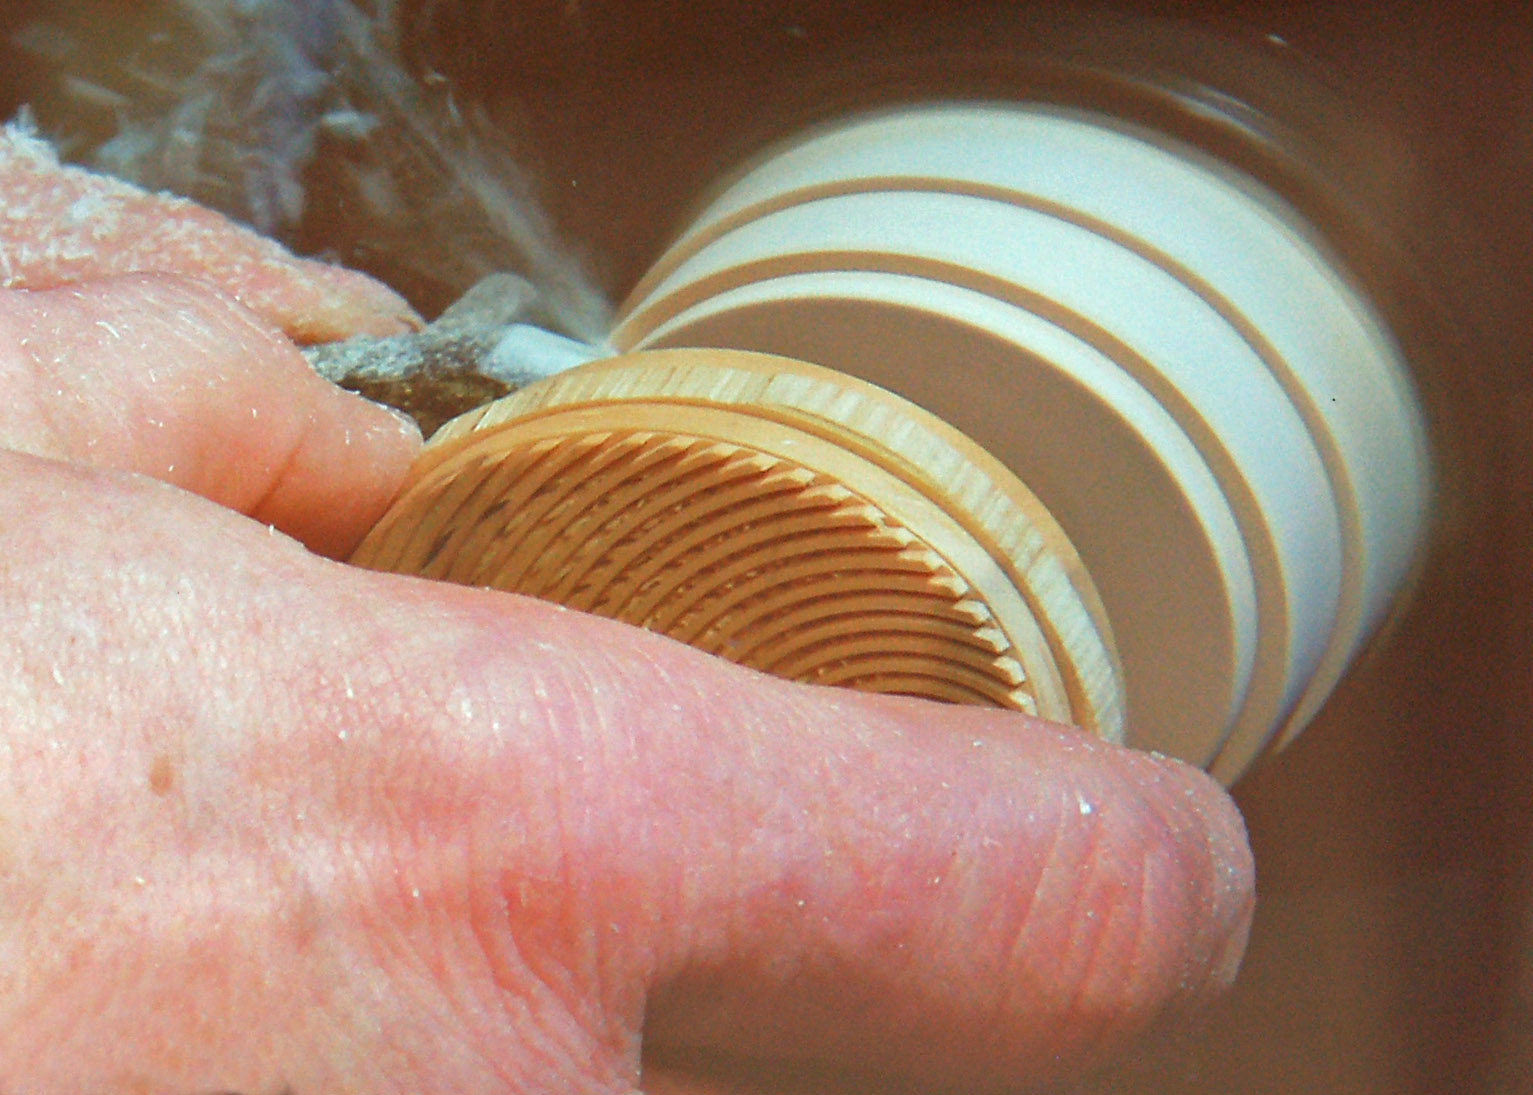
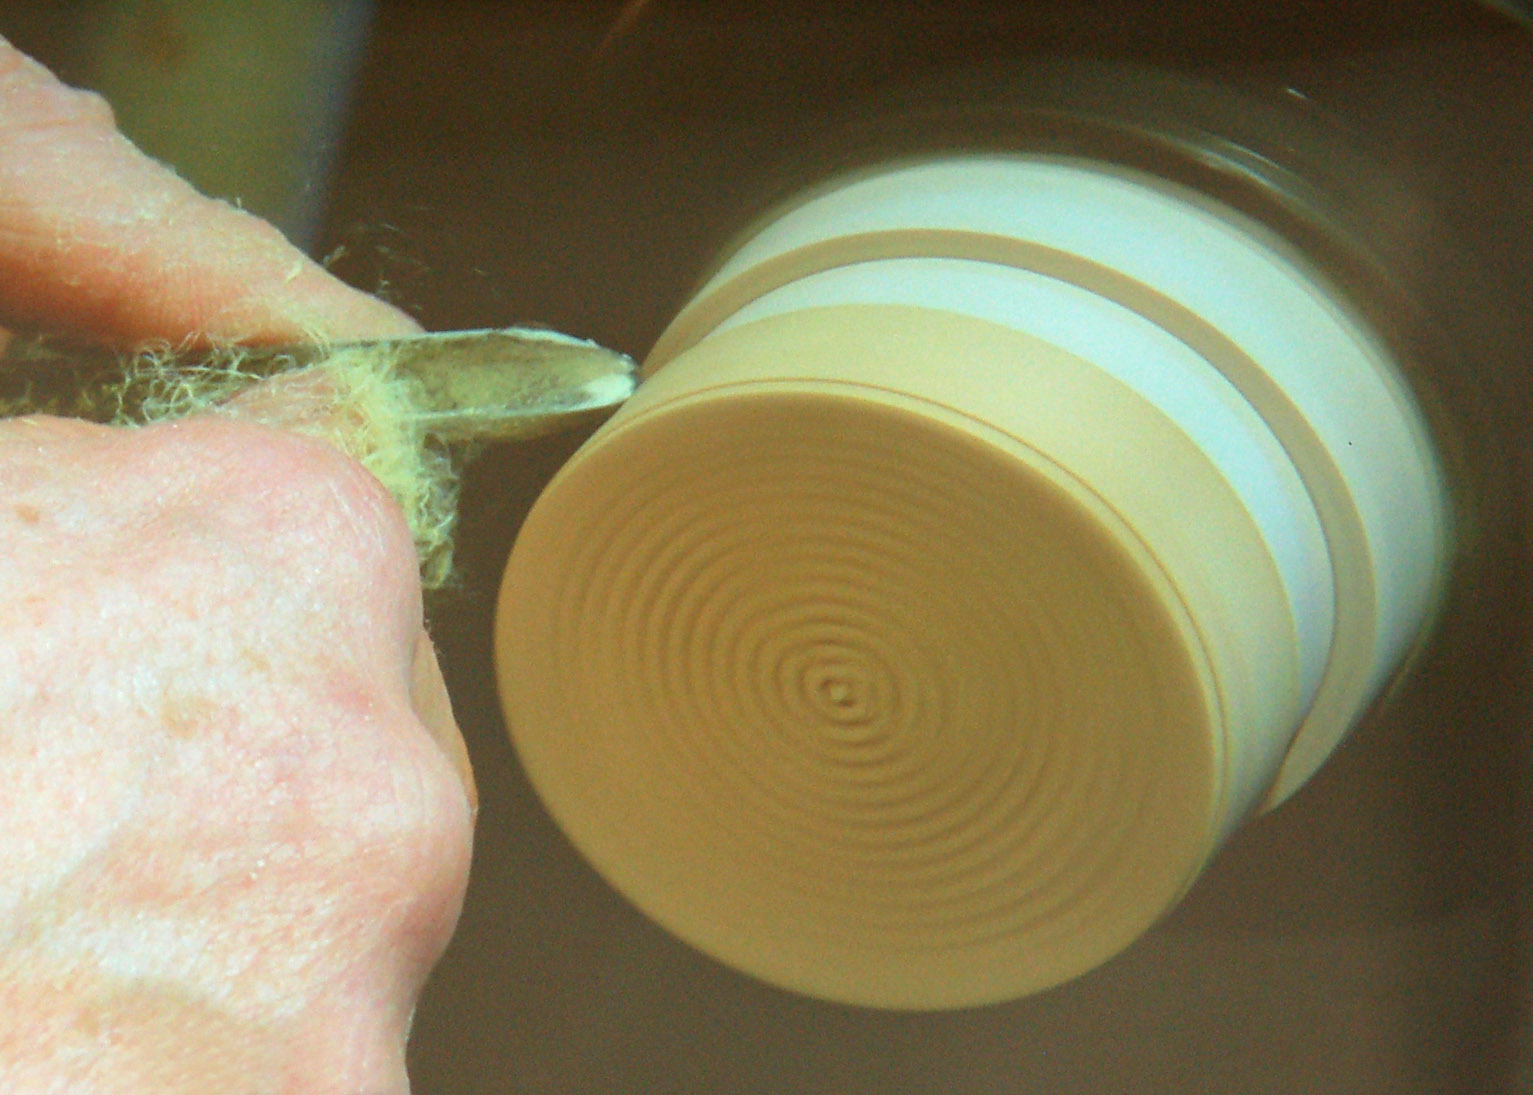
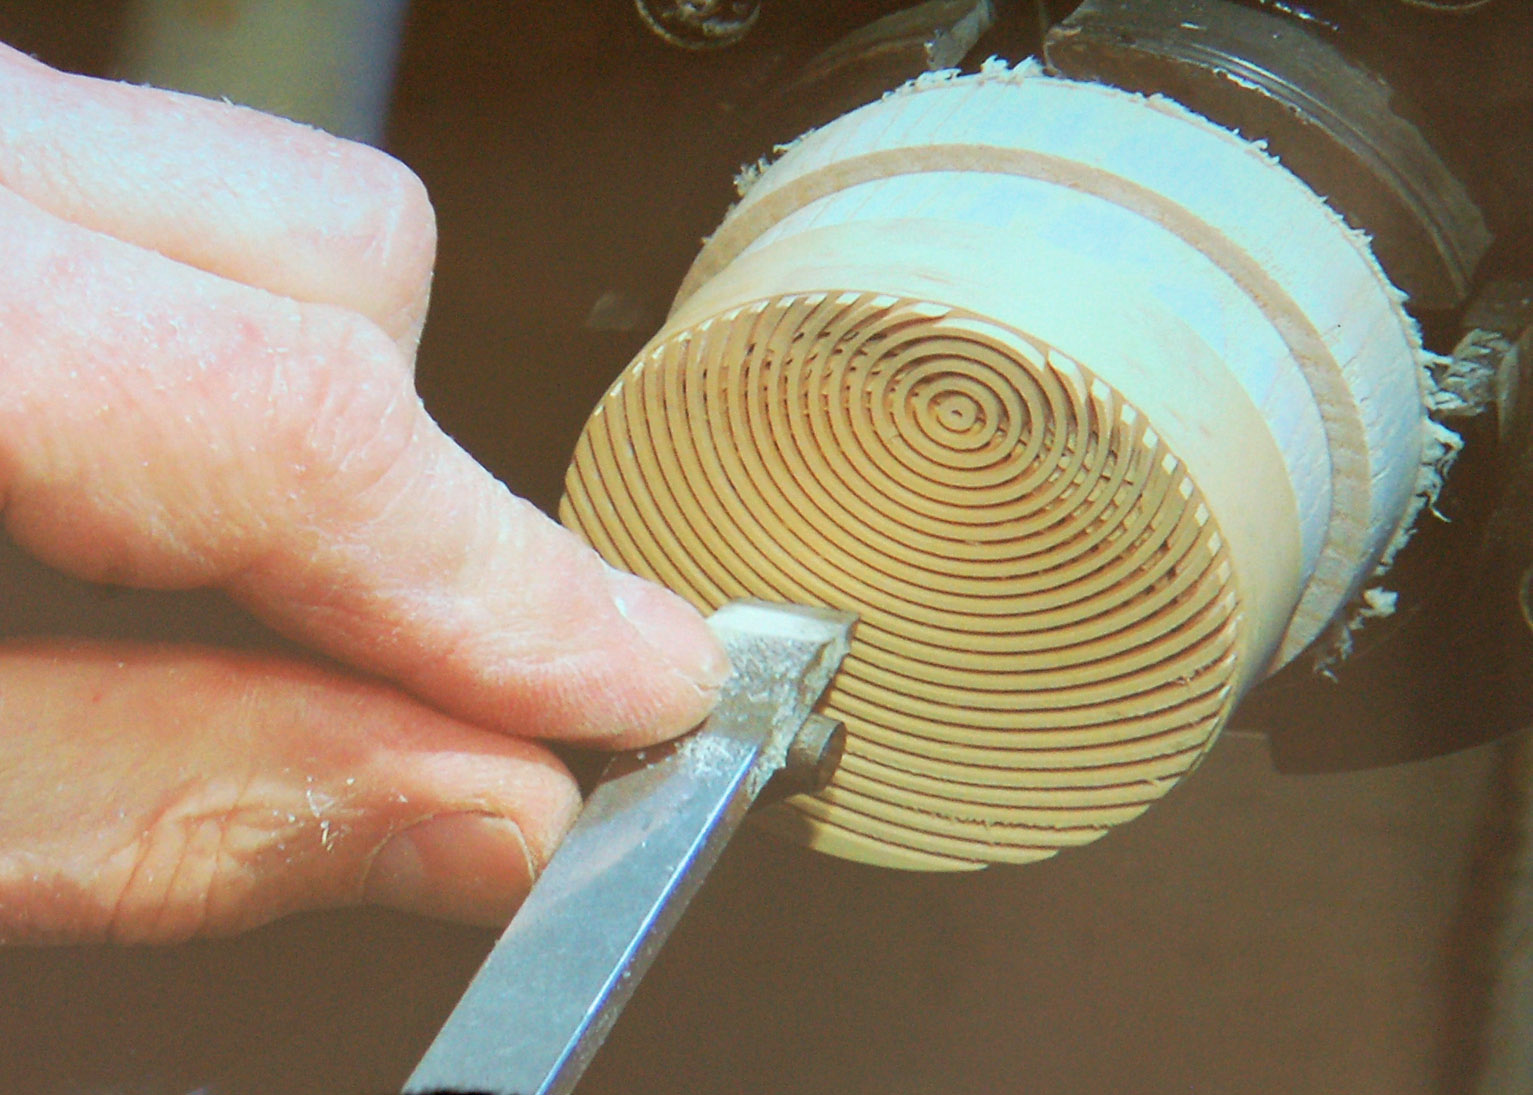
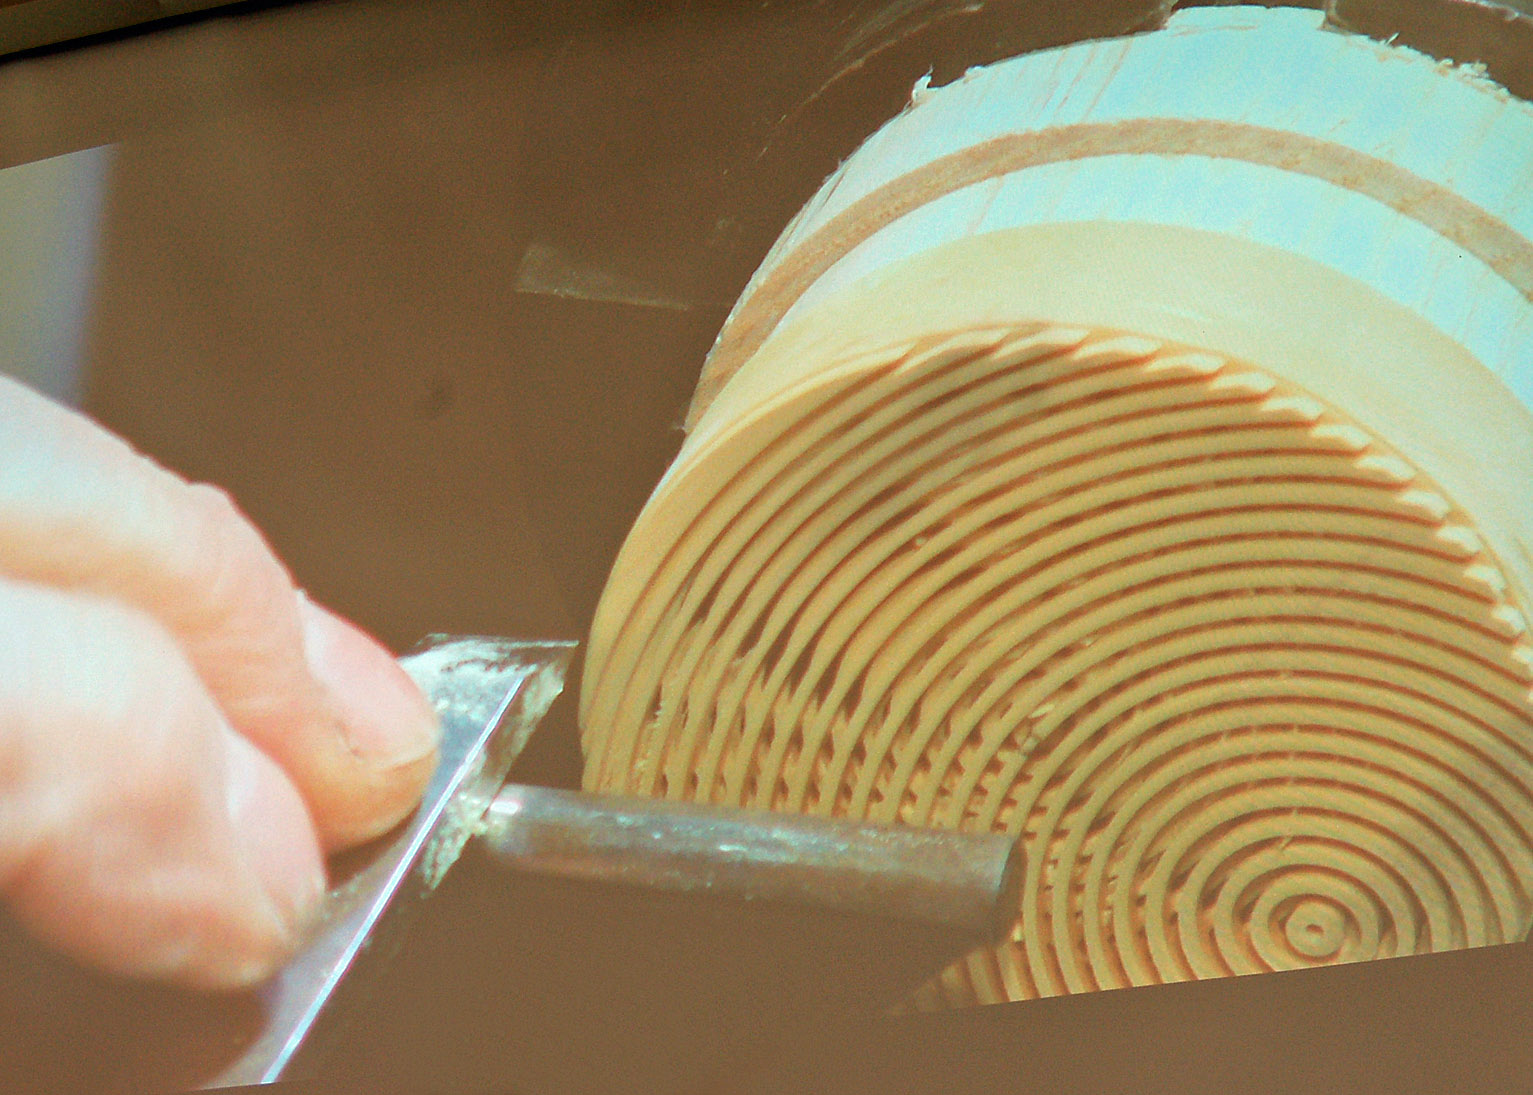
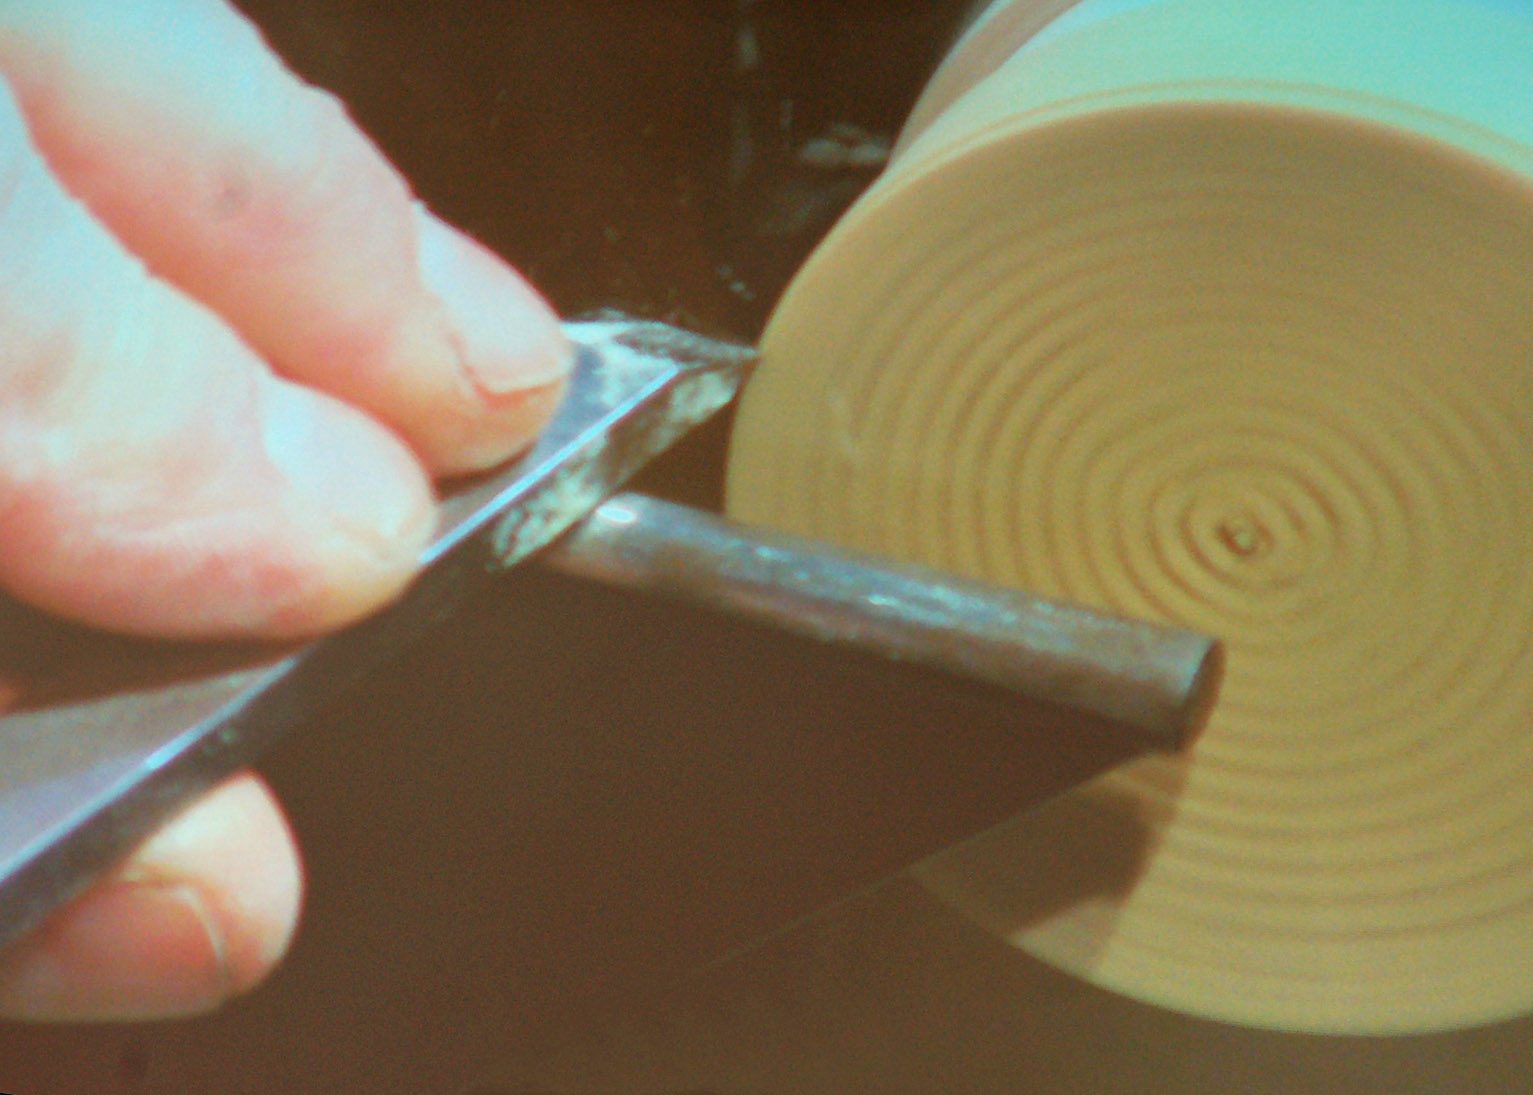
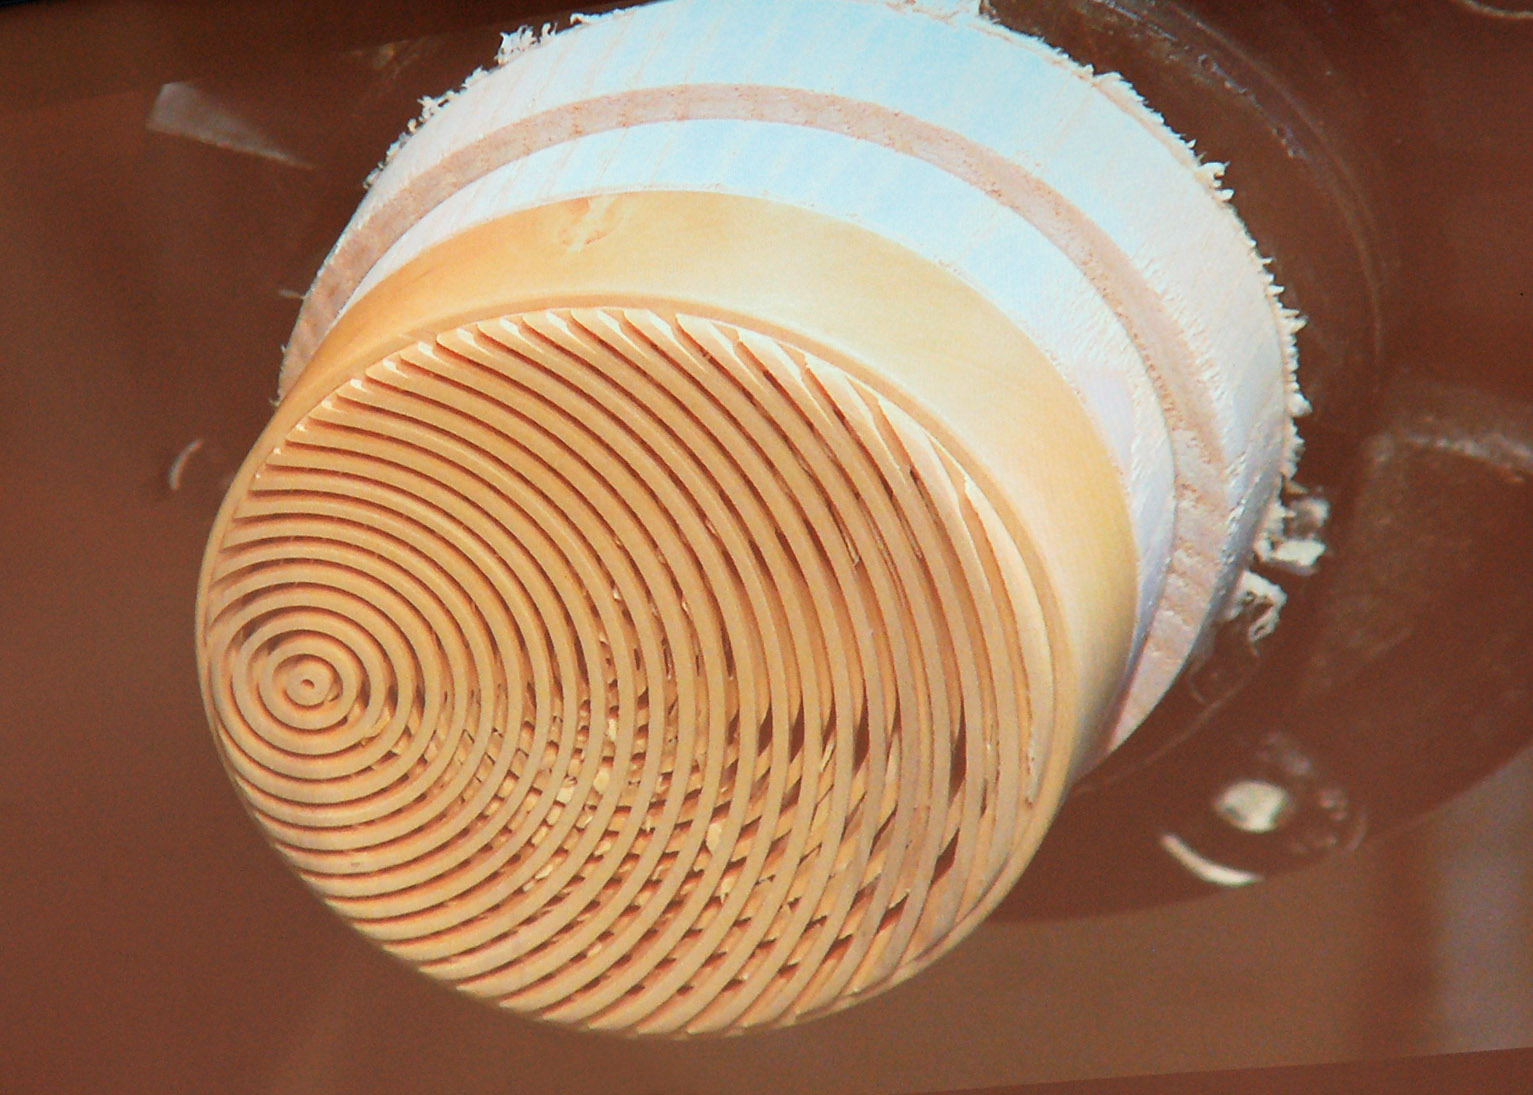
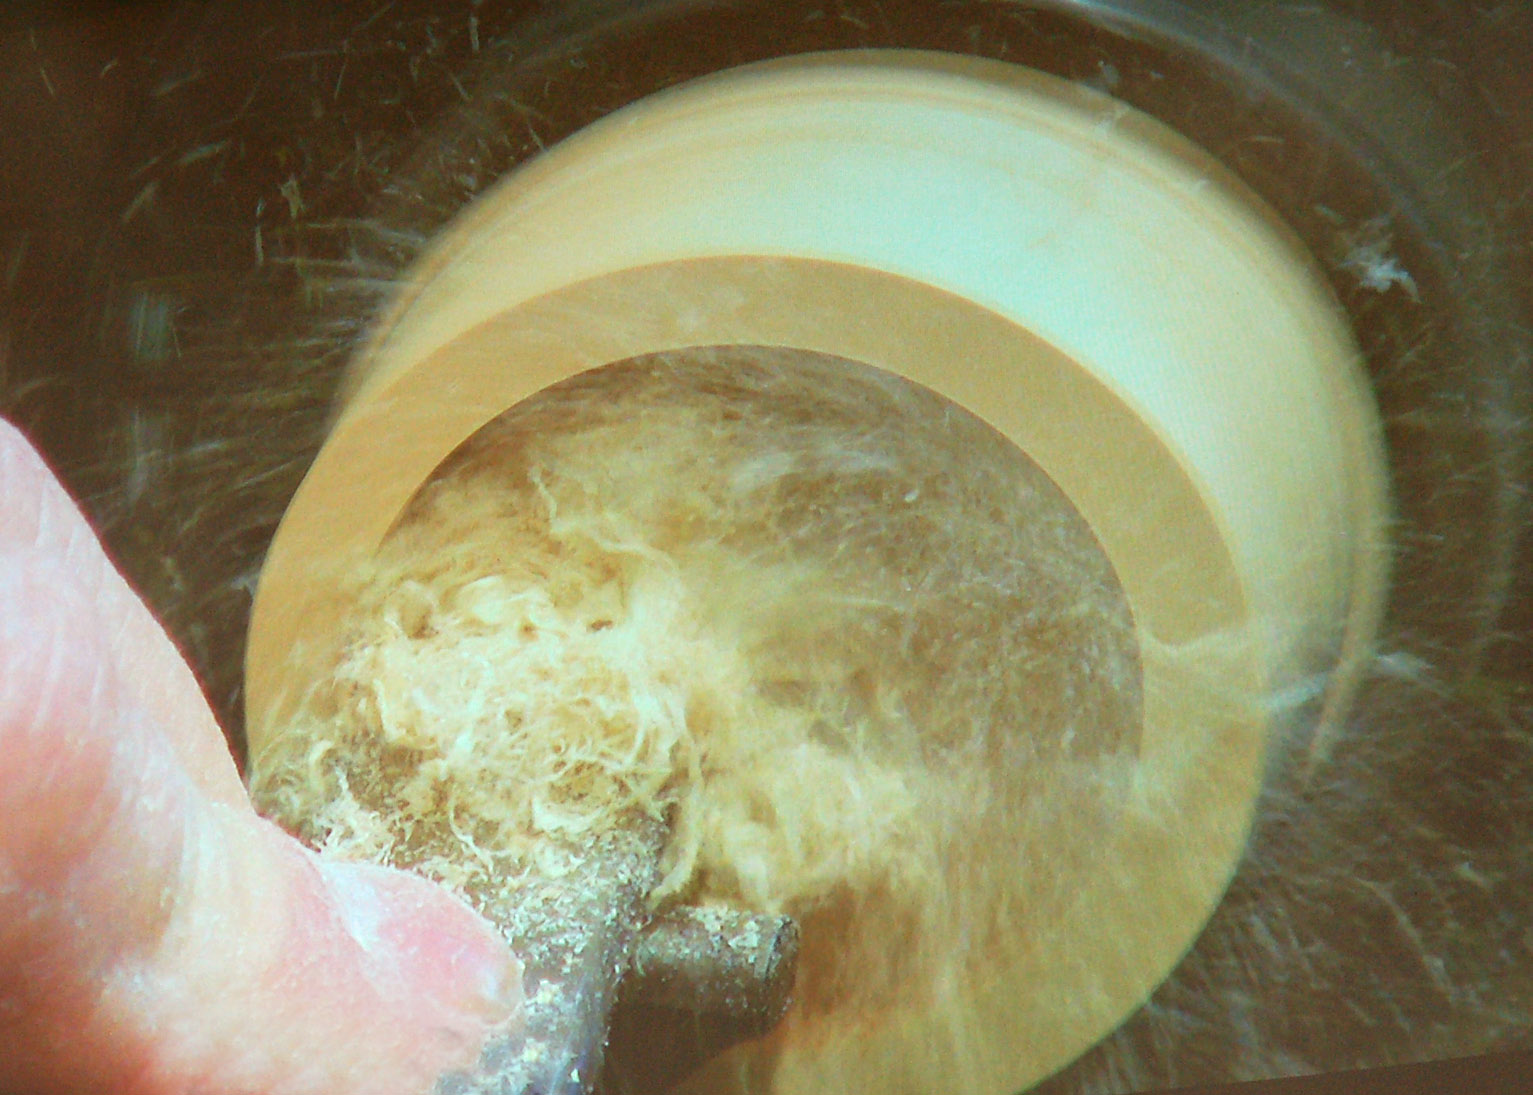
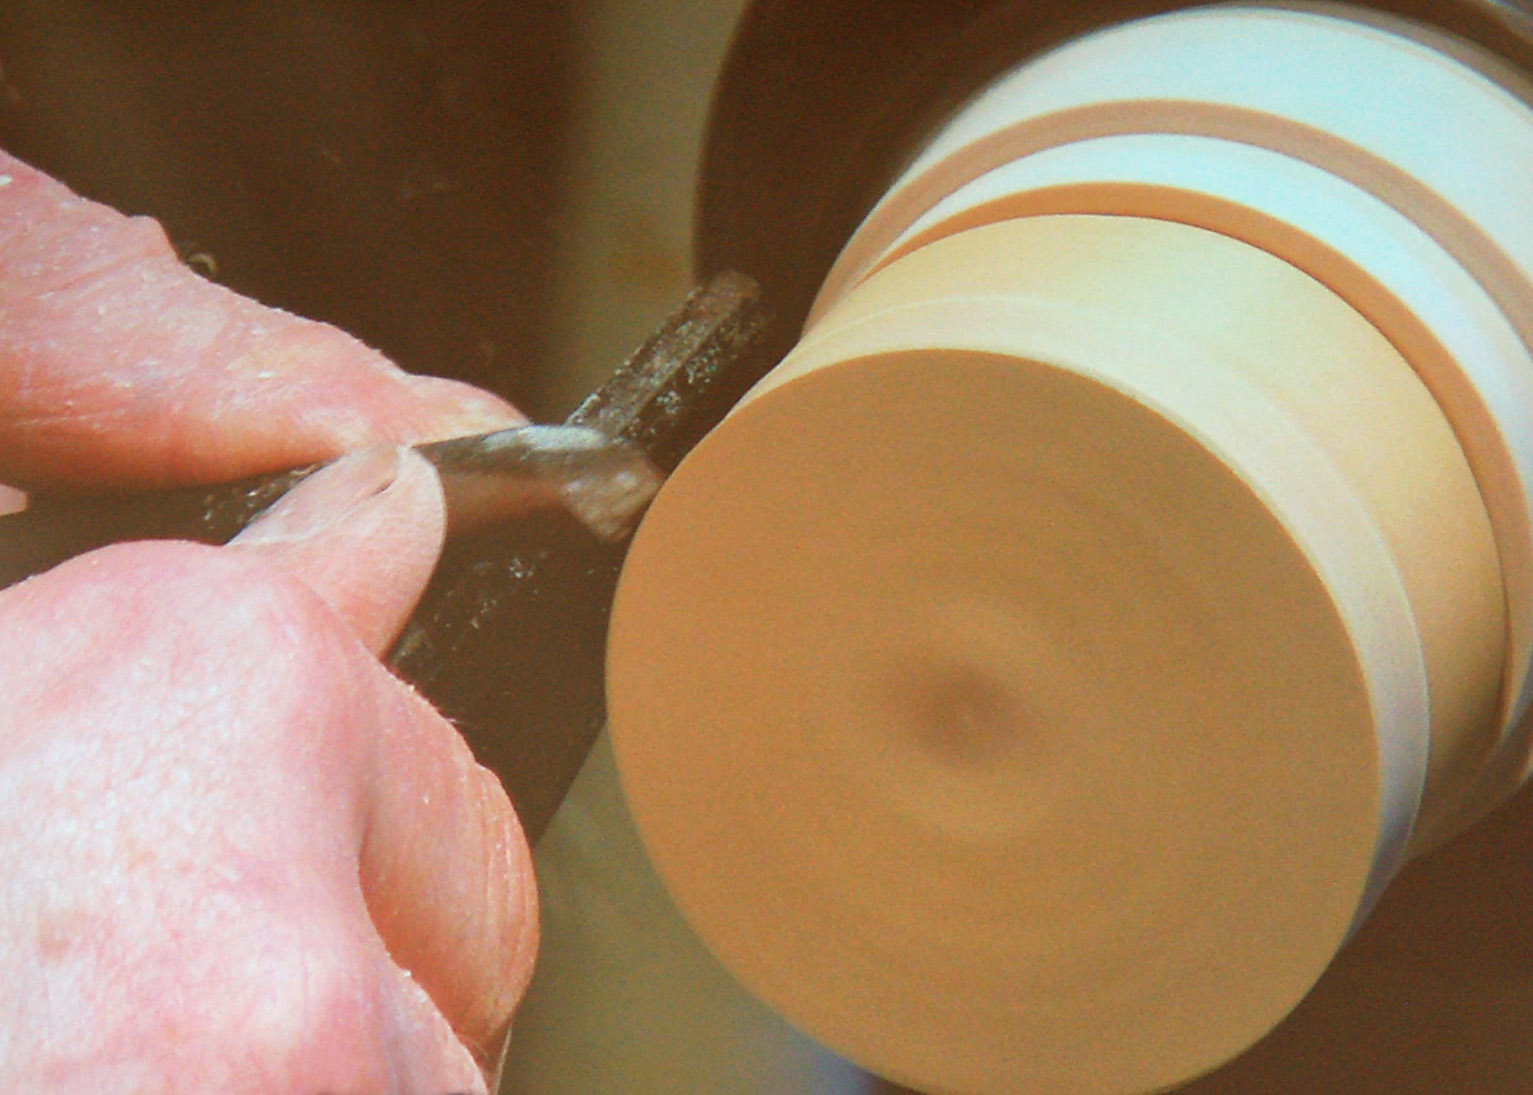
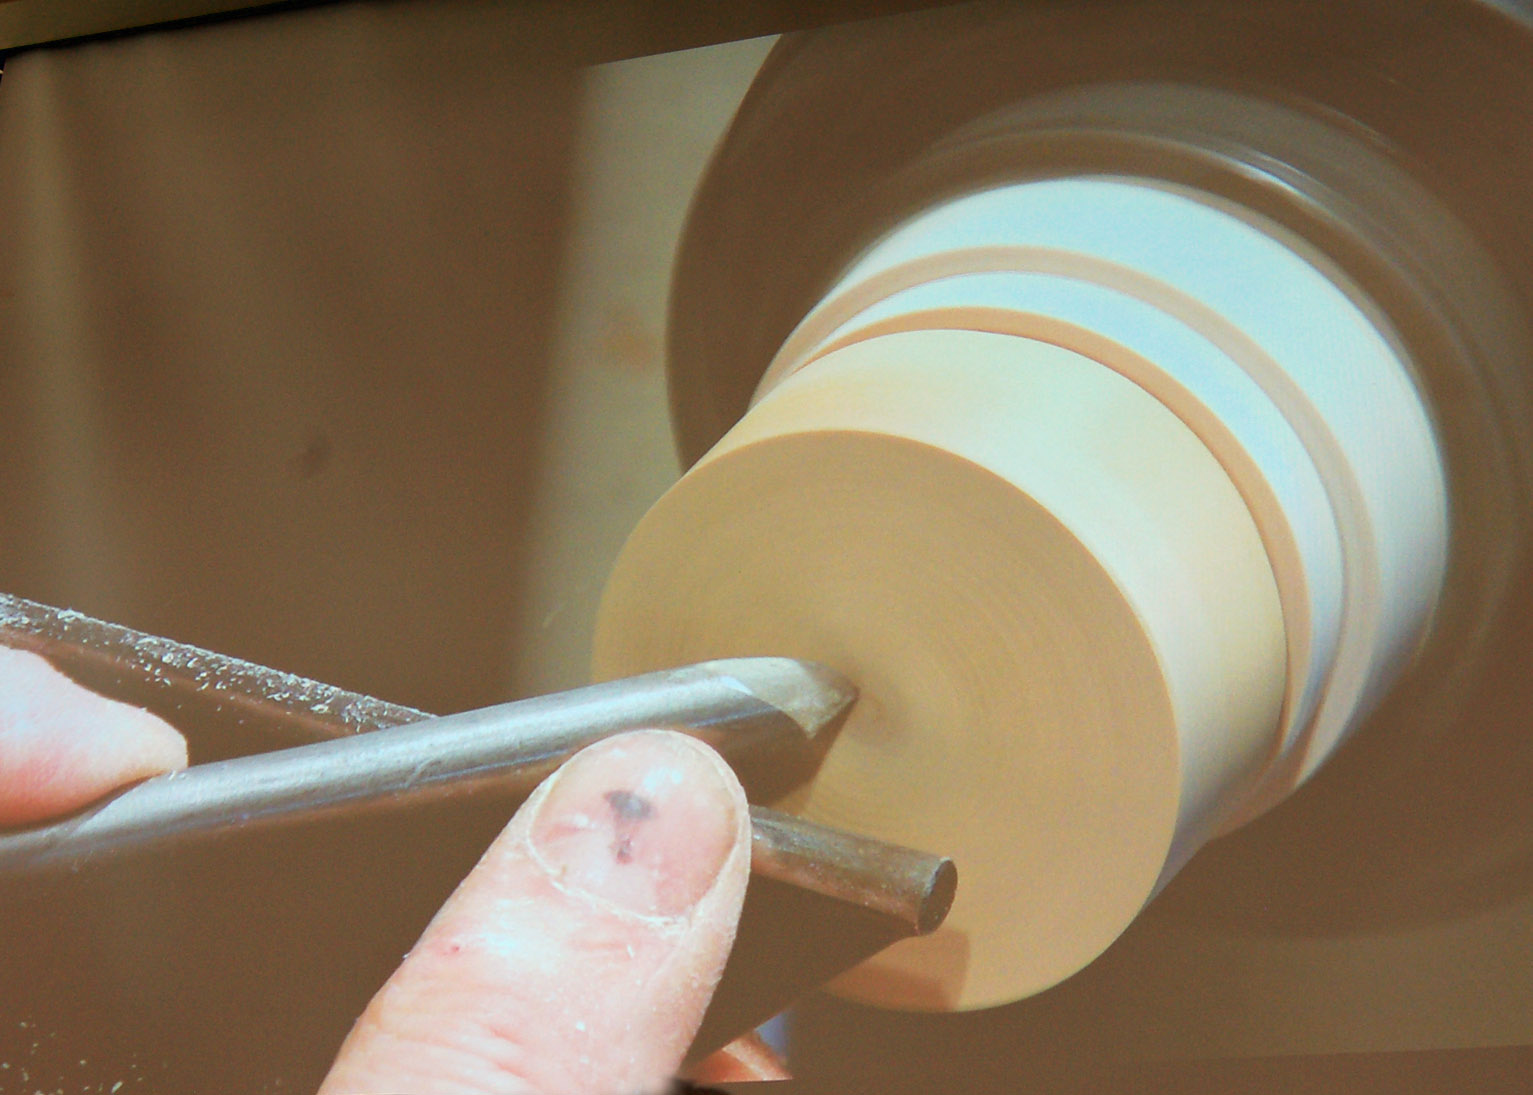
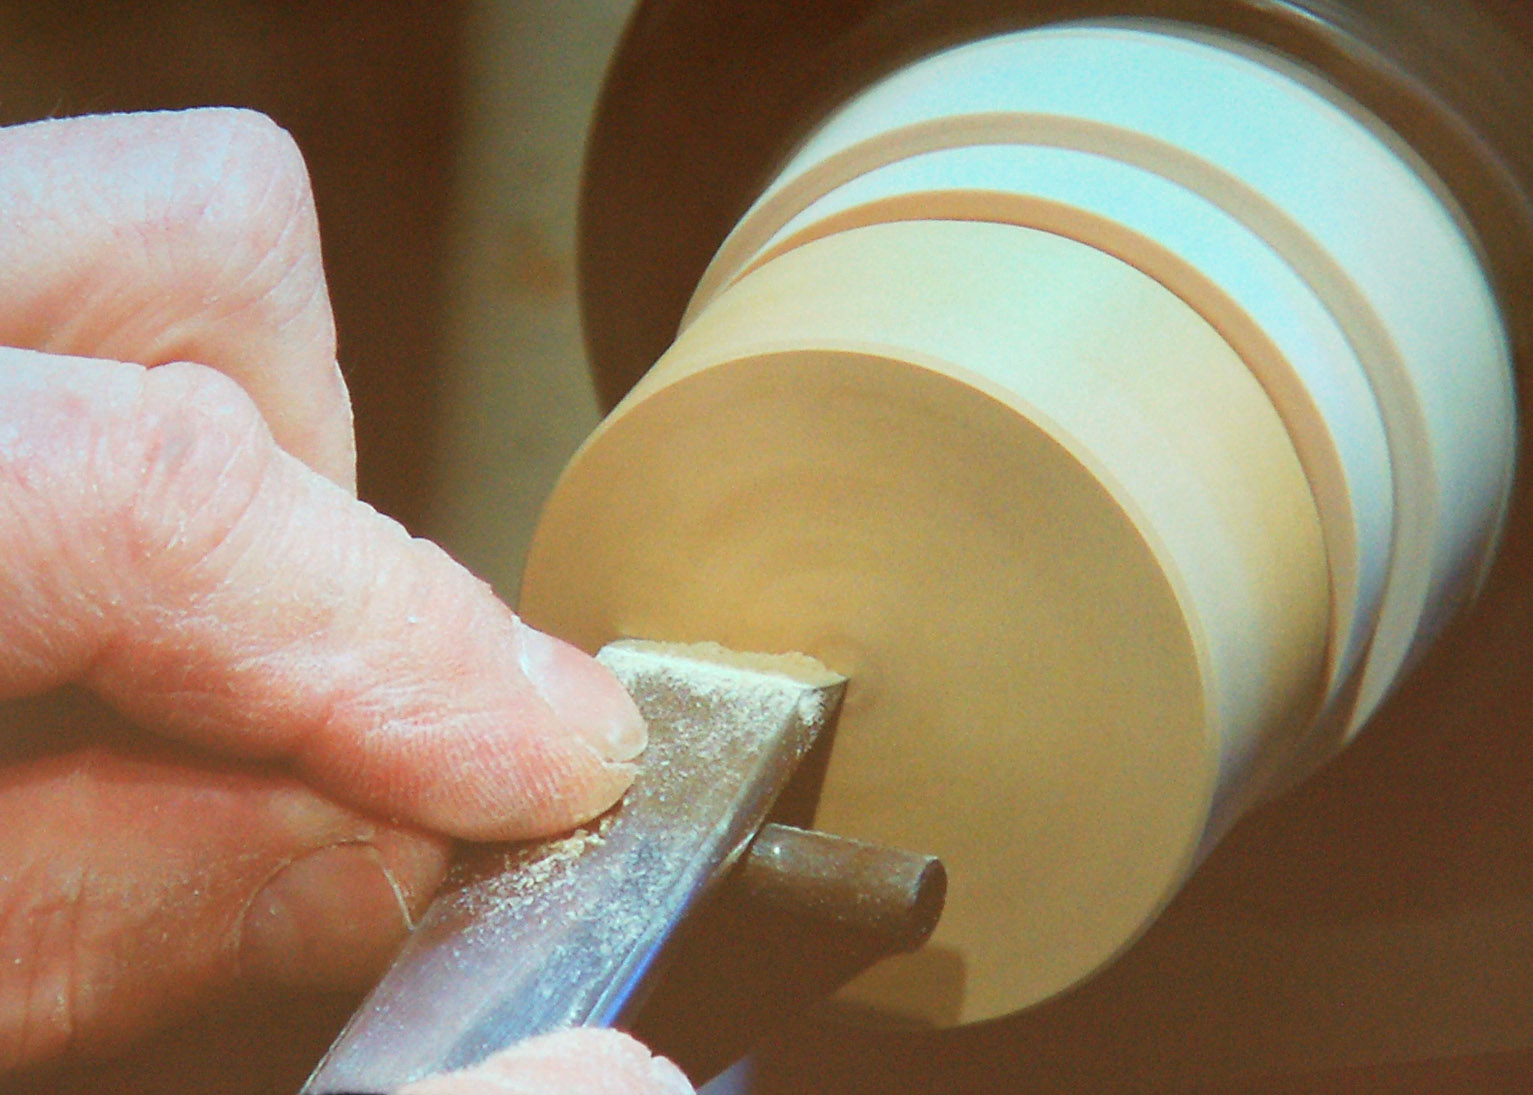
Here is what many of us were waiting for: how Hans makes those perfect ribs. With his lid blank firmly attached to the eccentric jaw, he brought out his magic parting tool. Using tool steel, he ground the two sides and top with the profiles shown in the chalk drawing to give him the depth and width of cut he is looking for. He did mention that a shorter overall tool length gave him better control, and the lightness of the tool gave his hands a better sense of the cut.
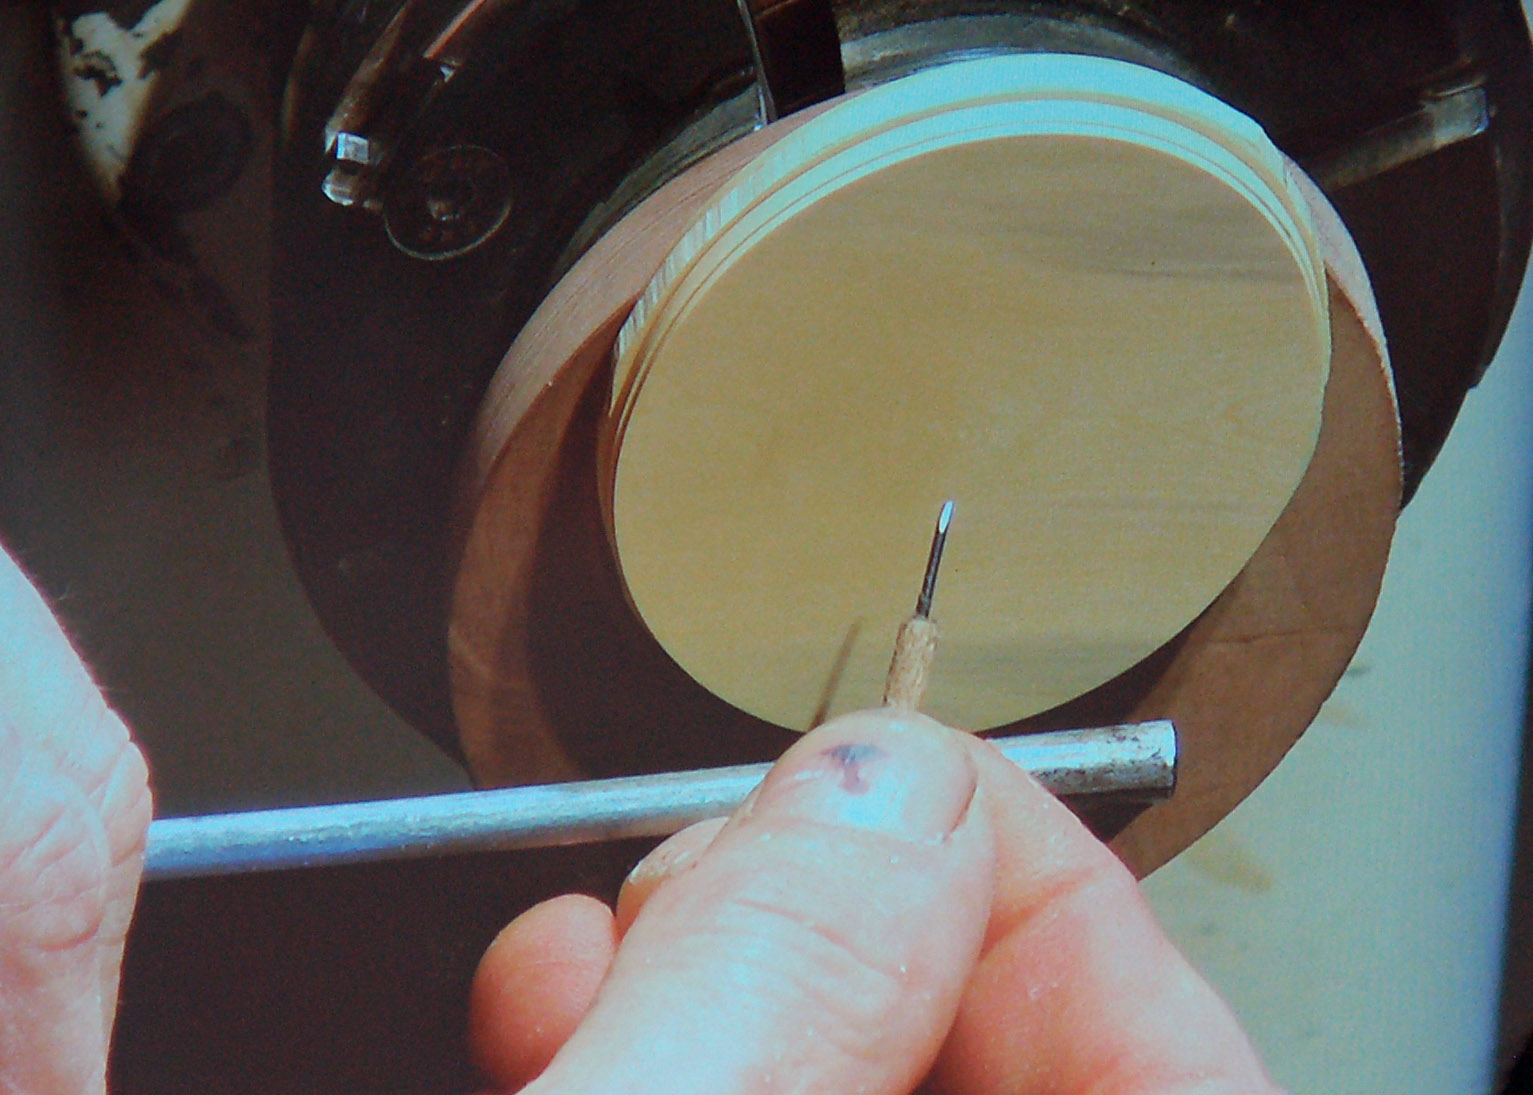
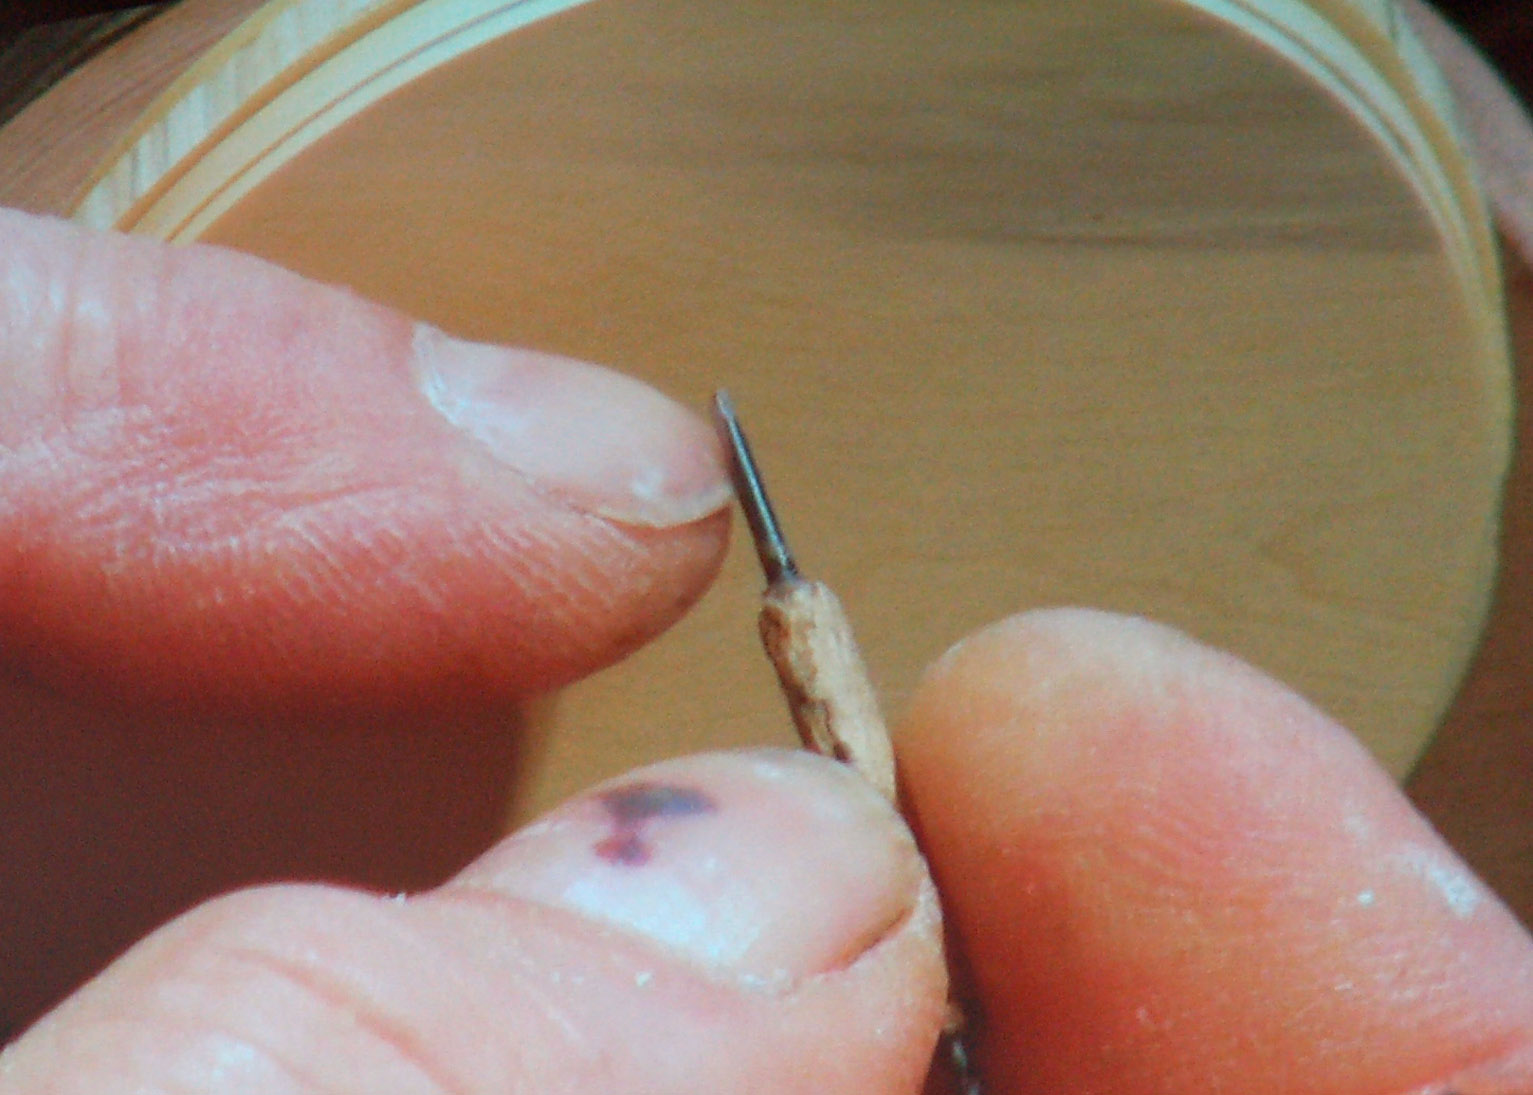
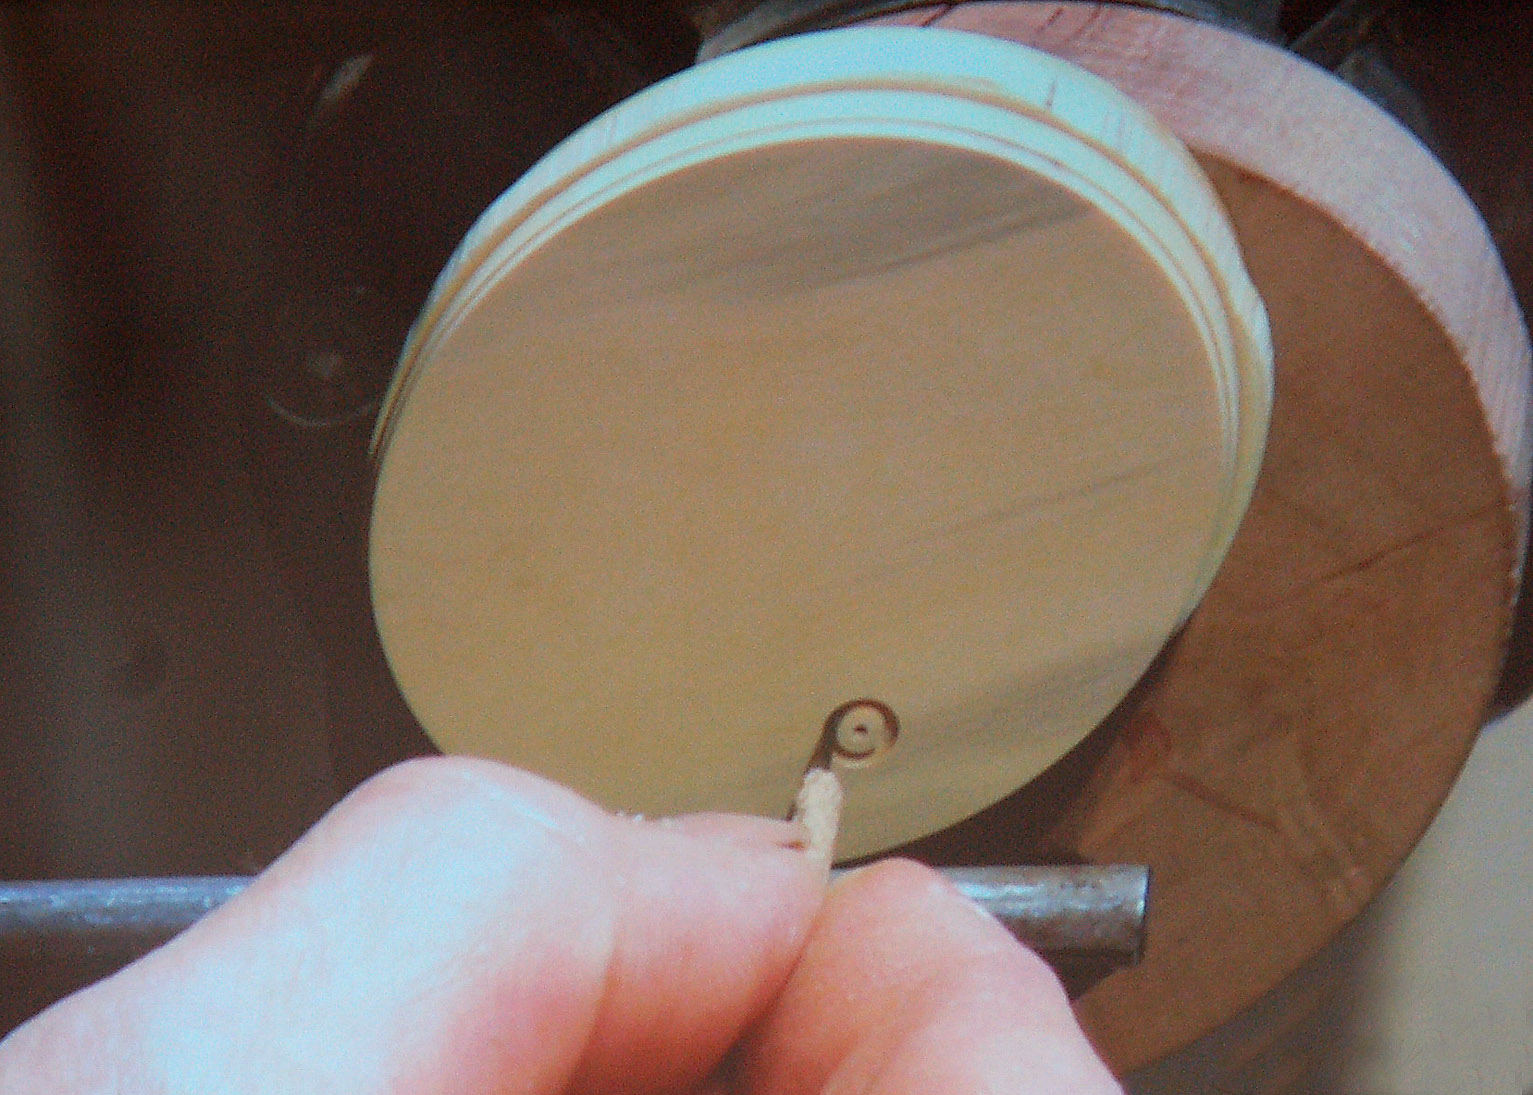
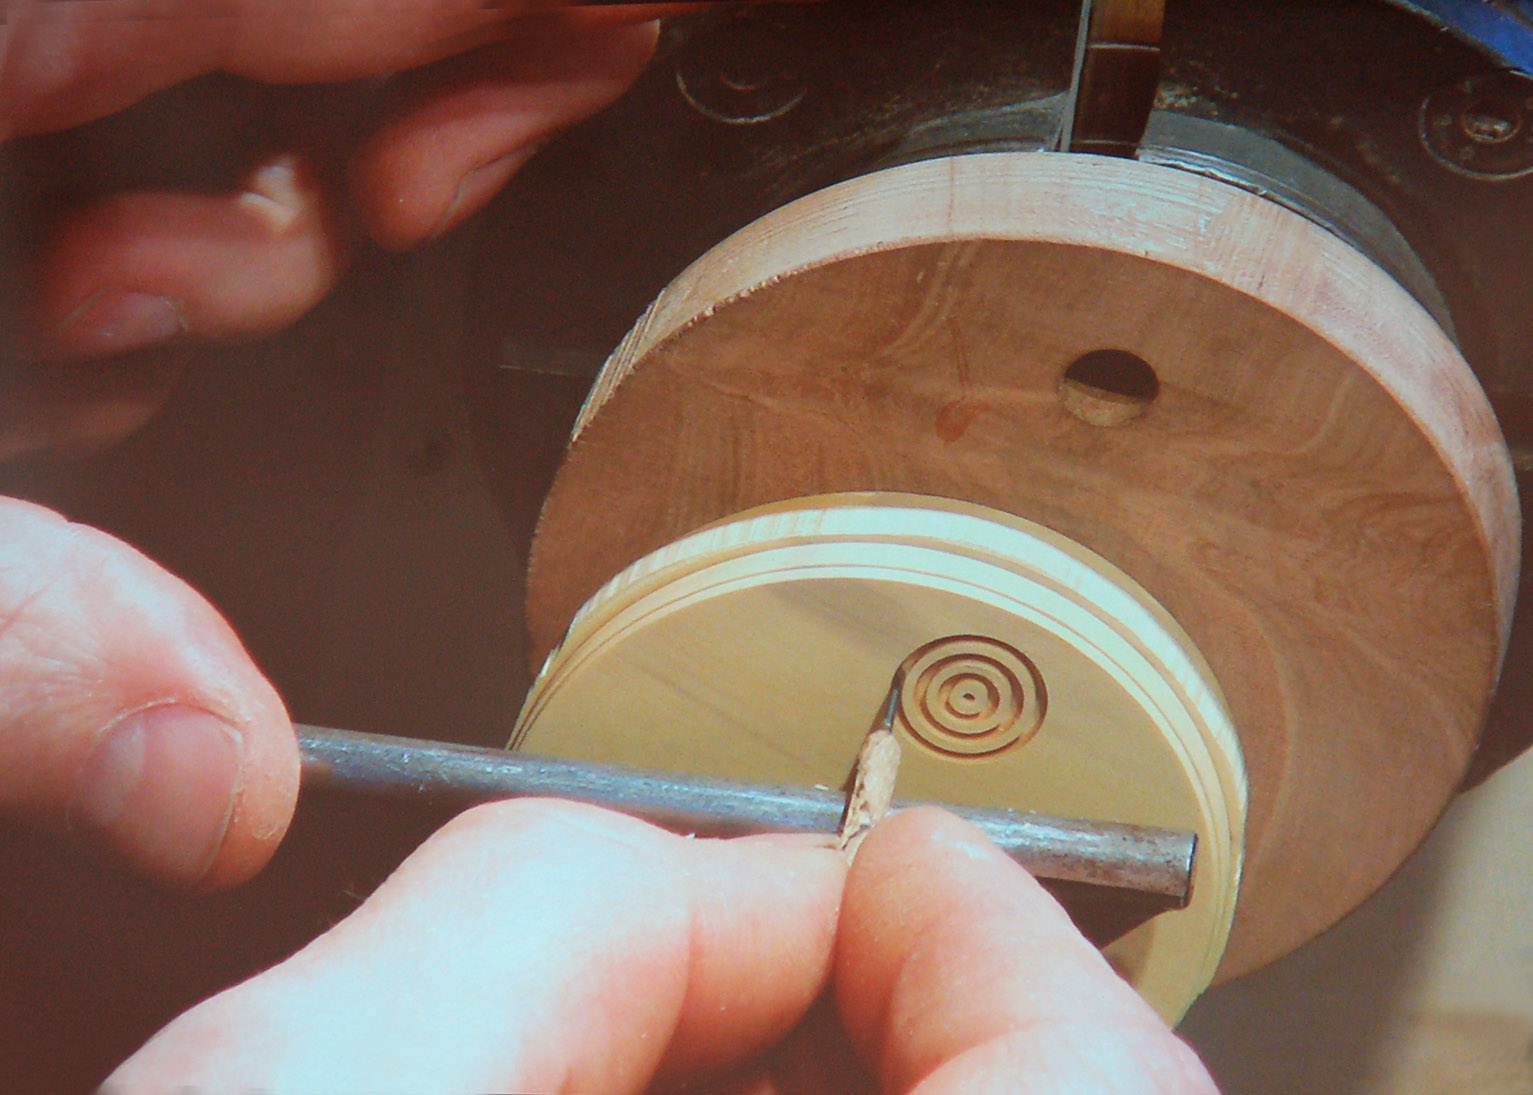
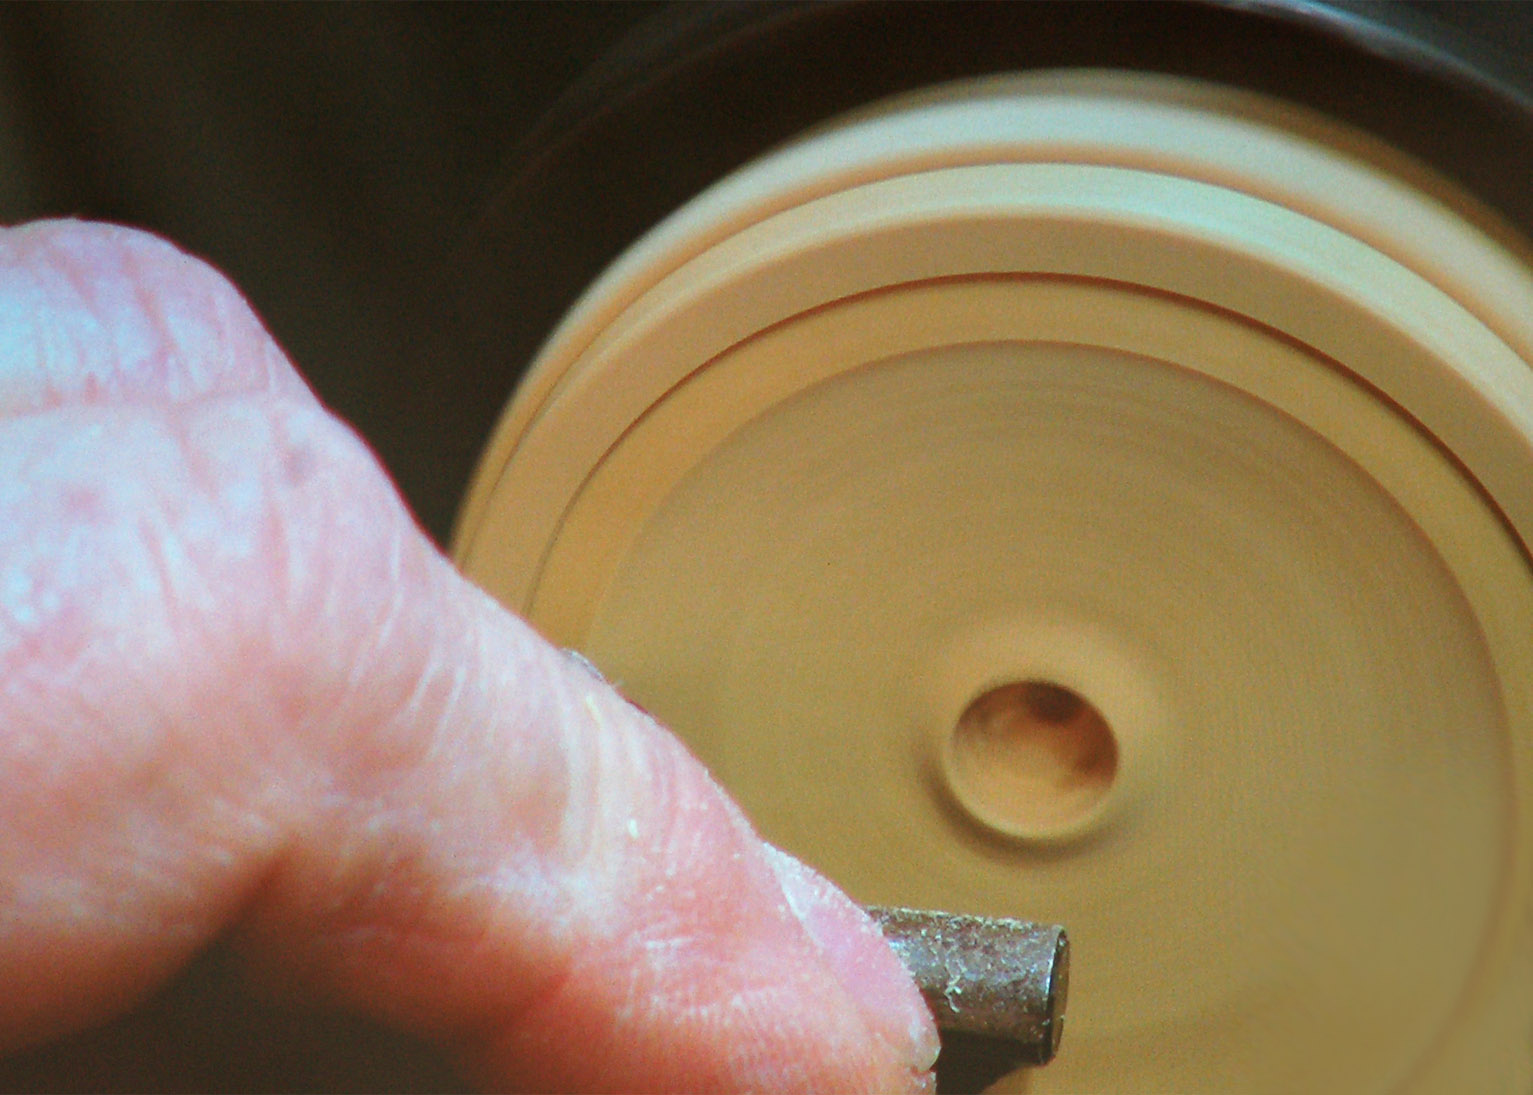
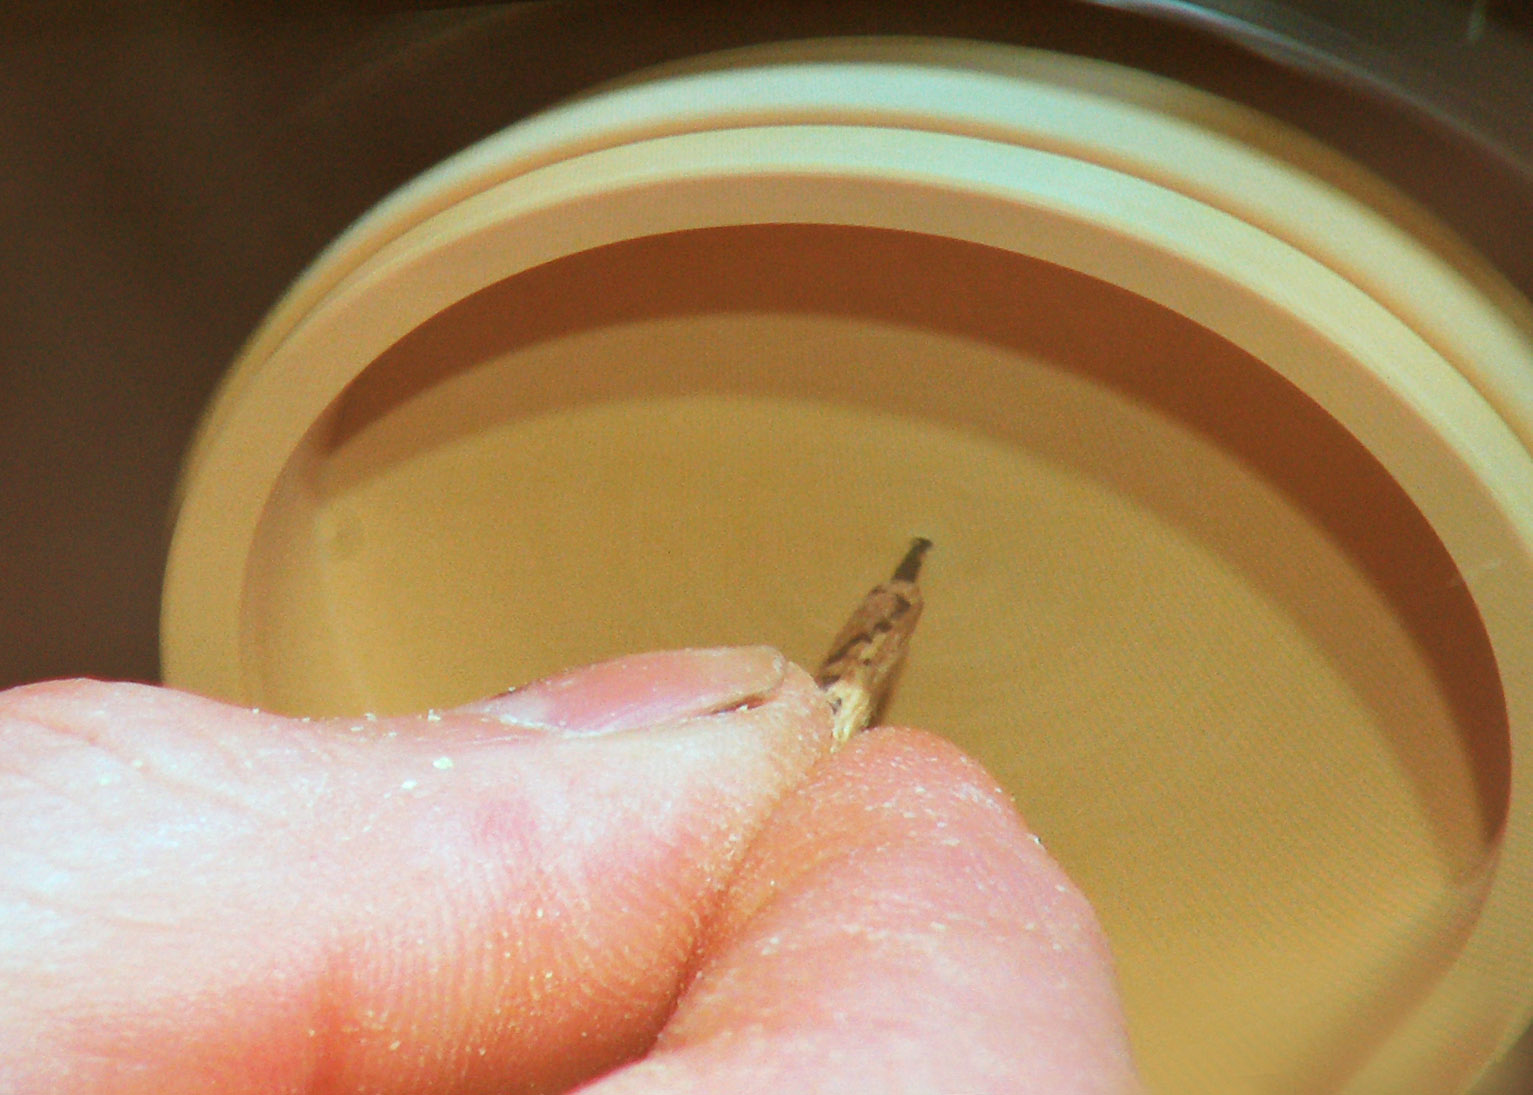
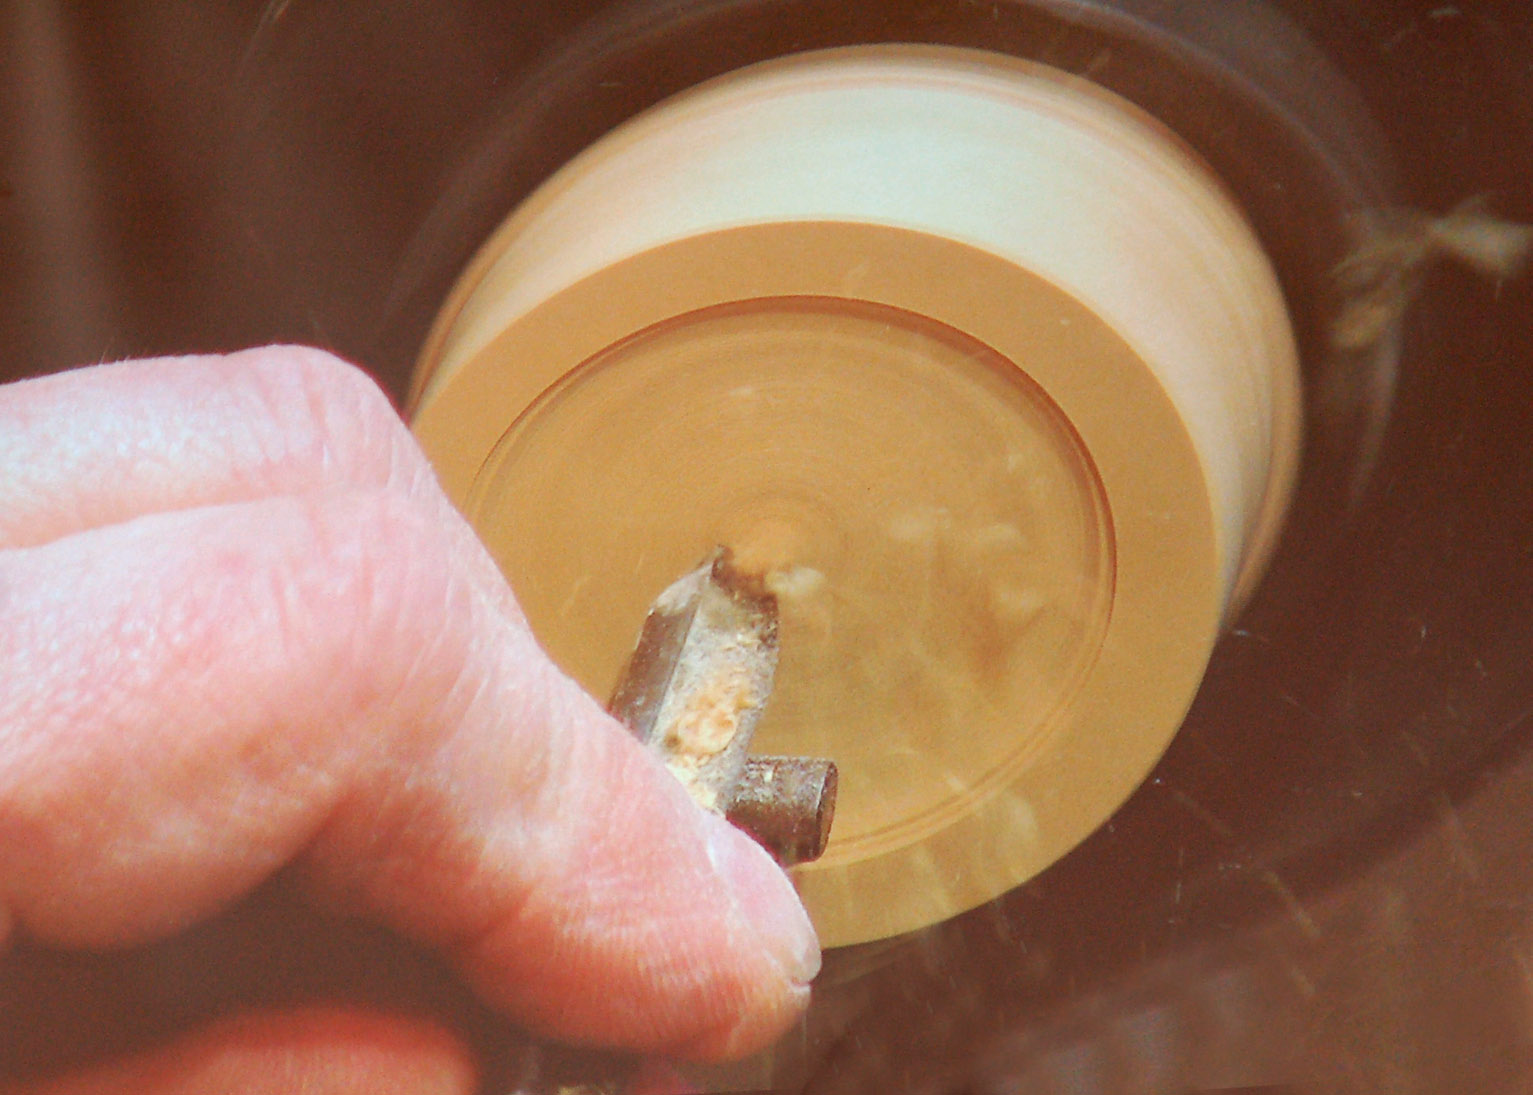
How deep do you go? Hans made a depth gauge with an 1/8th in drill bit ground to a flat on one end; when the shiny part disappears in making the cut, that is the depth. Hans has such a good eye, both with spacing and depth of cut, you will be hard pressed to find any problems. He did mention that if you are off, you will notice it in the fringe patterns- his of course are perfect. The ribs are spaced as wide as the grooves. A couple of hints on getting those perfect ribs, move your tool perfectly straight and square in and out (a steady hand helps) and use a sharp tool. When you feel some vibration, its time to sharpen. Keep the tool rest close. A wood like dogwood also helps give those crisp edges. You might notice that the depth of cut varies along the length of the groove since the wood pushes to tool away during the cut. Just go back with a light cut and that sharp tool.
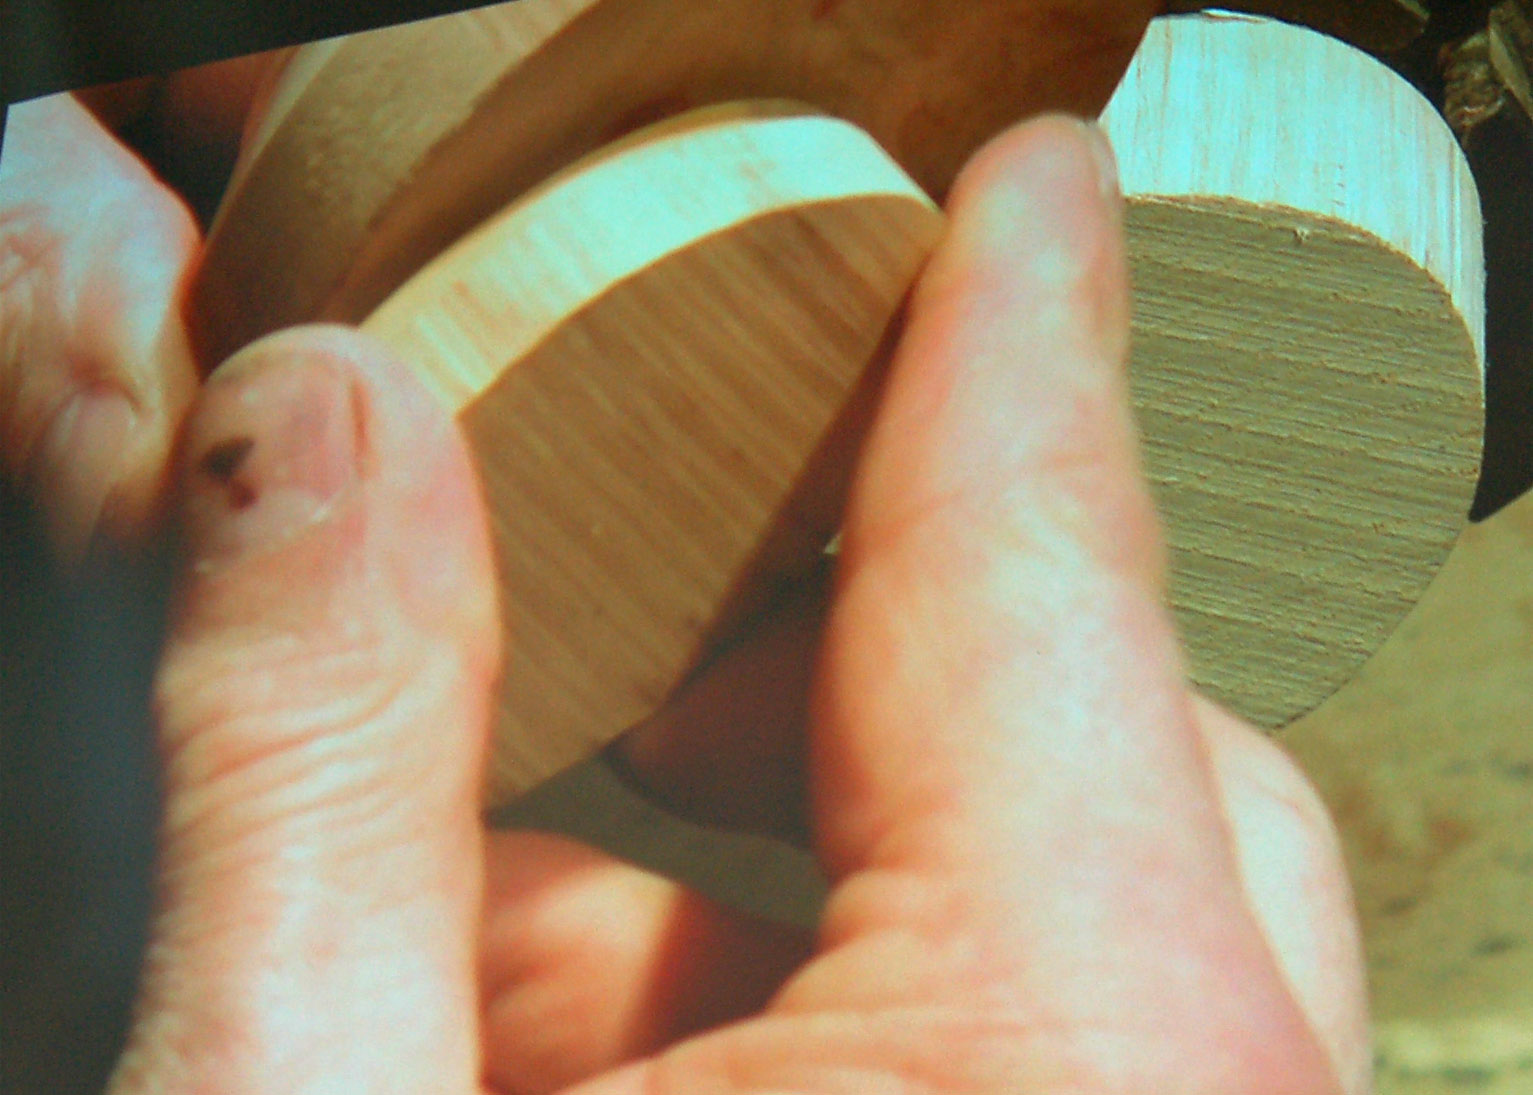
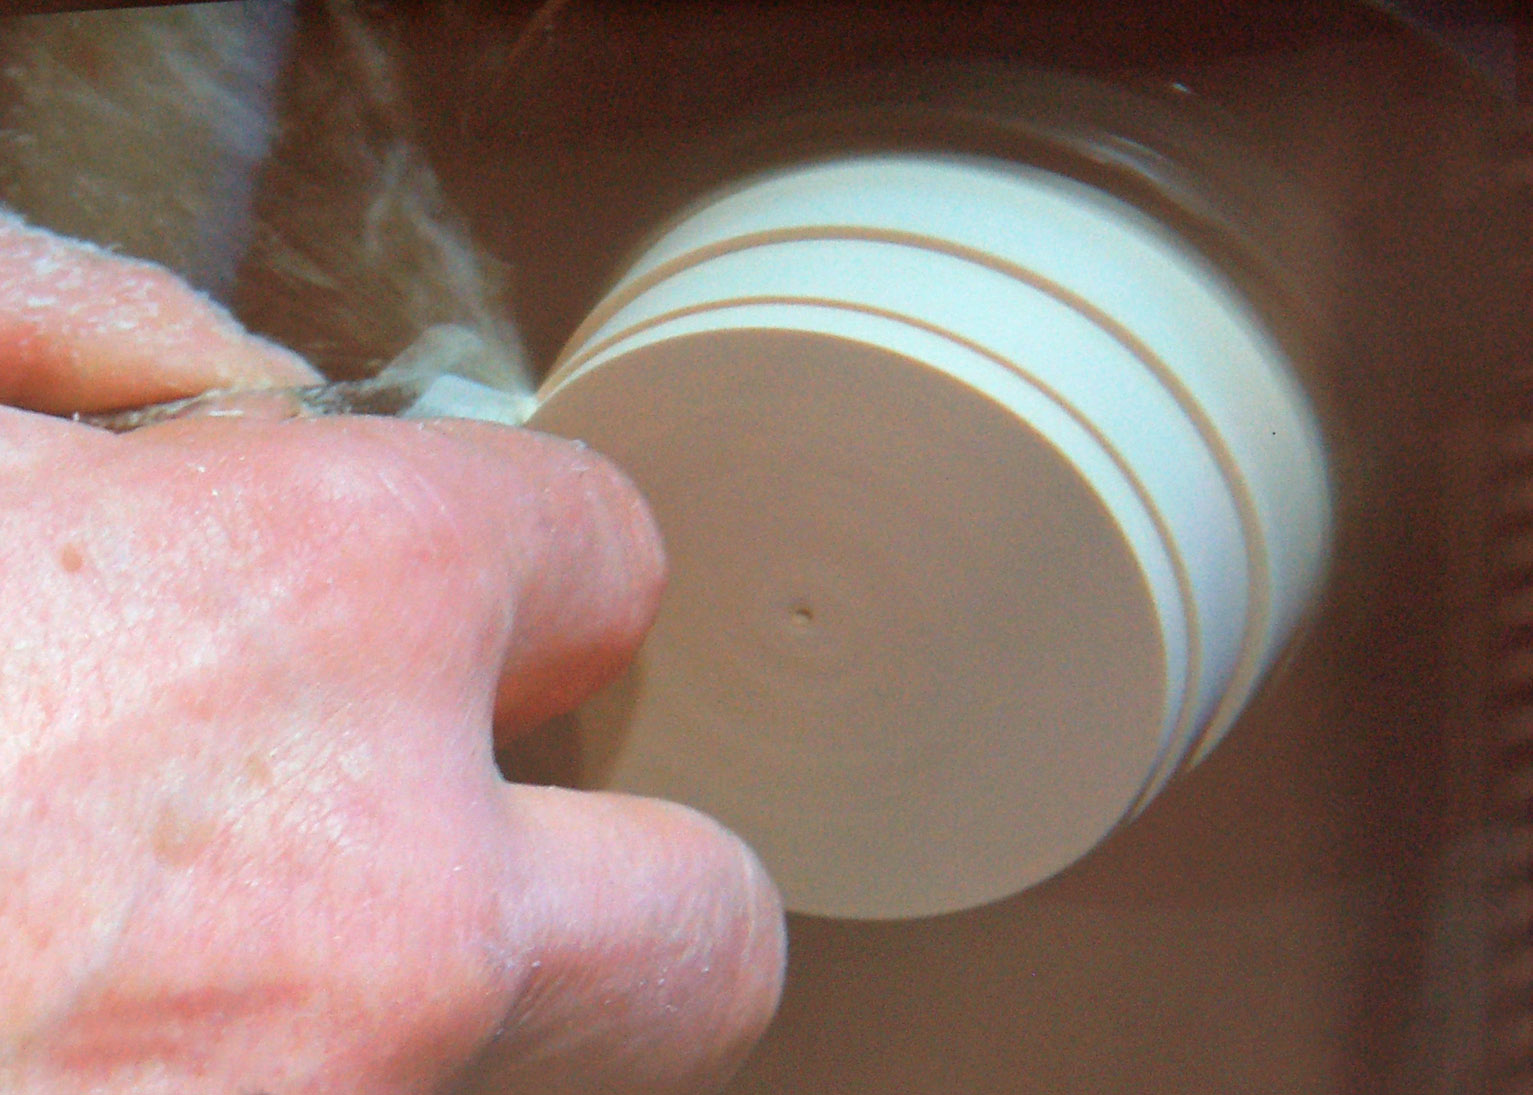
Once he made the top side ribs, it was time to flip the piece. Hans put the lid in the four jaw chuck on the face where the rabbet was made. He then defined the lid's inside and outside diameter, and took away the wood that's not supposed to be there. You'll note that Hans used a bowl gouge first and then cleaned up the cut with a scraper. His mechanical engineering background was evident in his detailed approach, intricate design, and use of calipers. His geographical background has him rooted in the metric system, although he readily moves between inches and millimeters. The math is so easy in the metric system: his lid was 13 mm tall with a top thickness of 3 mm, so the depth of the lid needs to be 10 mm. No flipping between 1/16ths and 1/32nds and decimal equivalents.
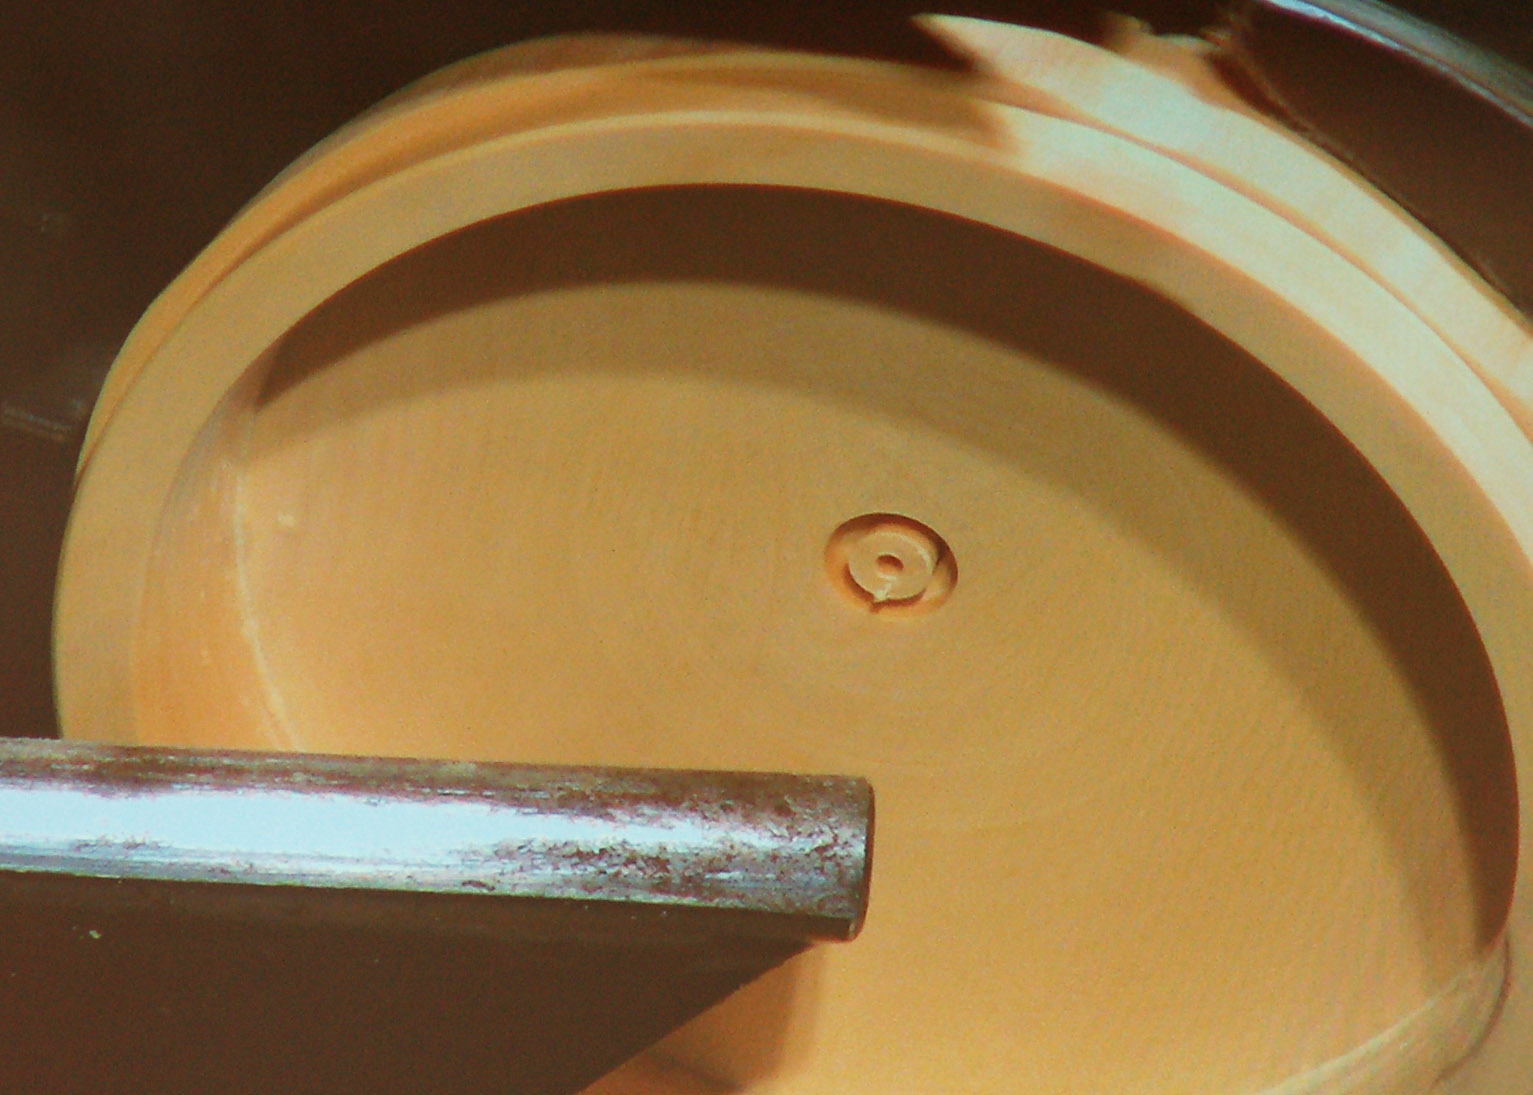
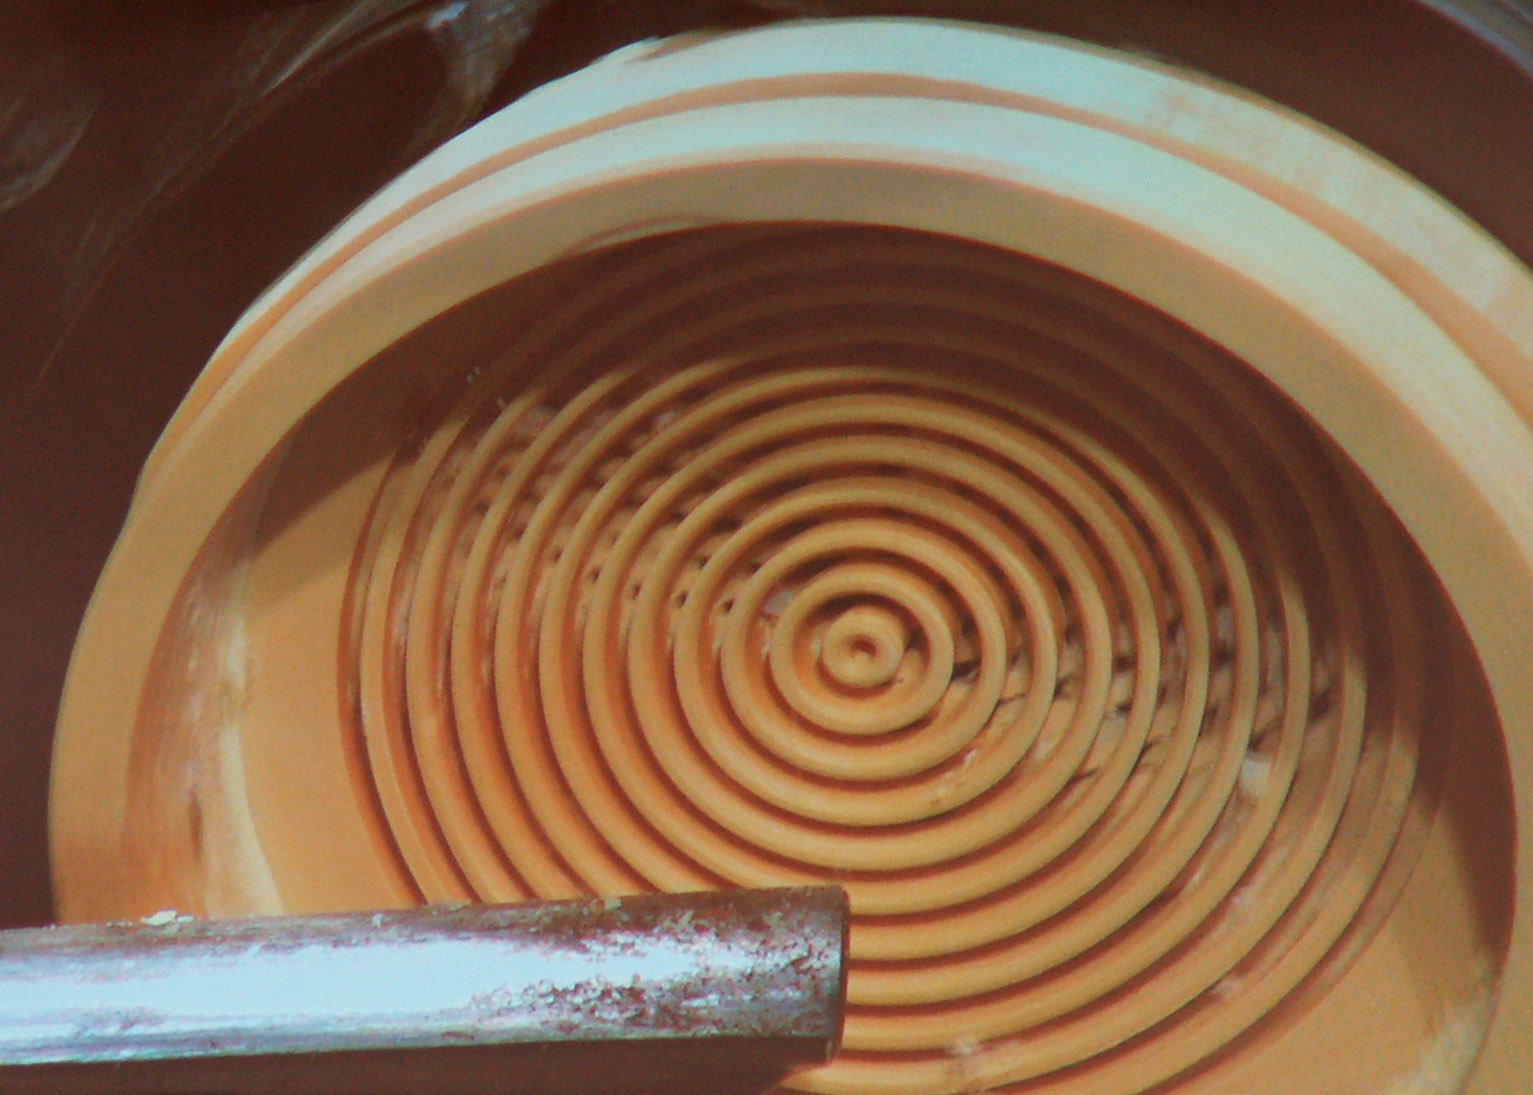


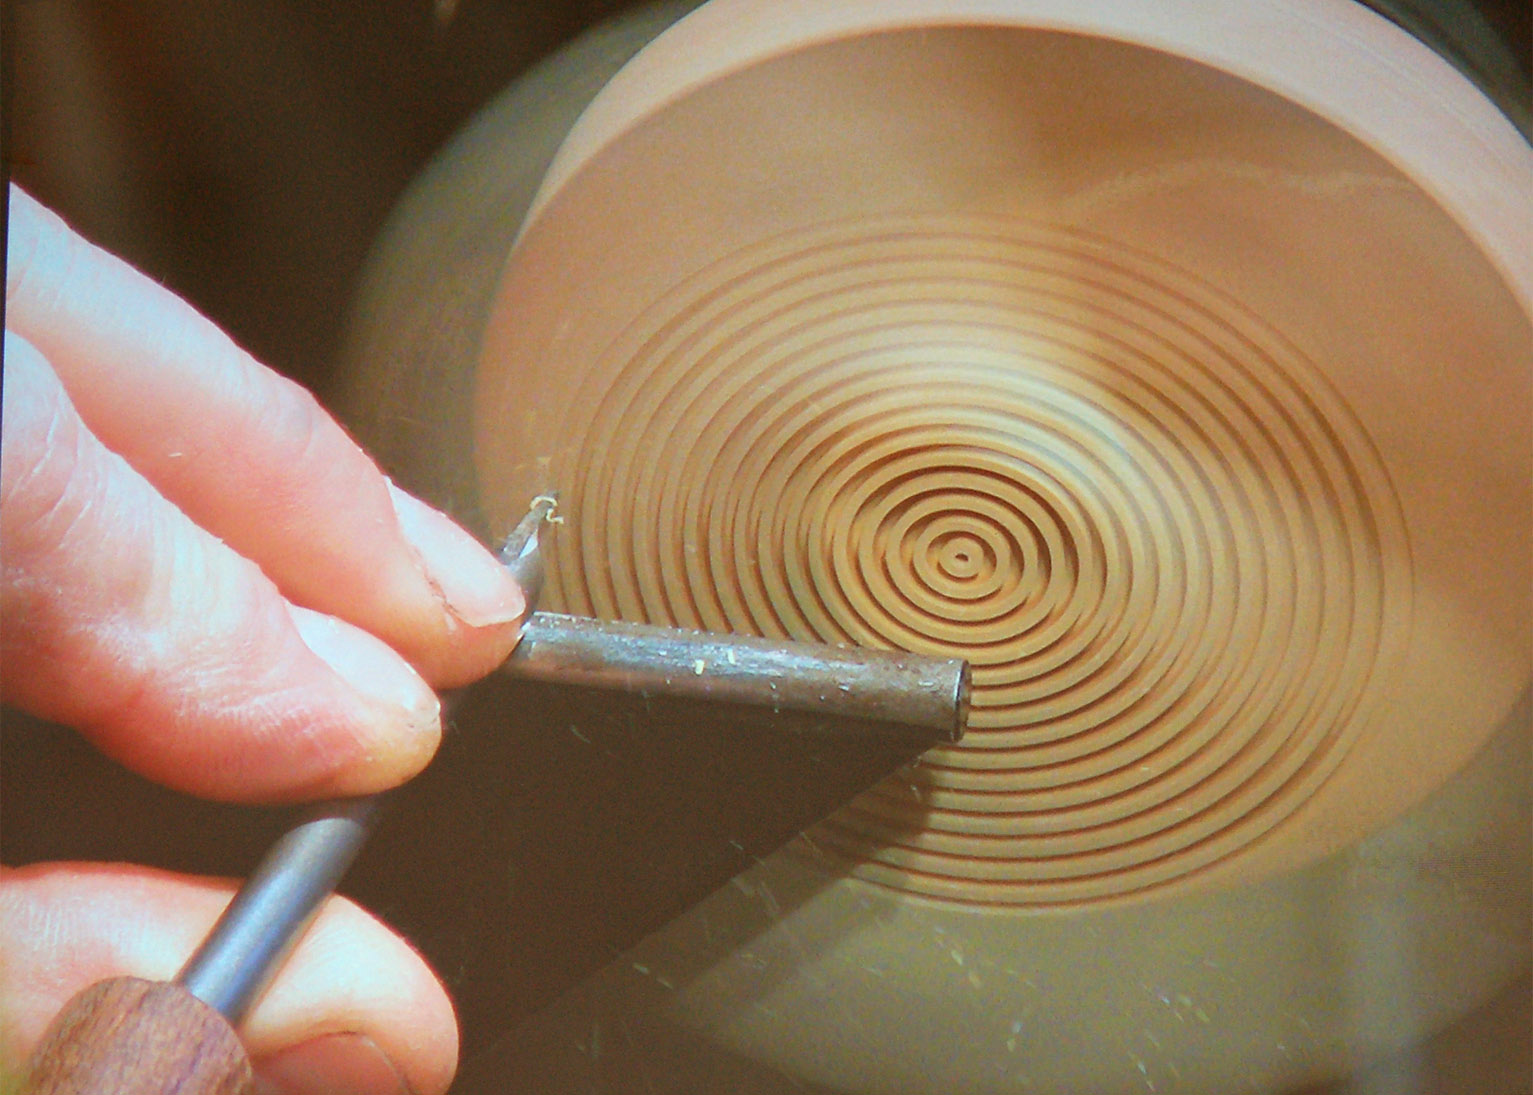
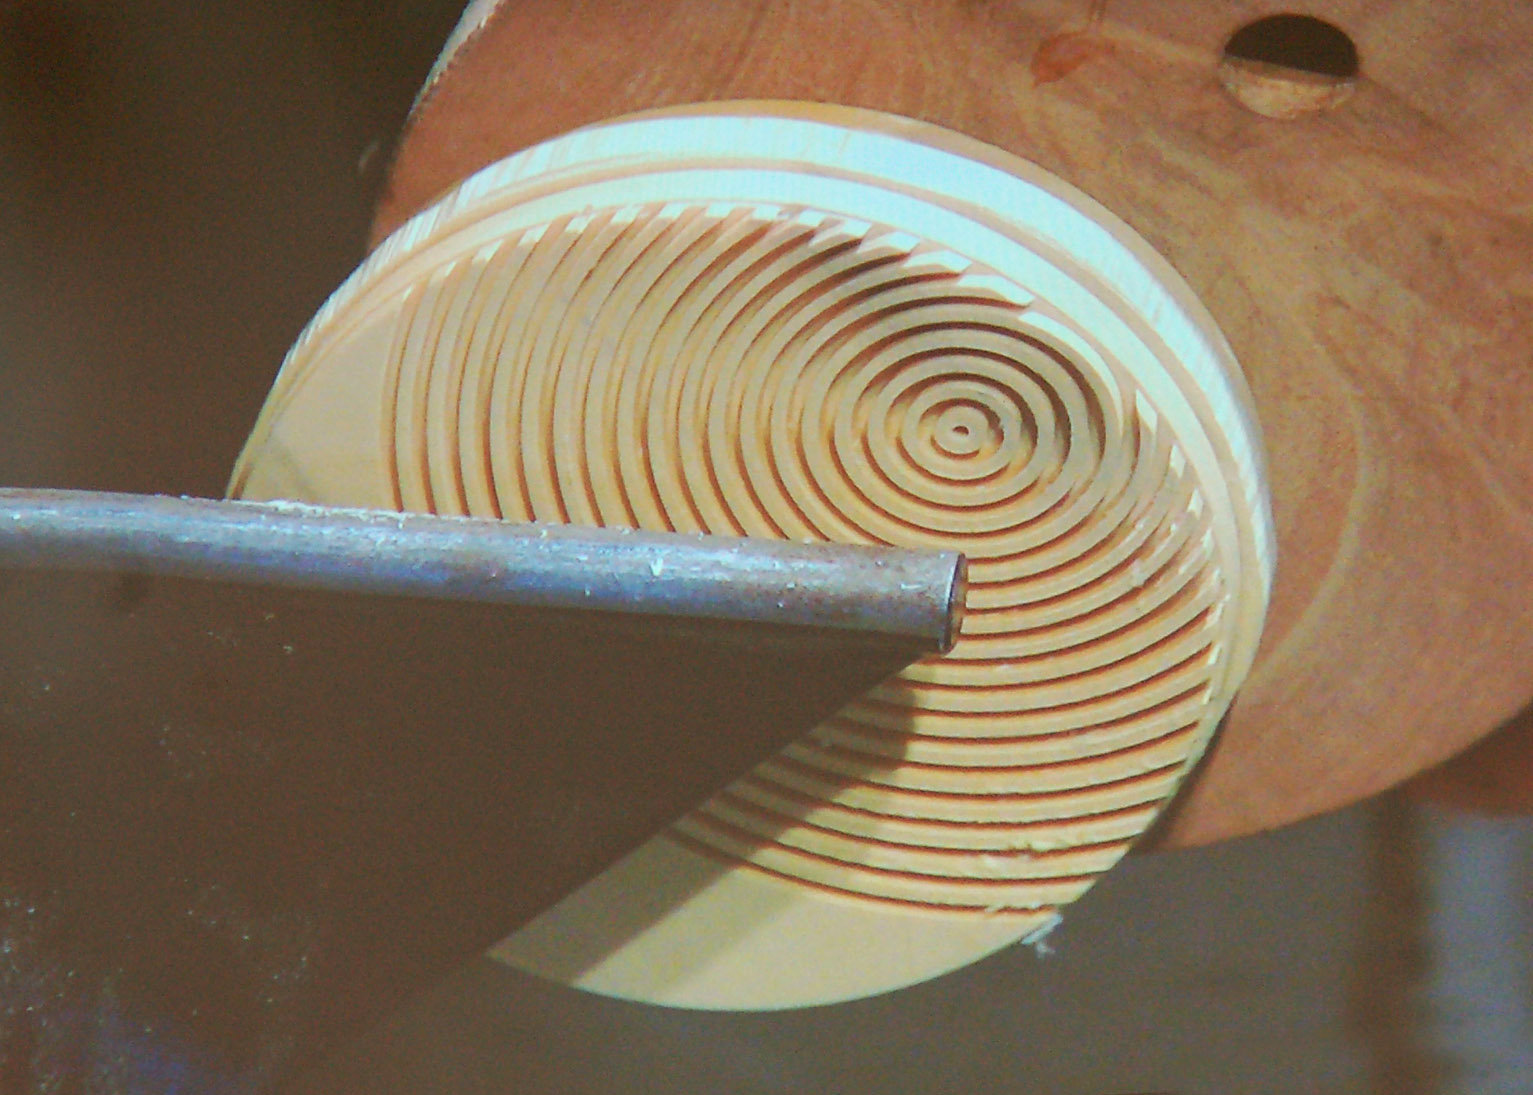
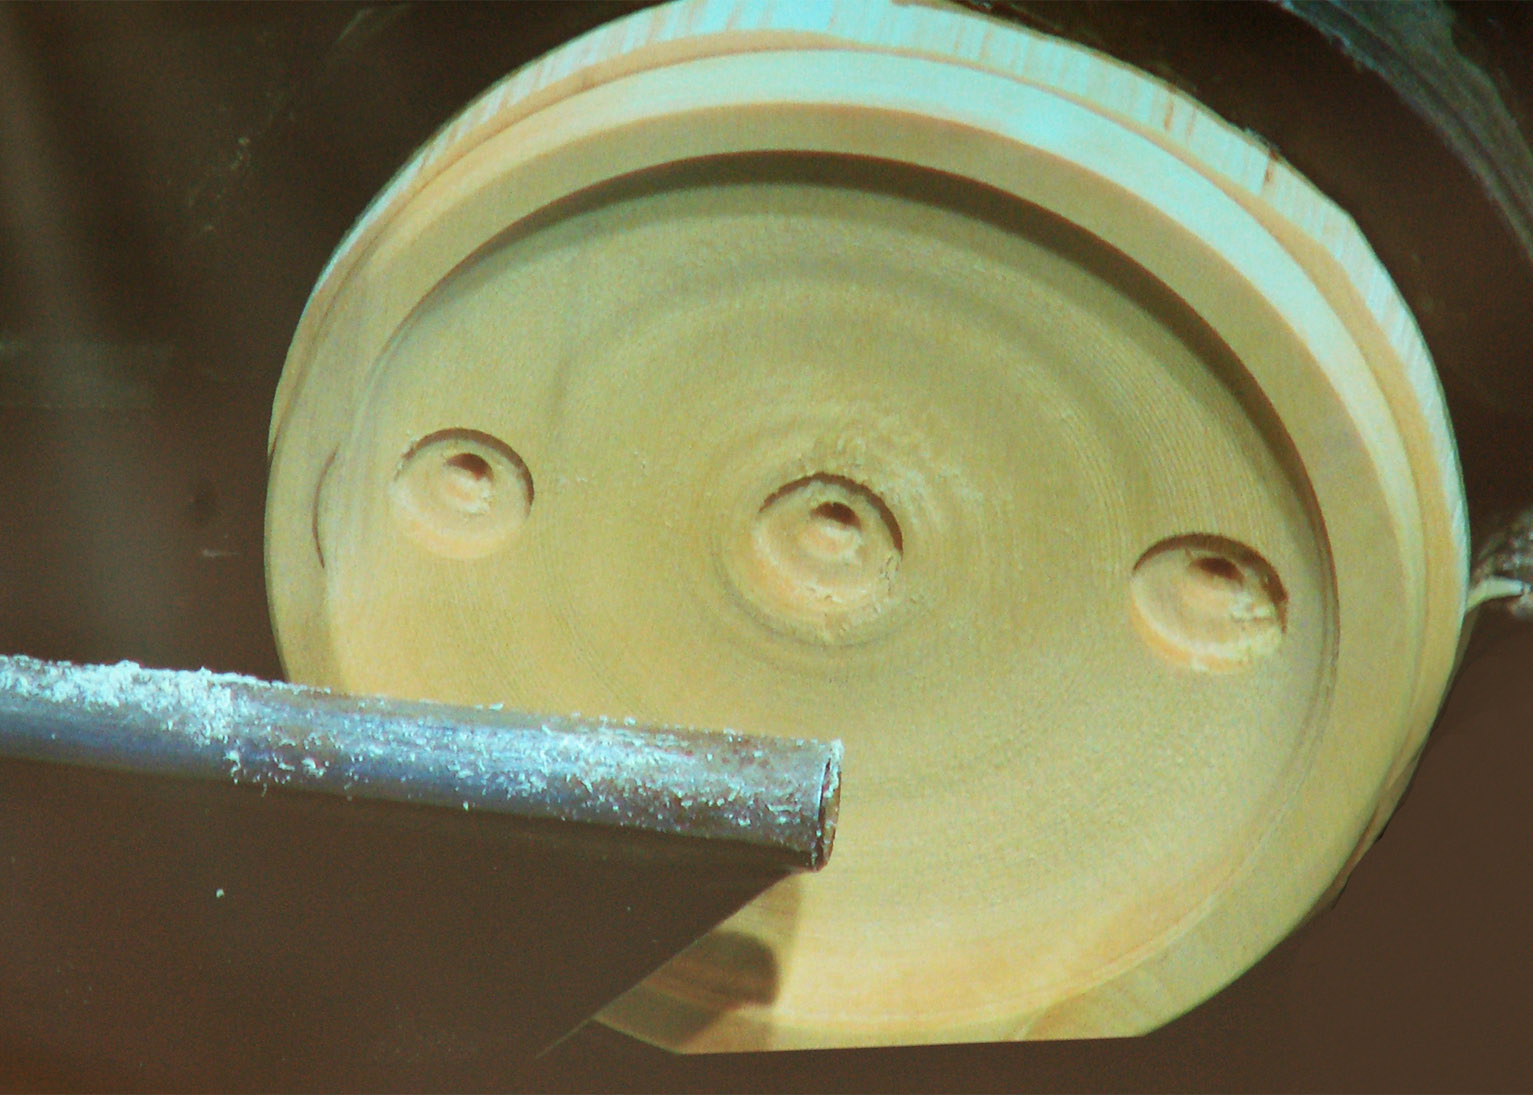
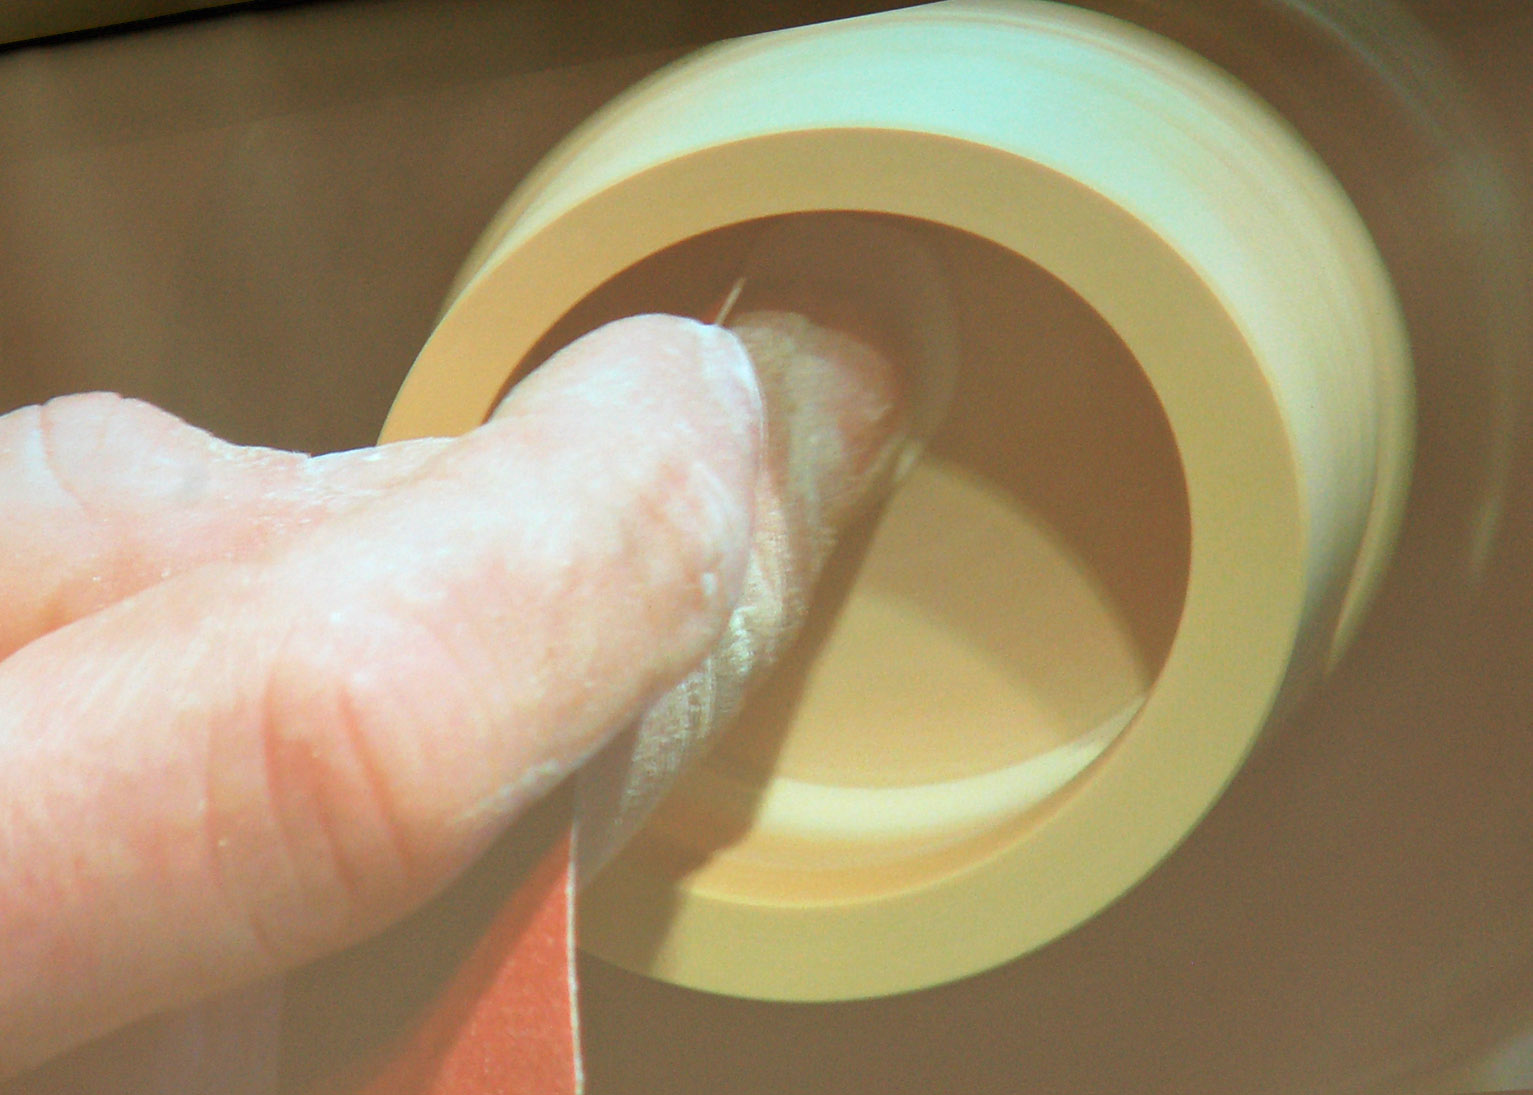
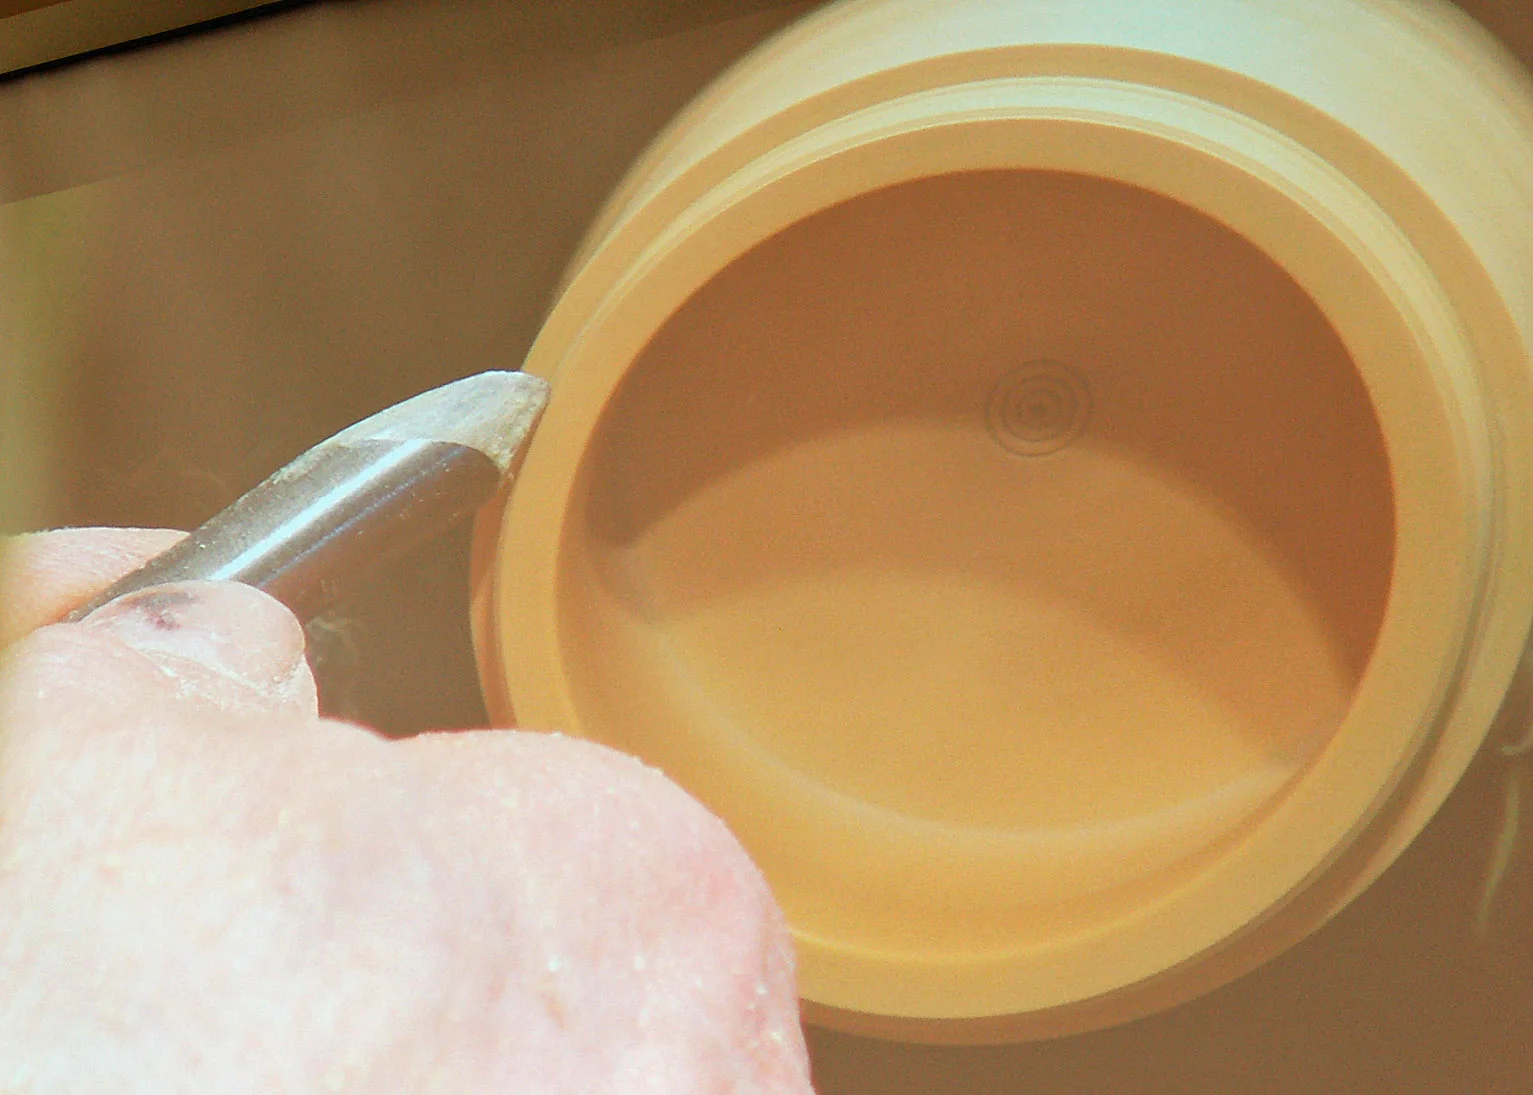
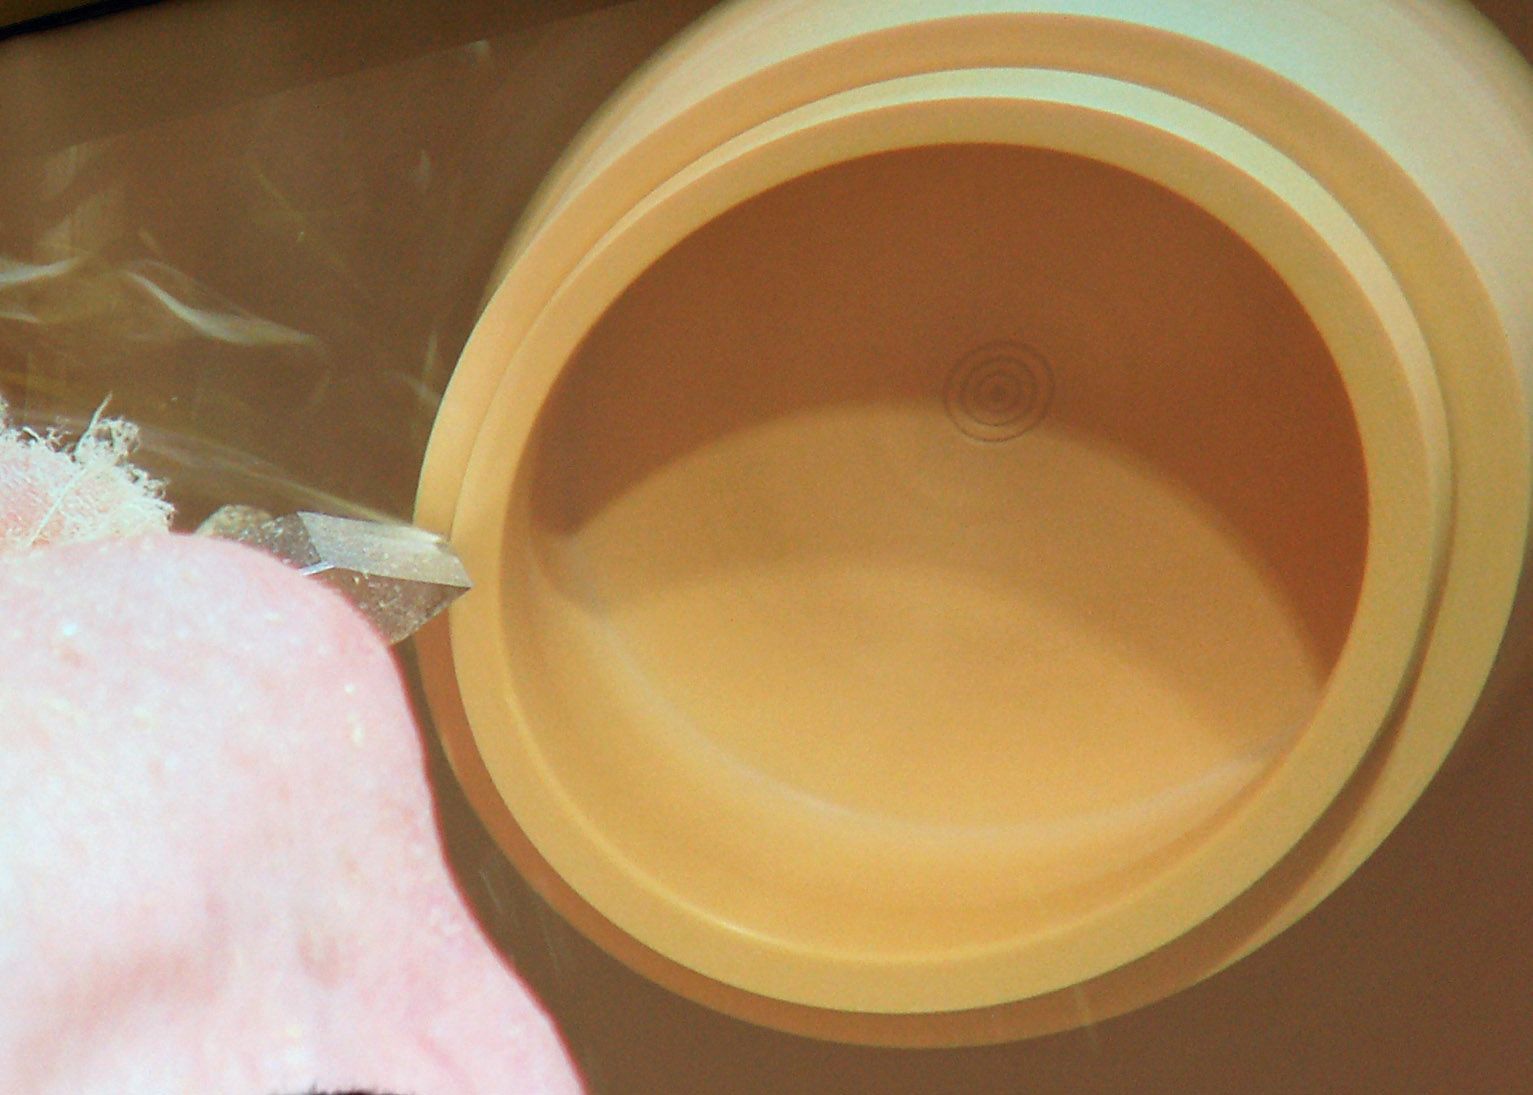
Now for the inside ribs. Once again, he used the small tool to determine the depth of cut. this time he was looking for breakthrough. But you can't be sloppy- the spacing and depth of cut has to be consistent each time. By comparison, concentric rings are easier, until you get close to the side of the lid. Hans noted that the rest is farther away and the side and shaft of the tool get in each other's way. Hans also used his skew to "break" or round the edges of each rib on the inside of the lid. He doesn't do this on the outside, it is more difficult and he still needed to shape the outside a bit more- that was to come.
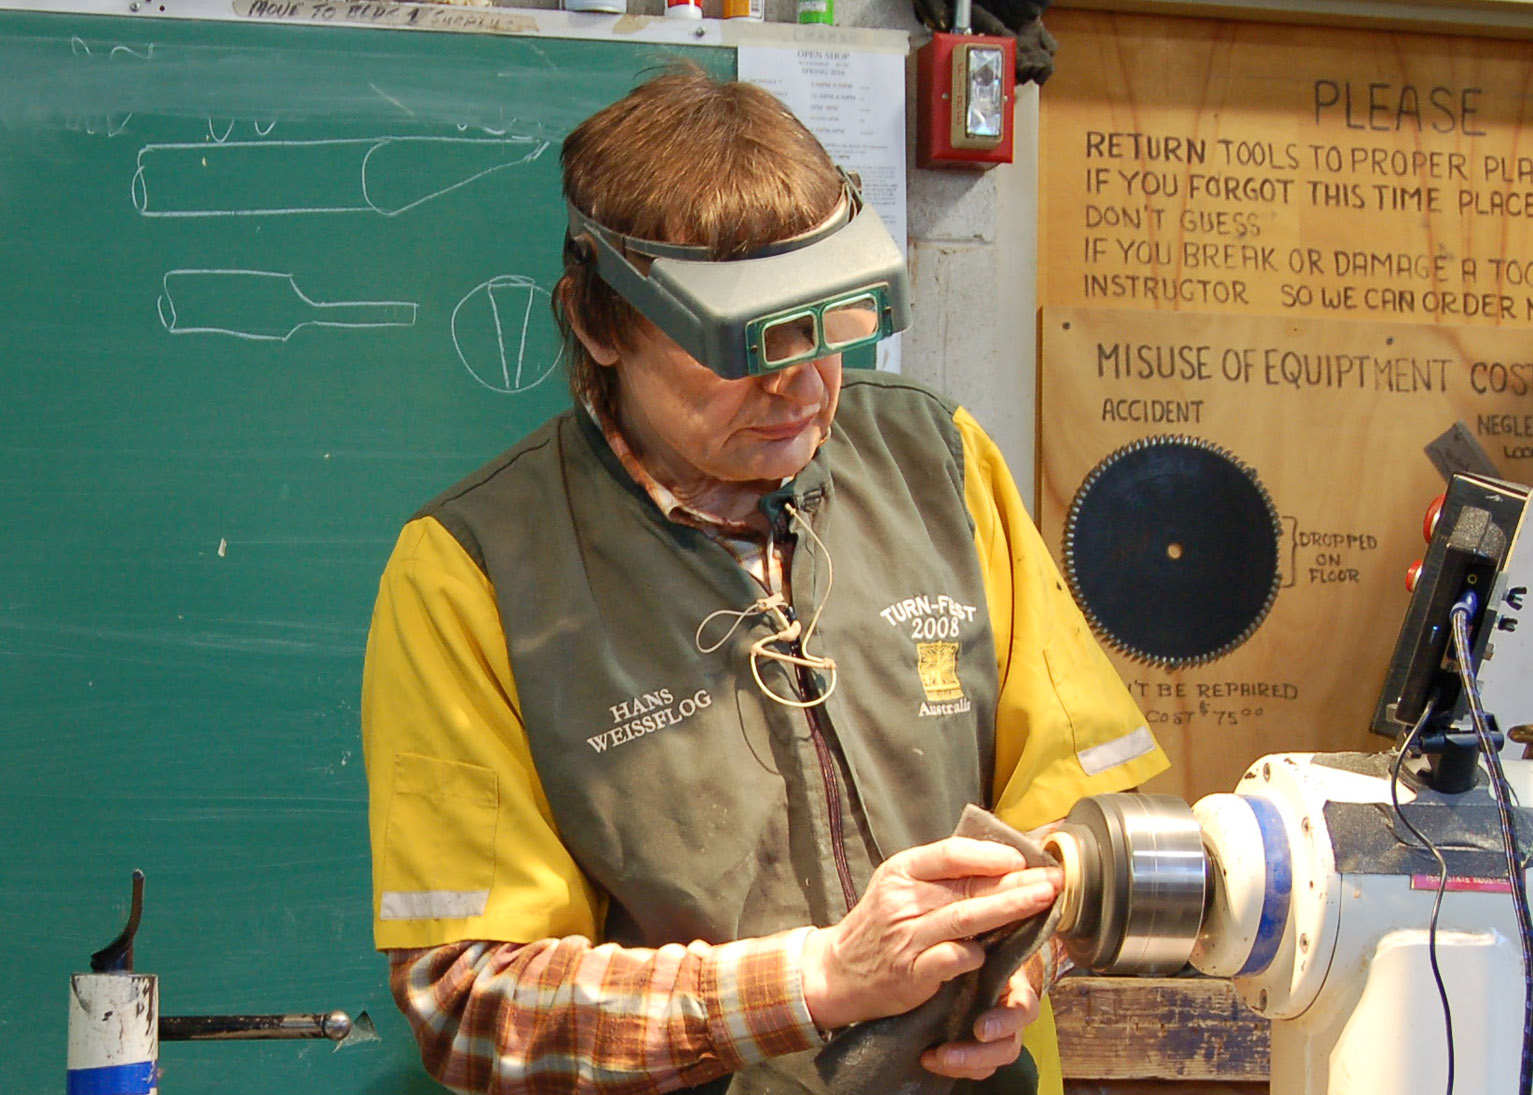
The inside was now ready to be sanded. His sanding regime consisted of 240, 360, and 1500 grit sandpaper. He used the sanding surface just once and then cut it away. He says sanding with dull sand paper is a waste of time and can overheat the wood causing cracks in some species. To get rid of the tenacious shavings and chips, Hans deployed a tooth brush and a small knife or parting tool.
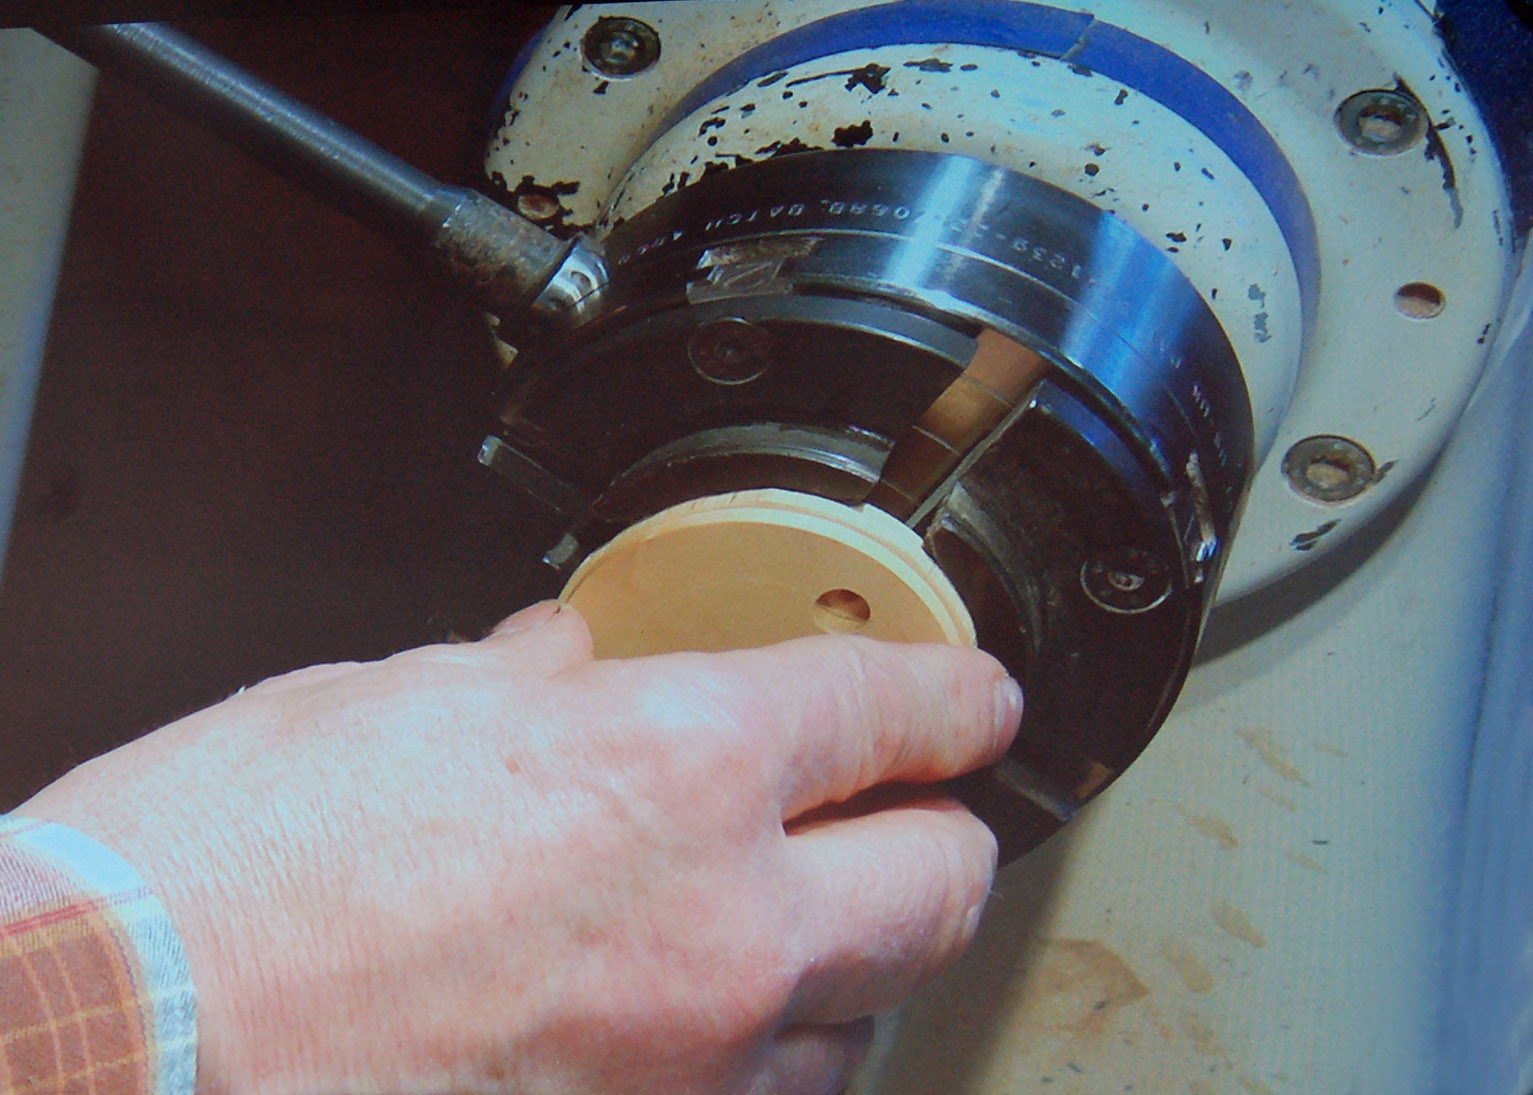
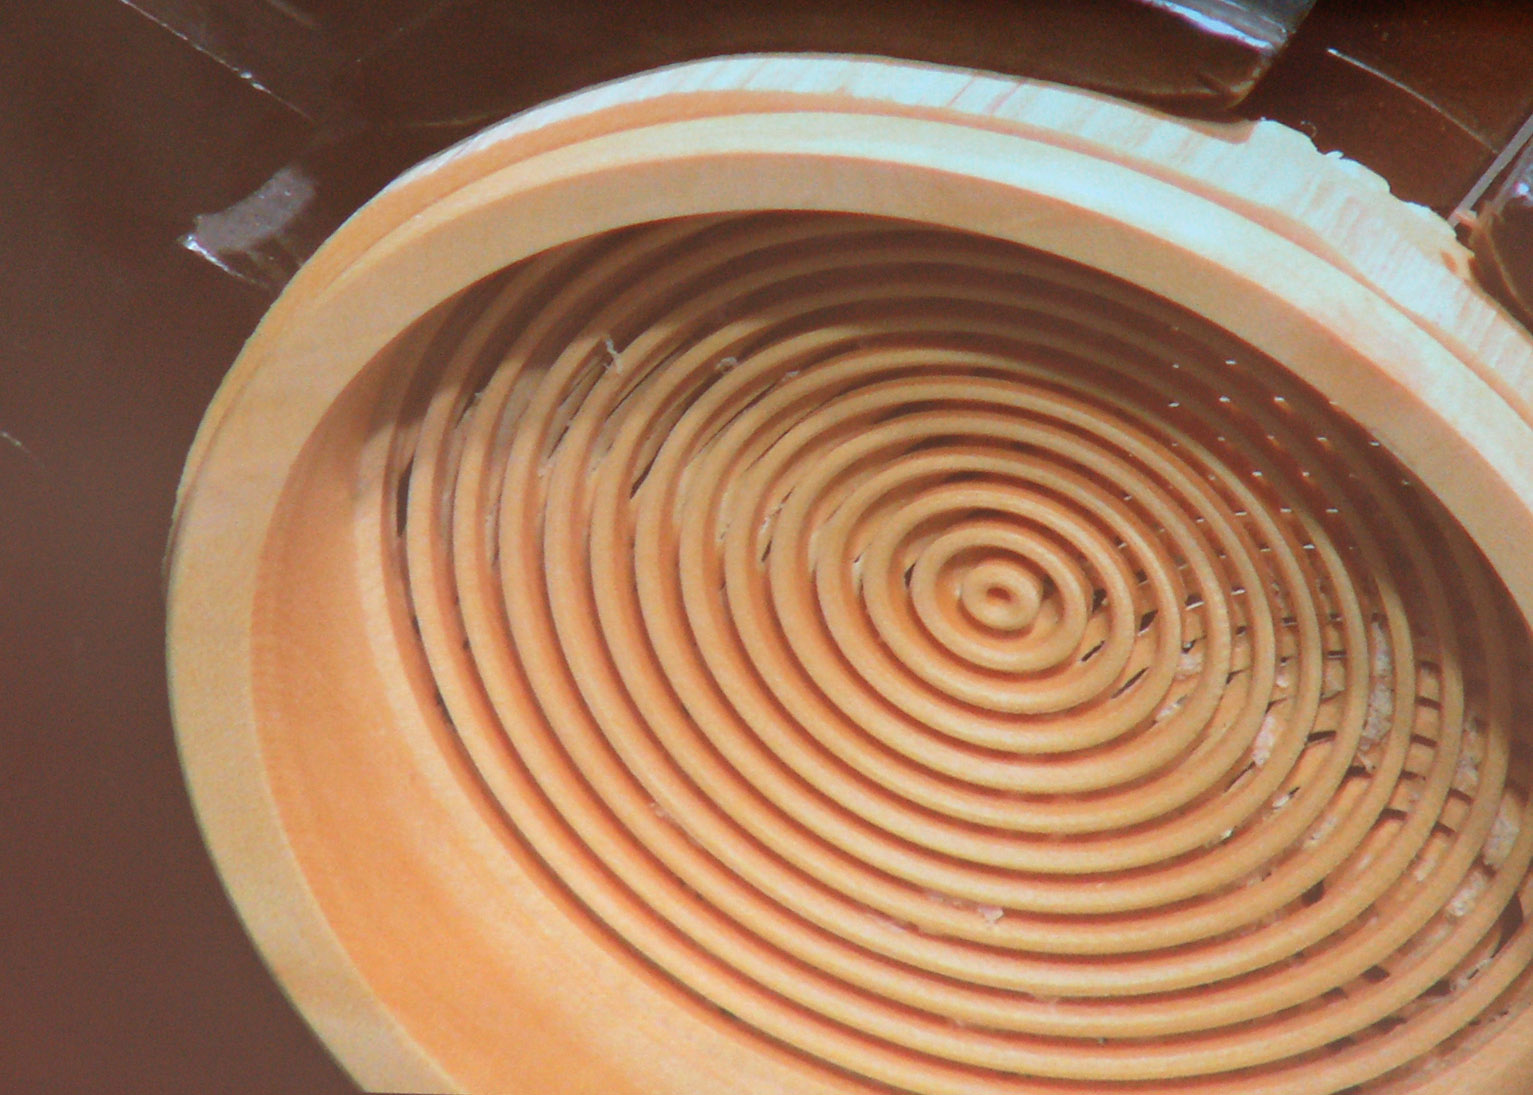
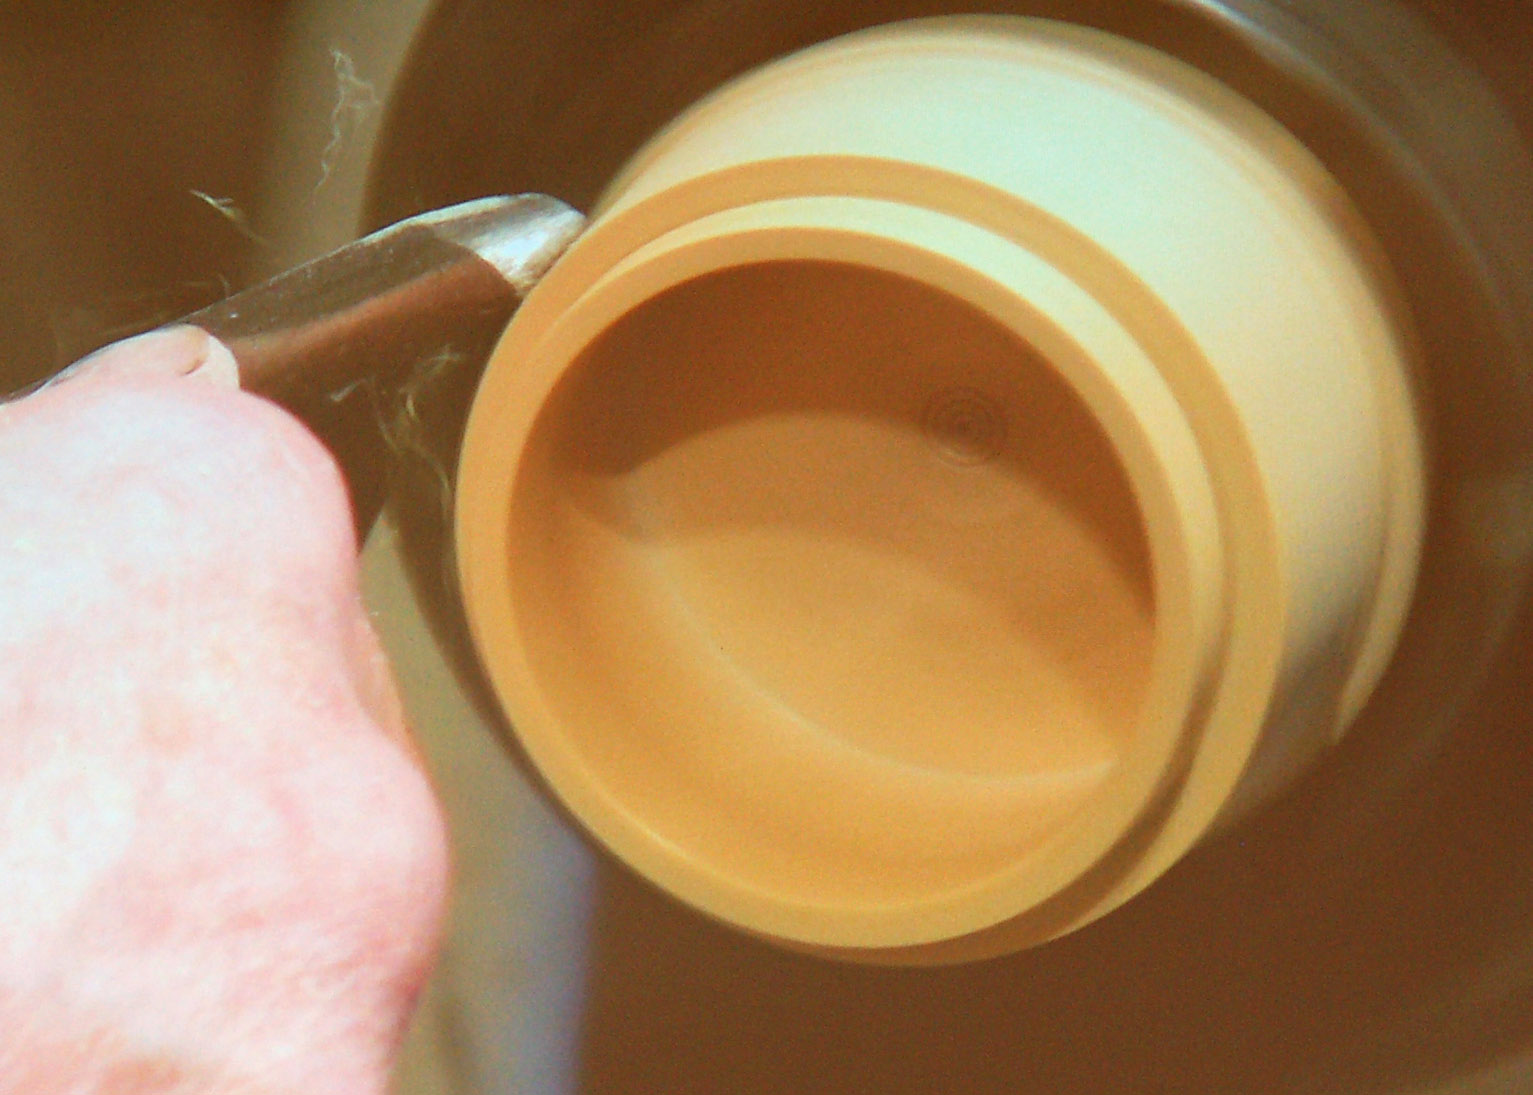
Next it was time to clean up the outside of the cap. A jamb chuck was turned to fit the cap securely. Once the cap was in place, Hans addressed the side of the lid using his bowl gouge to cut back toward the chuck. He then took a very thin cut across the top of the lid using his skew as a scraper, rounding the edge of the ribs to the rabbet.

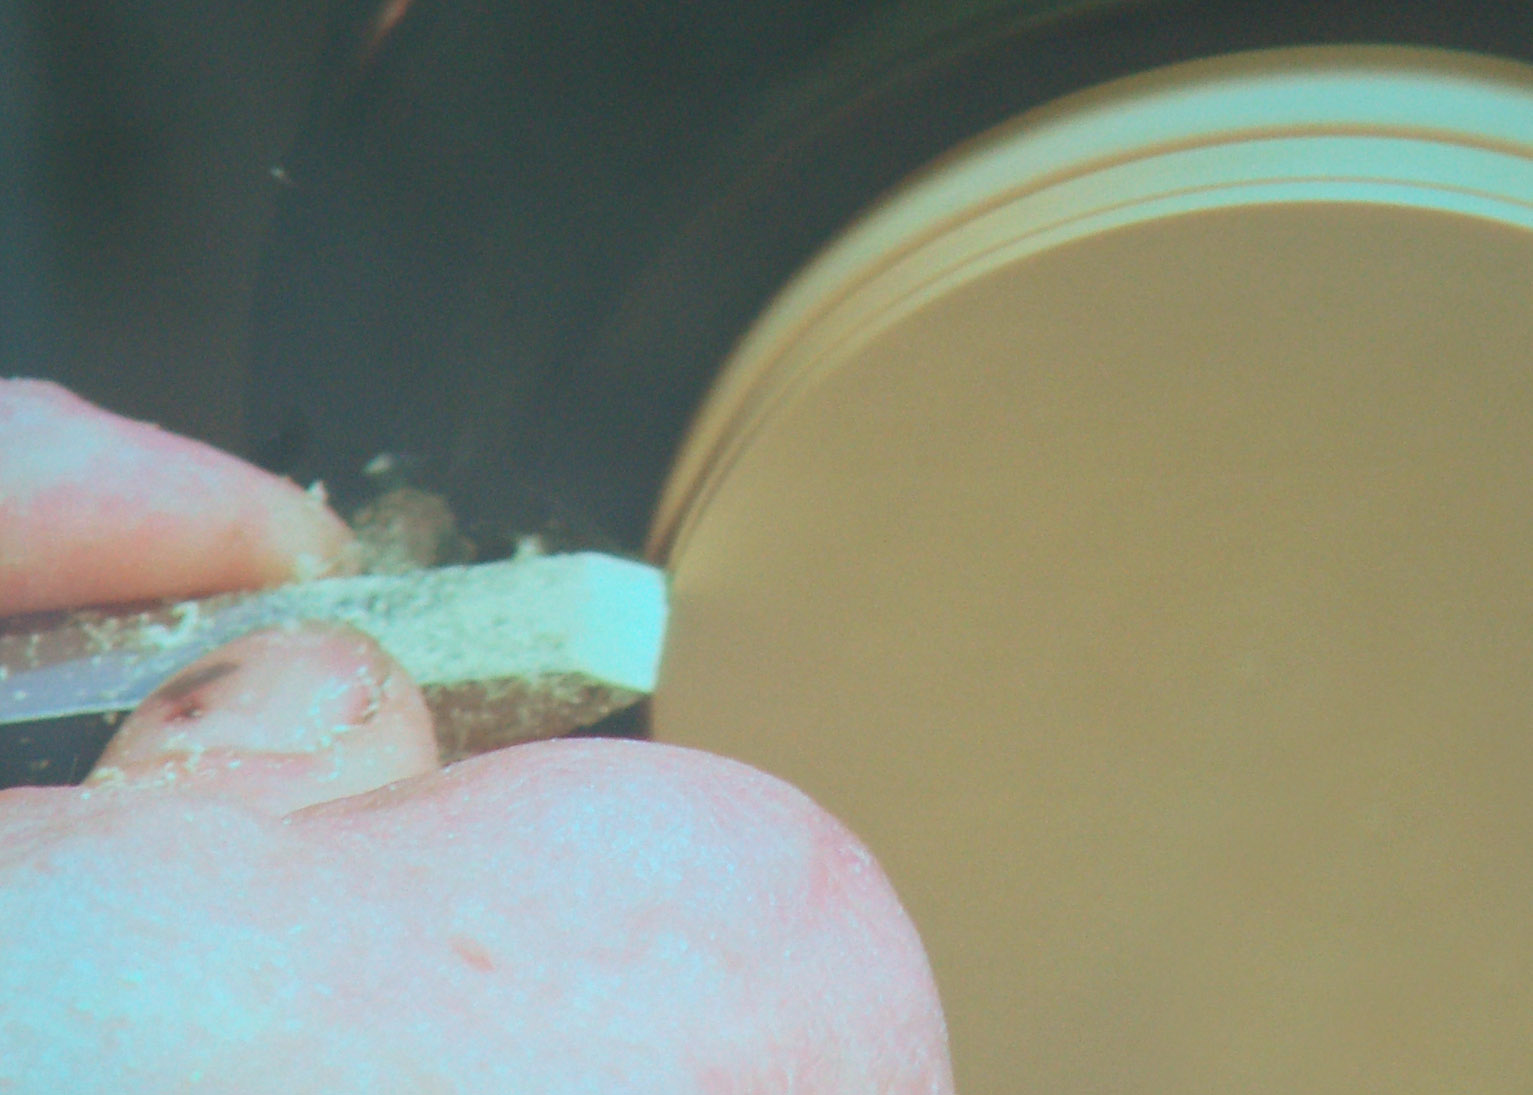
After Hans cleaned up the face and step, he took a very fine cut off the side to true up the diameter-look at those fine shavings. Next he sanded the top and side surfaces. Although it is not shown, he cleans the eccentric grooves with a rotary tool and radial bristle disc.
That was a lot of work, but he wasn't done. Next was the bottom of the box. Just so we were clear, Hans provided a drawing of the cross section. The inside diameter of the lid, plus 1/8 in walls, yields the inside diameter of the box. He quickly hollowed the bowl with a gouge and followed that up with a scraper to clean up the bottom and sides. He sanded the inside starting with Abranet sanding mesh, followed by the progression of papers mentioned above. He then used Mirka Mirlon Very Fine and Ultra Fine Scuff pads to finish it up.
To fit the top, Hans took some fine cuts off the outside diameter of the lip with a bowl gouge and used his skew as a scraper for fine tuning. Note the little chamfer on the outside edge of the lip. Hans softened all of the outside edges in this fashion. The chamfer also allowed him to easily start a cut to cleans up the outside diameter of the box bottom.
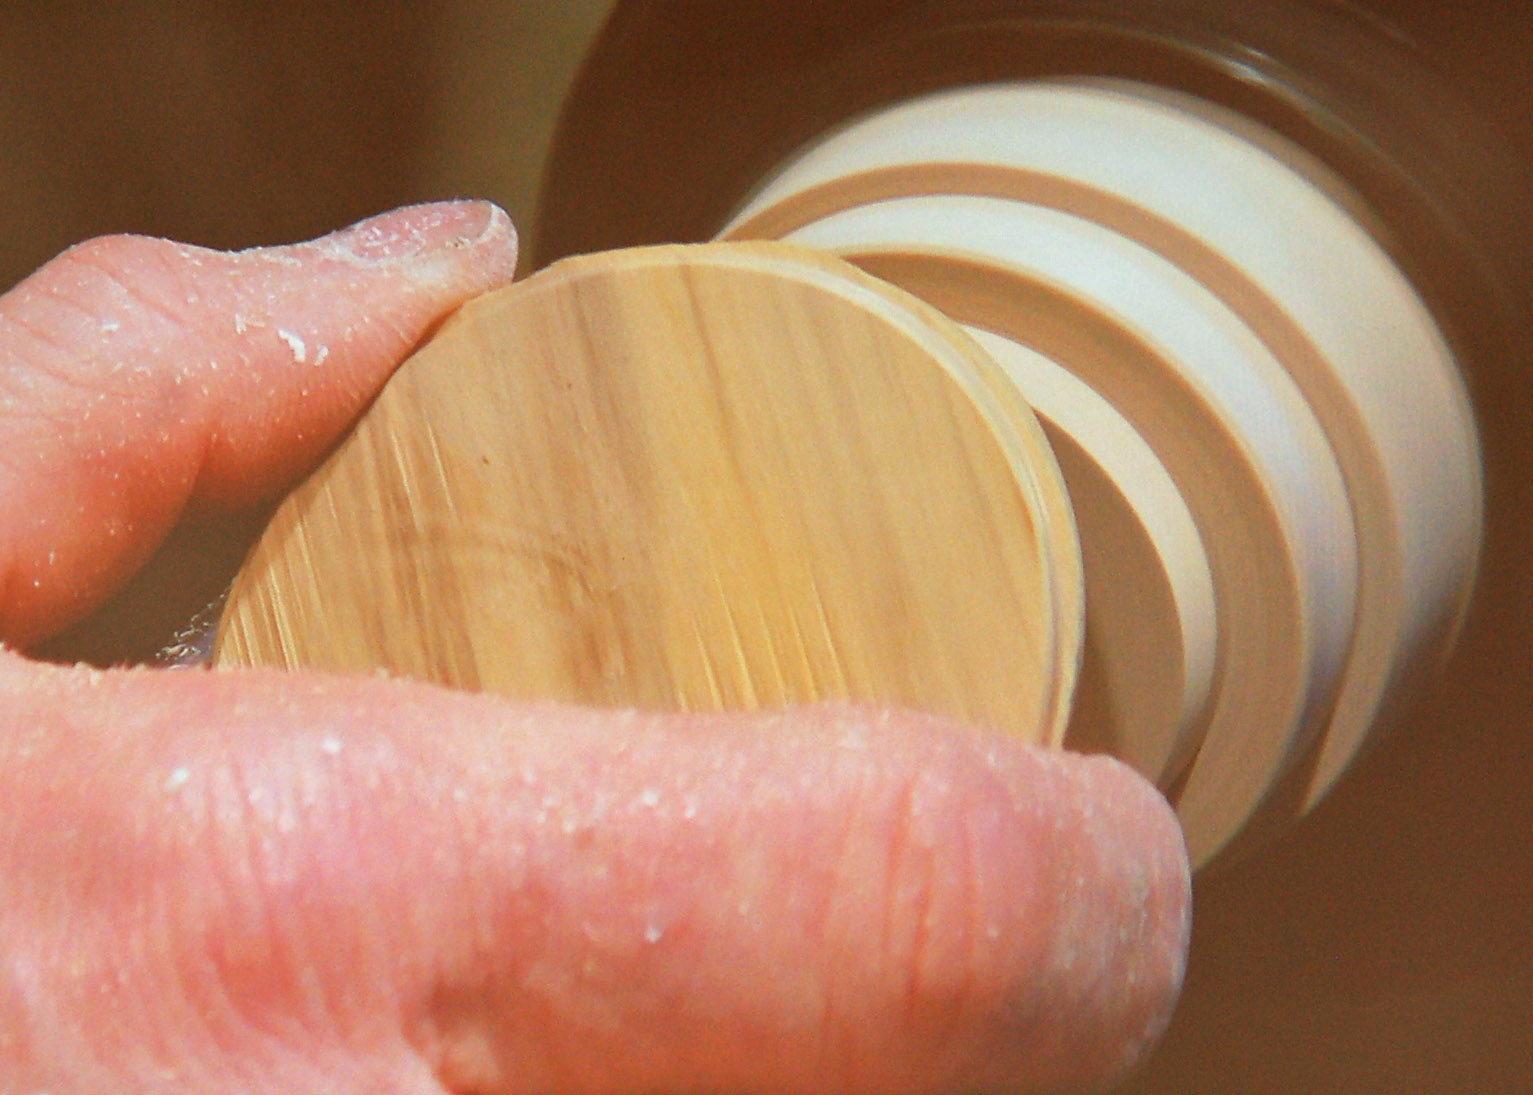
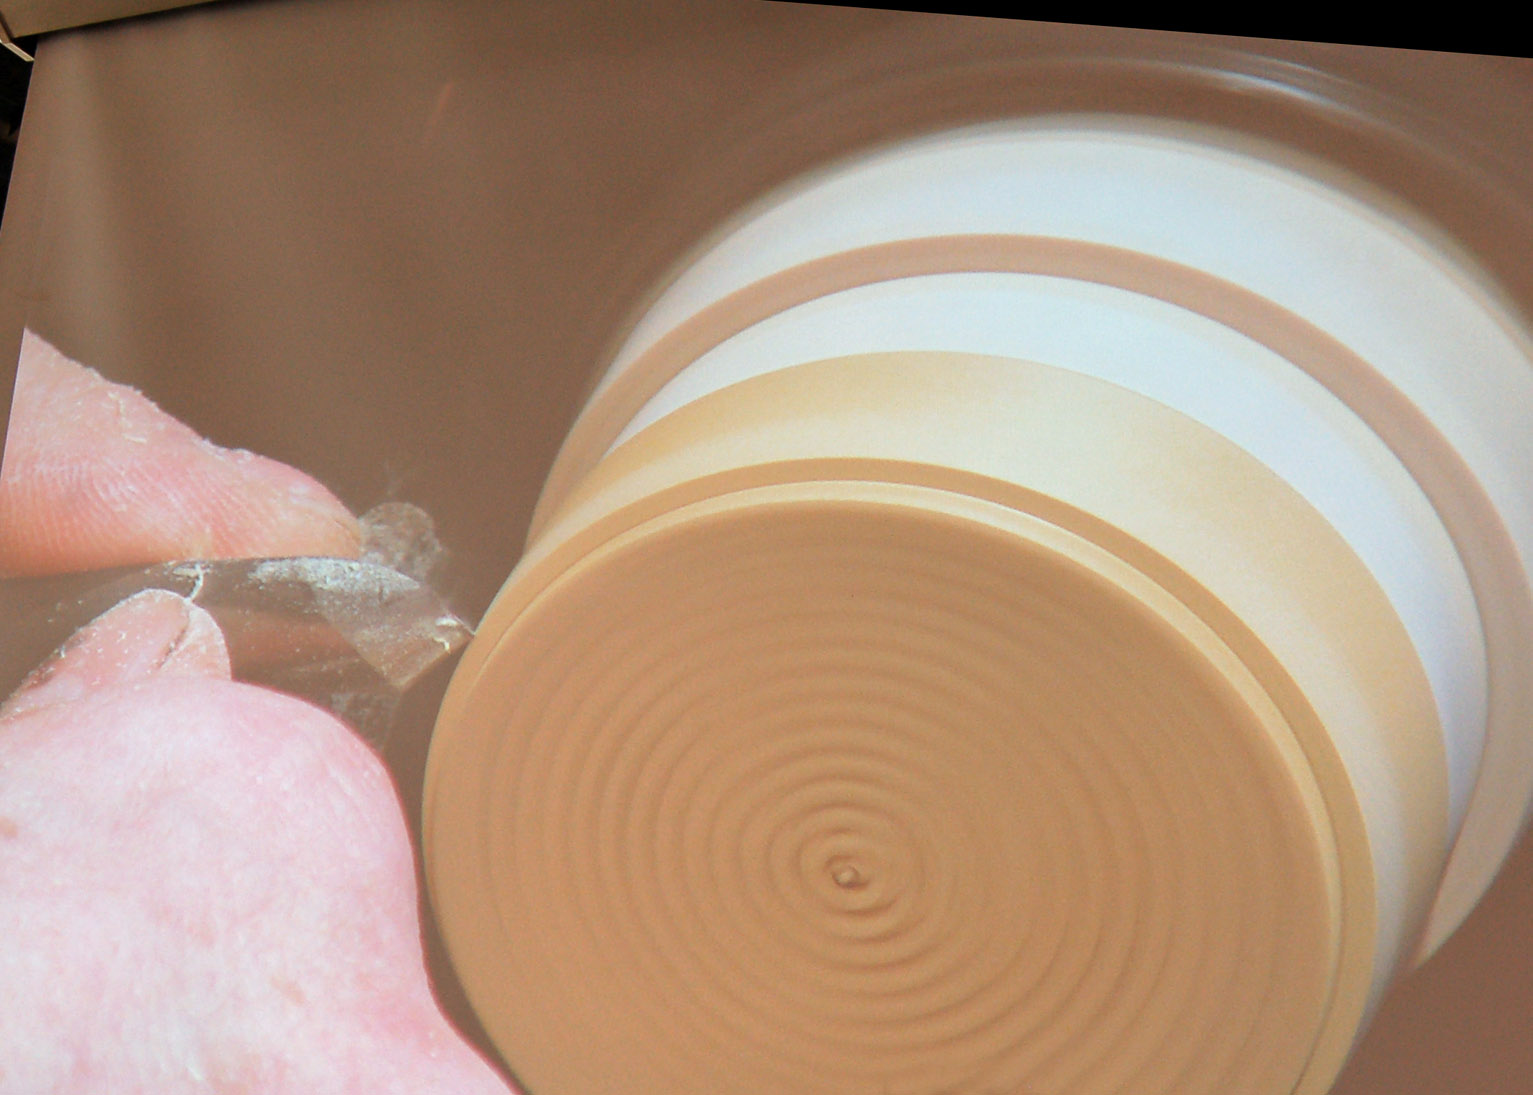
After the top and inside of the base was completed, now the bottom of the base needed to be finished. Once again a jamb chuck was employed. Once the base was placed on the chuck, Hans used his bowl gouge to turn the sides and bottom, and then refined those surfaces with his skew. He again used his progression of sandpaper. To finish the pieces in is shop, he generally uses nitrocellulose lacquer. Here is a look at the final result- pretty impressive!
